Easy Weeknight Vegetarian Supper

20140424_192710

Have you had one of those days when you are trying to do many things simultaneously when you suddenly realize, “yikes, it’s time for dinner!” If you said “yes,” then I don’t feel like the odd one out! 🙂

I had one of those days last week when I tried to bake couple of types of cookies and lost track of time. I realized I had no leftovers and had to quickly throw together something while one batch of cookies were baking with remaining dough chilling in the refrigerator.

20140424_192209

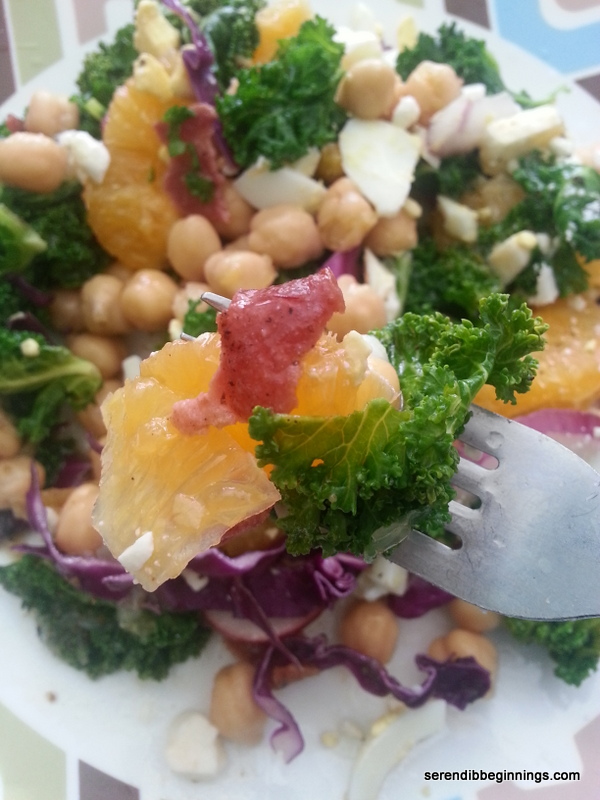
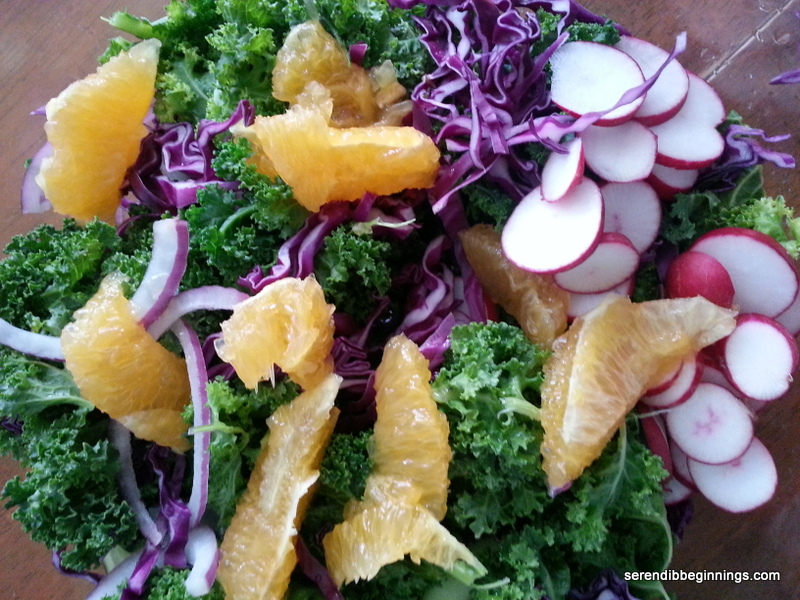
My conditions – our dinner had to be something nutritious, quick and vegetarian! A quick inventory of what I had on hand resulted in me laying out an eggplant, a red pepper, can of chickpeas (see, I didn’t lie when I said I try to have cans of beans around), red onion, couple of Roma tomatoes, non-fat plain Greek yogurt and a small can of tomato paste.

20140424_192342

Since I had some leftover dill rice, I thought of making a one-pot Greek-style sautéed veggies and beans. It was amazingly simple, quick, delicious and filling that I think I might actually plan on making this again.

20140424_193843

Try it topped with extra plain Greek yogurt for a nice touch!

  • Servings: ”4″
  • Print

Ingredients
1 small eggplant, sliced thin
1 large red pepper, cut into long thin strips
2 Roma tomatoes, sliced
1/4 cup thinly sliced red onions
1 tablespoon olive oil
1 tablespoon minced garlic
1 tablespoon tomato paste
1 teaspoon ground cumin
1 can chickpeas, drained and rinsed
salt to taste
optional, dash of cayenne
1/4 cup non-fat plain Greek yogurt

OPTIONAL: Additional Greek yogurt, lemon juice, feta cheese

Preparation
1. Begin by preparing the vegetables.
2. Heat a non-stick frying pan over medium high heat. Add olive oil.
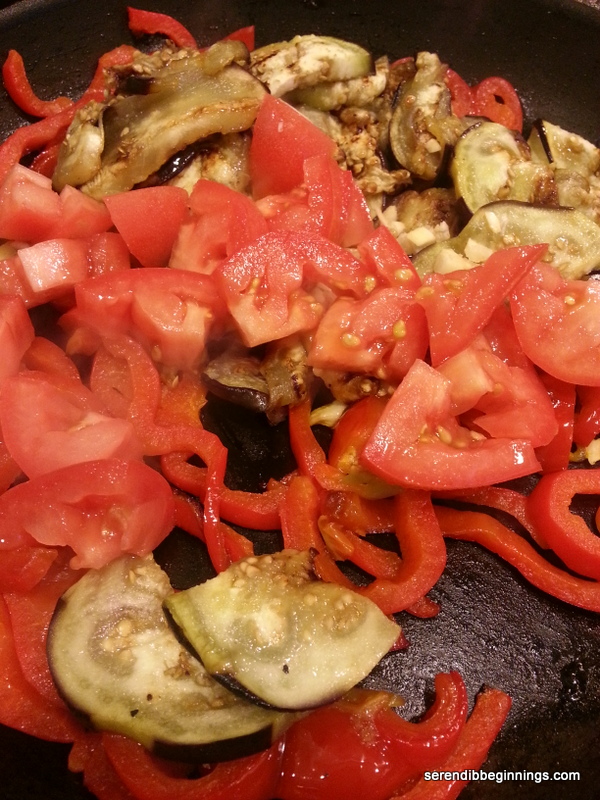
3. Add eggplant, red pepper and onions and sauté till lightly browned. Add garlic and continue to sauté for another minute.
4. Now add the tomato paste and ground cumin and cook for about 3 minutes.
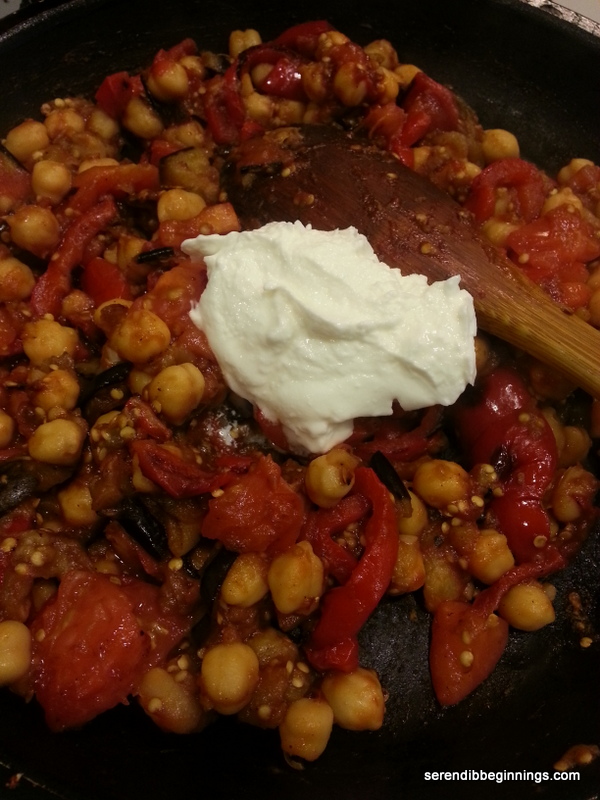
5. Add the chickpeas and Greek yogurt and stir to heat through. Remove from heat and serve with warmed pita or rice.

You can “dress up” your meal with a small dollop of Greek yogurt, light spritz of fresh lemon juice and a sprinkling of feta cheese.

Hearty and Healthy Kale Salad

20140427_130123

Green may not be my favorite color, but I love greens – the eating type! Spinach, collar, mustard, kale, turnip…When it comes to spinach and kale, I enjoy them in every which way. So, when it was time for a light and quick lunch over the weekend, I was motivated by my sister to prepare a kale salad.

I had kale on hand along with bunch of salad-type veggies. So, a quick look through the refrigerator and pantry resulted in me laying out kale, radish, red onions, purple cabbage, fresh orange, fresh lemon, canned chickpeas, feta cheese, leftover turkey bacon and boiled eggs! It’s gonna be delish!

20140427_102700  20140428_180201

I have heard people complain about kale being difficult to digest. Although I haven’t found this to be an issue, I figured I will look into it. After a brief cyber consulting, I decided to do a flash-blanch of the leaves prior to preparing the salad. Briefly sautéing or blanching kale not only helps with easier digestion, but also softens its earthy, slightly bitter taste. Additionally, it also makes it easier to make kids eat it too!

20140427_125947

Feel free to add in any salad vegetables of your choice. You can also add in cooked quinoa, barley or couscous in lieu of (or in addition to) the chickpeas. Similarly, replace boiled egg with grilled chicken breast or salmon. Let your creativity run wild – I guarantee you will enjoy the finished dish!

Lastly, I really think the quick salad dressing made using orange juice, lemon juice, olive oil, salt, pepper and dash of crushed cumin seeds is just perfect for this salad. Again, feel free to substitute another dressing of your choice. This salad is satisfying, delicious and packed with chock full of nutrients! Enjoy!

Hearty and Healthy Kale Salad

  • Servings: 3-4
  • Print

Ingredients
3 cups of kale leaves, stems removed and torn into bite size pieces
1/2 cup sliced red cabbage
1 can chickpeas, drained and rinsed well
1/4 cup thinly sliced red onions
1/2 cup thinly sliced red radish
2 sweet oranges, segments removed and juices reserved for dressing
2 – 3 slices of cooked turkey bacon, chopped
2 boiled eggs, chopped
2 tablespoons of crumbled feta cheese, optional

Dressing
1 tablespoon freshly squeezed lemon juice
1-2 tablespoons of fresh orange juice (from above)
1/4 teaspoon cumin seeds (or 1/4 teaspoon cumin powder)
1/8 – 1/4 teaspoon kosher or fine sea salt
1/4 teaspoon crushed or ground black pepper
1 1/2 tablespoons extra virgin olive oil

Preparation
1. Blanch kale leaves very quickly by dropping them in boiling water and immediately removing them. You can transfer them to an ice-cold water bath, but I skipped this step. Transfer the drained leaves to a salad spinner and remove any remaining water.
2. Place the leaves in a large bowl. Add in remaining salad ingredients and toss to evenly distribute.
3. In a small bowl, whisk dressing ingredients thoroughly.
4. Drizzle over salad and serve immediately.

Protein-Packed Banana-Date Muffins

20140429_134751

Adapted from a Cooking Light (July 2007) recipe, these muffins were just what I needed to make use of two ripe bananas!

I modified the original recipe by adding in more protein and cutting down on sugar. These muffins use predominantly white whole wheat flour, some soy flour and Greek yogurt. Although the muffins are on the dense side, they are very flavorful and not overly sweet. Banana-date combination yields a wonderful natural sweetness – so much that I might be tempted to cut down the sugar a little more from the 1/2 cup. Best part yet is that these muffins have barely any added oil or butter. Just 2 tablespoons for 16 muffins! Original recipe does not have any though.

20140428_164608  20140428_165943  20140428_165955

These muffins store well for a few days and can even be frozen and thawed to serve for a grab ‘n go breakfast or snack.

If you plan to use Greek yogurt instead of regular plain yogurt, you might want to consider adding few tablespoons of milk to loosen up the batter a bit and add little extra moisture. Since Greek yogurt is double strained, it is much thicker than regular yogurt. I will certainly be adding the extra milk in my next batch. Also, although the original recipe does not mention any flavorings, I think either cinnamon, vanilla or almond extract will round off the flavor of these muffins.

20140428_173259

All in all, a winning recipe and would be keeper! Try a batch and let me know what you guys think!

20140428_173310

Protein-Packed Banana-Date Muffins

  • Servings: 16 muffins
  • Print

Ingredients
1 cup white whole wheat flour
1/4 cup all-purpose flour
1/4 cup soy flour
1 cup old-fashioned oats
1/2 cup brown sugar
1 tablespoon wheat bran
2 teaspoon baking soda
1/4 teaspoon salt
1 cup yogurt
1 cup mashed ripe banana
1 large egg
2 tablespoons oil
3/4 – 1 cup chopped dates tossed in a tablespoon of flour
1/3 – 1/2 cup chopped nuts such as walnuts, pecans or almonds
3 tablespoons ground flax

Preparation
1. Preheat oven to 350F. Line muffin pan with liners or lightly spray with cooking spray and a dusting of flour.
2. Combine flours with oats, brown sugar, wheat bran, baking soda and salt.
3. Combine yogurt, banana oil and egg.
4. Add liquid mixture to dry ingredients and stir gently to combine.
5. Fold in dates and nuts.
6. Spoon into muffin cups and top with a light sprinkling of ground flax.
7. Bake for about 20 minutes till muffins are golden brown on top and are baked through.
8. Remove from oven, let stand in the muffin pan for 5 minutes and then transfer to wire rack to cool completely.
9. Store them tightly covered.

(NOTE: Tossing the dates in flour prevents them from sinking to the bottom of the muffins.)

Crispy Homemade Fries

20140423_195555

Everyone has a secret indulgence, wouldn’t you agree?! 🙂 One of mine is fries! Not the fast food type, but real good fries that are perfectly crisp on the outside and light and fluffy on the inside. You know the type that I am talking about – the kind that doesn’t get limp and lifeless as soon as you scoop it out of the oil! Yes, that kind!

20140423_184053  20140423_184043  20140423_200126

Yes, yes, I am talking about the deep fried version. Yikes! But once in a while, it’s OK to eat a few of these without any guilt. Of late, I am following the principle of “limit, not restrict”. I feel it works better for me and my family to actually treat ourselves to “normal” food so we don’t feel deprived. Do I over-indulge often?? Of course not! But when I do prepare a not-so-light versions of anything, I allow myself to enjoy them shamelessly within bounds! And hence these fries!

These fries are lightly coated in a very thin batter, drained off of any excess and fried at high temperature so the oil doesn’t get soaked into the spuds. You can hold them in a low-temp oven till you are done with all the batches, so they remain crisp and delicious when it is time to serve!

20140423_201815

Crispy Homemade Fries

  • Servings: 4
  • Print

Ingredients
2 medium size russet potatoes
1/2 cup all purpose flour
1 teaspoon seasoned salt
1/2 teaspoon ground black pepper
1/2 teaspoon salt
1 teaspoon paprika
1/2 teaspoon garlic powder
1/2 teaspoon onion powder
1/4 – 1/2 teaspoon cayenne powder
1/4 teaspoon baking soda
3/4 – 1 cup cold water
Oil for deep frying

Preparation
1. Vigorously scrub the potatoes and rinse under cold water.
2. Slice them into long strips, about 1/4 inch wide on all four sides (or slightly bigger). Cover them with cold water (feel free to add few ice cubes) and let stand for about 20 minutes or so.
3. While the potato is standing in water, prepare the batter by mixing the flour with all other ingredients, EXCEPT the oil. Adjust the seasonings as desired. Batter should be fairly thin to coat the spuds and easily drip off.
4. Drain the potatoes and pat them dry with a kitchen towel or paper towel.
5. Heat at least an inch deep of oil in a shallow frying pan over medium-high heat.
6. Dip the potato strips lightly in the prepared batter and let any excess drip off. Do this one at a time. Drop them into the hot oil. Fry for about 5 minutes, turning occasionally till the fries are golden brown and crisp.
7. Transfer the fries to a baking tray in a preheated warm oven (about 200-225F) till you are done frying everything. Serve immediately.

Orange-Almond Biscotti

20140426_080837

I think few things go perfectly with a cup of coffee or tea as biscotti. The delicate flavors, the crunchy texture that slowly melds to a soft crumble at the touch of your hot beverage…You get the point.

20140424_175535     20140424_180403

They are not the most diet-friendly item out there. So, when I do make some at home, I opt for recipes with less butter and sugar – you know, the light kinds which are really hard to come by, especially if you are looking for the typical biscotti texture. This recipe however is a regular ol’ version, softened just so with the use of half Splenda/half sugar and less butter (about 5 tablespoons for about 20 cookies).

20140425_162311

Biscotti flavor possibilities are endless. This one is one of my favorite combinations – orange and almond! Combination of the citrus notes from the orange zest and the toasted crunchiness of almonds are pure delight. I am looking forward to repeating this recipe with anise flavor – something I have never tried before! 🙂

You can store these biscottis in a tightly closed container for a week or so. So, what are you waiting for? Bake a batch and make next week one to pause and enjoy!

(NOTE: This recipe is adapted from the original from Bon Appetit, Dec 1999)

Orange-Almond

  • Servings: 20
  • Print

Ingredients
2 1/4 cups flour (I used combination of white whole wheat and all purpose)
1 1/2 teaspoon baking powder
pinch of kosher salt
1/2 cup Splenda for baking
1/2 cup refined sugar
5 tablespoons butter, melted
2 eggs
1 teaspoon vanilla
1 teaspoon orange zest
1/2 cup finely chopped almonds
1 egg white for brushing the top

OPTIONAL
Semi sweet or dark chocolate for dipping or drizzling on the baked cookies
Chopped nuts for sprinkling on chocolate.

Preparation
1. Preheat oven to 350F. Line a baking sheet with parchment and set aside.
2. Sift flours with baking powder and salt.
3. In a medium bowl, combine melted butter and sugar and whisk to incorporate well.
4. Add eggs, one at a time, mixing well after each addition. Add vanilla and orange zest.
5. Incorporate dry ingredients till a soft dough forms.
6. Fold in chopped almonds.
7. Transfer the dough to the parchment. Form into a roll about 18″ long. Gently press to flatten it to about 4-5″ wide. Brush the top with lightly beaten egg white.
8. Bake for 30 minutes. Remove from oven. Let cool for about 5-10 minutes. Using a sharp knife, slice the loaf about 3/4″ wide. This should result in at least 20 cookies.
9. Place the sliced cookies cut side down on the parchment and return to the oven for another 10 minutes till they crisp up.
10. Remove from oven, let cool completely and store in airtight container for up to a week.

If using optional touch-ups, melt chocolate over double boiler (or in microwave, taking care not to scorch the chocolate) and dip just the ends or entire one side of the cookie. Sprinkle nuts if desired.

Layered Cherry Coffee Cake

20140424_191000

Last night was one of those busy evenings when I was trying to make multiple treats almost simultaneously – occasionally confusing myself as to which sifted flour mixture went with which recipe! 🙂 All fun though! I ended up baking a batch of funfetti sugar cookies, low sugar almond-orange biscotti and this amazing layered cherry coffee cake.

20140424_185010  20140424_185716

You see, I have had this canned lite cherry pie filling in the pantry for couple of months waiting for me to do something with it. I would think of many ideas, but never really took the next step to actually making them. So, in an effort to bake some sort of a little breakfast treat, I looked for ideas when I came across this amazing recipe (courtesy Rose Garden Inn Bed and Breakfast). I made a few minor changes such as using lite cherry pie filling, light sour cream and half white whole wheat flour. Also, I toned down the topping by using half the sugar and just about 1/3 cup of flour.

20140424_191110  20140424_191238

I have to make a special note about this recipe/batter. My batter was very thick, so after starting to spread half the batter in the 13″X9″ pan, I started to wonder if I should scoop it out and bake as layered muffins. It just didn’t seem like enough batter. Also, after layering the cherry filling, the top batter layer was even more challenging. As you see in my pictures, there are swirls of red from trying to smooth out the batter to cover the entire top surface of the cake. I figured if the taste is good, who cares about the looks. However, to my pure joy and satisfaction, the cake baked perfectly.

20140424_191809  20140424_201546

I am planning to make this again over summer with fresh summer berries lightly coated in sugar instead of pie filling and also baking them in individual muffins cups/liners. Who knows, maybe I will even replacing all of the flour with white/regular whole wheat. Can’t wait! In the meantime though, I hope you guys give this a try at your earliest! It will make even an April showers day seem enjoyable!

20140425_065911  20140425_070010

Layered Cherry Coffee Cake

  • Servings: 13x9 cake
  • Print

Cake Ingredients1/2 cup (1 stick) unsalted butter, softened
1 cup granulated sugar
2 eggs
1 cup light sour cream
1/2 teaspoon almond extract
1 teaspoon vanilla extract
1 cup all-purpose flour
1 cup white whole wheat flour
1/2 teaspoon salt
1 1/2 teaspoons baking powder
1/2 teaspoon baking soda
1 can lite (low sugar) cherry pie filling

Cake Topping
1/4 cup granulated sugar
1/3 cup all-purpose flour
1/2 cup chopped pecans
2 tablespoons butter

Preparation
1. Preheat oven to 350F. Lightly grease and flour a 13″ x 9″ baking pan and set aside.
2. Sift flours with salt, baking powder and baking soda.
3. Cream butter. Add sugar and beat till creamy and light, adding eggs one at a time.
4. Add sour cream and extracts and mix well.
5. Slowly add dry ingredients, mixing well to incorporate. You can use a spatula or your electric beater on low setting.
6. Spread half the batter in the prepared pan, smoothing with a butter knife or spatula to cover the bottom. This will be a thin layer.
7. Spread the pie filling over the batter. Follow with the remaining batter, again smoothing to cover the pie filling.
8. Combine all topping ingredients to resemble bread crumbs and spread over the top of the cake.
9. Bake for 50-55 minutes till cake is done.

Whole Wheat Zucchini Chocolate Chip Quick Bread

20140416_173633

Don’t you agree zucchini is one of the most underrated vegetables? It has a mild flavor that works well for slicing it up to enjoy with your favorite dip. It’s flavor could be amped by sautéing with garlic and other seasonings. It could be grated into pasta sauces and quick breads as a way to increase the nutritional value without altering the taste.

  20140416_161945  20140416_162635   20140416_162242

Although my kids will eat pretty much any veggie, there are few veggies that I need to be creative with so I don’t have to listen to too much whining. 🙂 Zucchini is one of them! However, this quick bread with grated zucchini and chocolate chips was a winner! Yes, tiny specks of green did give away the hidden secret, they still continued to bite into the bread! This to me means a winning recipe.

20140416_163336

The original recipe is from King Arthur Flour website. I modified it only slightly by replacing some of the flour with ground flax. I did not add any nuts in this attempt, but I would love to throw in some chopped walnuts or pecans in my next batch.

20140416_163551

Give it a try! I think you will enjoy it!

Whole Wheat Zucchini Chocolate Chip Quick Bread

  • Servings: 12 slices
  • Print

Ingredients
2 large eggs
1/3 cup honey
1/2 cup vegetable oil
1/3 cup brown sugar
1 teaspoon vanilla
1 3/4 cups white whole wheat flour
1/4 cup ground flax
1 teaspoon kosher salt
1/2 teaspoon baking soda
1/2 teaspoon baking powder
1 teaspoon ground cinnamon
2 cups shredded, unpeeled zucchini
1/2 cup semi-sweet chocolate chips

Preparation
1. Preheat oven to 350F.
2. Thoroughly whisk eggs, honey, oil, brown sugar and vanilla.
3. Sift together, salt, baking soda, baking powder and cinnamon. Stir in ground flax.
4. Add the dry mix to the wet ingredients, stirring till well combined.
5. Fold in zucchini and chocolate chips.
6. Transfer batter into a 9″ x 5″ lightly greased and floured loaf pan.
7. Bake for 50-55 minutes till top the bread is baked through.
8. Let cool in the pan for about 10 minutes. Then, remove from pan and let cool completely on a wire rack. Slice and serve or store well covered.

Baked Chocolate Donut Holes with Citrus Glaze

20140411_165629

Let me start off by saying I am not a huge donut fan. However, occasionally I do enjoy a Boston cream donut or a maple glazed donut with some walnuts on top! Yum! I guess I would enjoy them more willfully if they were not so darn loaded with calories. But then again, all delicious things are, right?!

20140411_161738  20140411_163622  20140411_163647

Anyway, since I have had my cake-pop maker hiding in the pantry for a while, I figured I will try a “baked” donut hole recipe as a treat for my kids. I have seen many recipes for chocolate muffins and cakes and oodles of other things made with sour cream. In fact, my sweet potato pie bread  is one of them as well. So, when I came across a Huffington post recipe for a chocolate donut hole, I figured I could modify the recipe using sour cream instead of buttermilk. Also, since I am not crazy about plain vanilla flavored glaze, I wanted to switch it out for something more flavorful and fresh – hello lemon glaze! Now, my first choice would have been orange, but lemon is all I had on hand, and lemon it will be for this batch! In addition, since I couldn’t really stomach the idea of attempting to make a healthier version of this already empty calorie treat by frying, I opted to cook these in lightly sprayed “cake pop” maker! Bye bye added fat calories and hello deliciousness!

20140411_163658  20140411_165135  20140411_165546

Baked Chocolate Donut Holes with Citrus Glaze

  • Servings: About 30+ donut holes
  • Print

Ingredients
3/4 cup all-purpose flour
1/4 cup whole wheat flour
1/4 cup ground flax
1/2 cup Dutch-processed cocoa powder*
1/2 teaspoon baking soda*
1/2 teaspoon espresso powder
1/8 teaspoon salt
1/2 cup granulated sugar
1/3 cup light sour cream
1 large egg
2 tablespoons unsalted butter, melted
1 teaspoons vanilla extract
Nonstick cooking spray
Colored sprinkles, sparkling sugar, finely chopped candy bits or nuts, optional

Glaze
1/2 cup powdered sugar
1 tablespoon milk
1 teaspoon lemon juice
1/4 teaspoon grated lemon zest

Preparation
1. Sift the flours, ground flax, baking soda, cocoa, baking soda and espresso into a medium bowl. * If using regular unsweetened cocoa powder, remember to add 1 teaspoon baking powder as well.
2. Whisk together sugar, sour cream, egg, melted butter and vanilla extract in a small bowl.
3. Slowly add the wet ingredients to the dry mixture and combine just until a dough forms.
4. Preheat the cake-pop maker.
5. Scoop dough into each well filling only half-way. Close the top and bake until ready.
6. Transfer the cooked donut holes to a wire rack placed on top a baking sheet.
7. Prepare the glaze: Stir all the glaze ingredients till smooth.
8. Gently spoon the glaze over the donut holes and let set for 10-15 minutes. If using any topping, sprinkle them on or roll the donut hole in them immediately after dipping in glaze and then let them set.

Creamy Potato-Broccoli Soup

20140410_190615

I love creamy soups – broccoli-cheddar, baked potato and leek….But if you order them at any restaurant, you can be assured of ingesting few days’ worth of sodium and fat! So, I usually reserve these cravings for times when I can prepare these at home.

20140410_181550  20140410_182944

I usually resort to a roux-based sauce made with 1% milk and a bit of light cream – if I am particularly brave! Mix in some 2% reduced fat or regular cheddar cheese and I promise you, you won’t miss the full-fat version! In fact, you might actually not even feel a tiny speck of guilt going for a second bowl! At least I didn’t! 🙂 Lastly, instead of typical chicken or vegetable broth, I used just water. With the addition of crushed dried herbs, taste was not sacrificed. Feel free to substitute this with broth if you so choose.

20140410_183352  20140410_185452

Even though the title says potato-broccoli, I did amp up the veggie count by adding plenty of chopped carrots, celery and bit of red pepper. This soup was quite hearty without having to chow down on a bread roll – although go for it if you must!

20140410_185742

Creamy Potato-Broccoli Soup

  • Servings: 4-5
  • Print

Ingredients
2 cups broccoli, cut into small pieces
2 medium potatoes, cut into small cubes
2 medium carrots, cut into small cubes
2 stalks of celery, diced
2-3 cloves of garlic, minced
1/4 cup chopped onion
1 tablespoon extra virgin olive oil
1/2 teaspoon dried oregano, crushed
1/2 teaspoon dried basil, crushed
1/4 teaspoon dried sage, crushed
3 cups water
1 tablespoon butter
2 tablespoons all purpose flour
3/4 cup 1% milk
1/4 cup light cream
1/2 cup 2% reduced fat or regular grated cheddar cheese
1 tablespoon powdered cheddar cheese, optional
salt and pepper to taste

Preparation
1. In a small pan, melt butter and lightly toast all-purpose flour to prepare a roux base. Remove pan from heat, let cool and stir in milk, light cream and powdered cheddar, if using. Set aside.
2. Heat a large pan over medium heat. Add olive oil and sauté all the vegetables except broccoli, onion and garlic for 3-5 minutes.
3. Add crushed herbs, water, salt and pepper. Cover, reduce heat to low and simmer for about 20-25 minutes till all the vegetables are cooked through.
4. Add broccoli and cook for another 5 minutes.
5. Add the roux mixture and bring back to a low boil and let cook for 3 minutes or so. Stir in grated cheese.
6. Serve immediately.

Lemon Ricotta Pancakes

20140411_065706

Here is a yummy recipe just in time for your weekend breakfast, although this could be whipped up for a weekday starter as well.

Orange-Ricotta Pancakes

Orange-Ricotta Pancakes


Pancakes are simple yet delicious, especially when you mix in various add-ins like nuts, chocolate chips, diced fruits etc. One of my favorite type of pancake is the one using ricotta cheese. Ricotta goes incredibly well with citrus, specifically orange or lemon – either combination is irresistible. I have made these pancakes with both orange and lemon and I must say each had its own nuances when it came to taste and flavor and I enjoyed both types.

20140411_062503  20140411_063205

This recipe is a spinoff from the original found on Williams-Sonoma website. I made couple of changes including using a combination of all-purpose flour plus cornstarch instead of cake flour and replacing some of the flour with ground flax. I also used 2 extra large eggs and juice from only 1/2 the lemon – although next time around I will try a whole lemon. Lastly, you can certainly add in some chocolate chips to these pancakes – who can resist the combination of citrus and chocolate?!

20140411_064209  20140411_064413

These pancake are already slightly sweet, so they just need a light drizzle of maple syrup or honey – or as suggested in the original recipe, raspberry sauce! Yum!

20140411_070826

Lemon Ricotta Pancakes

  • Servings: 12-14 pancakes
  • Print

Ingredients
1 cup ricotta cheese
1 cup 1% milk
2 eggs, separated
4 tablespoons granulated sugar
Zest and juice of 1/2 lemon (could use up to a full lemon)
1 1/4 cups MINUS 1 1/2 tablespoons all purpose flour
1 1/2 tablespoons cornstarch
1/4 cup ground flax
1 Tbs. baking powder
1/4 tsp. salt, divided
Chocolate chips, optional

Preparation
1. Mix ricotta, milk, egg yolks, sugar, lemon zest and lemon juice in a medium bowl.
2. Sift together the flour, cornstarch, ground flax, baking powder and 1/8 tsp salt.
3. Stir in dry ingredients into the wet ingredients just until combined.
4. Whisk egg whites till frothy. Add remaining 1/8 tsp salt (I used kosher) and continue whisking until soft peaks form.
5. Slowly fold in about 1/2 the egg whites into the pancake batter and follow with the rest.
6. Heat a griddle over medium heat. Lightly grease and prepare the pancakes as usual.
7. Serve immediately with your favorite syrup or raspberry sauce.