Nutty Fruity Granola

20181124_171121

My kids love all sorts of granola, especially with fruits and nuts. I enjoy a bit of it tossed on top of Greek yogurt and fruits. Store-bought granola can be a time saver, but they are usually very heavy on sugar/corn syrup (or another sweetener) and fat. Granola, which could be something healthy and good for you often takes a backseat due to the many bad calories.

20181124_152653

So, that nudged me to try a homemade granola recipe. This super easy granola recipe uses ingredients that you are likely to find in your pantry, along with a fresh apple to give that fall flair – albeit we are really closer to winter than fall!!

20181124_154105

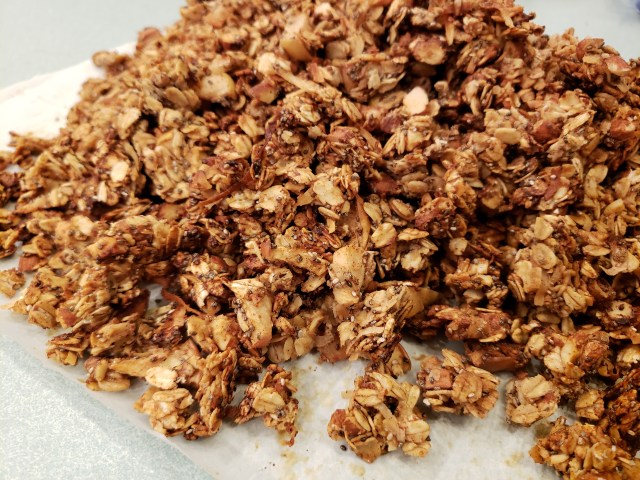
The hardest part of this recipe is really keeping an eye on the oat mixture as it slowly transforms into granola. You do have to take a peek every 15 min or so, and slowly toss them around to make sure they get cooked evenly without getting burnt. What I truly loved about this recipe was how I could control the amount of added sweetness. Even though honey or maple syrup is better than refined sugar, it’s still calories. Also, by adding in some applesauce, I was able to cut back on the oil as well.

20181124_155443

I hope you will give this recipe a try. I really am not sure how long this would keep fresh, especially with fresh apples in it. I would think they should keep well in an airtight container for about a week.

20181124_171111

Fruity Nutty Granola with Apples

Ingredients:
2 cups old fashioned oats
3/4 cup raw almonds, roughly chopped
1 gala apple (or another firm apple of your choice), finely chopped
1/2 cup chia seeds
1/2 cup shredded coconut
1 scoop vanilla flavored protein powder (optional)
1/4 cup honey
1/4 cup coconut oil, melted
1/4 cup unsweetened apple sauce
1/2 teaspoon salt (I omitted this)
1 1/2 teaspoons ground cinnamon
1/2 teaspoon grated nutmeg

Preparation:
1. Preheat the oven to 275F. Line a large baking sheet with parchment paper. Set aside.
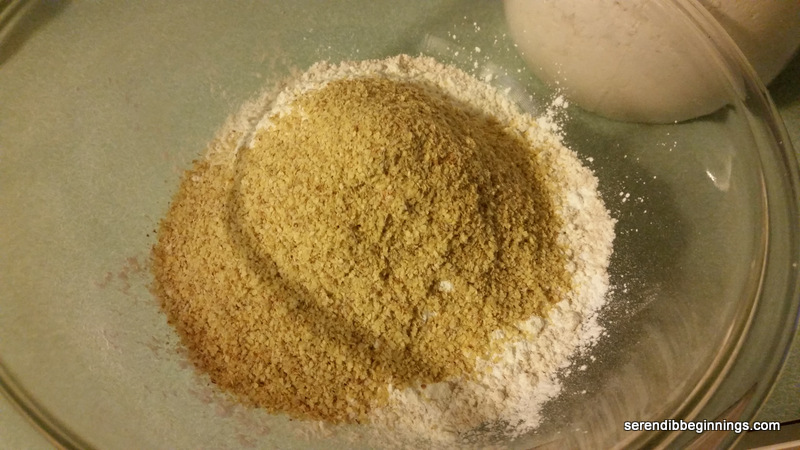
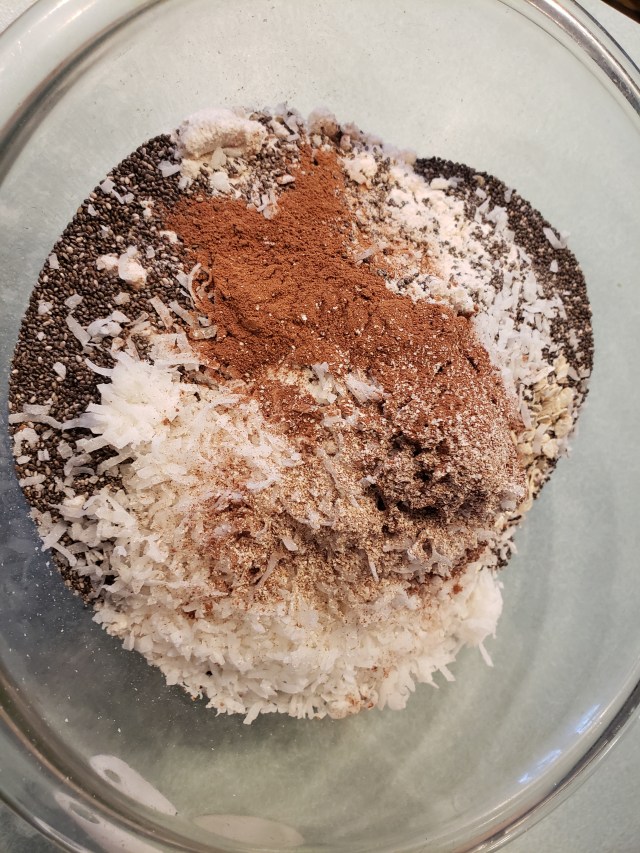
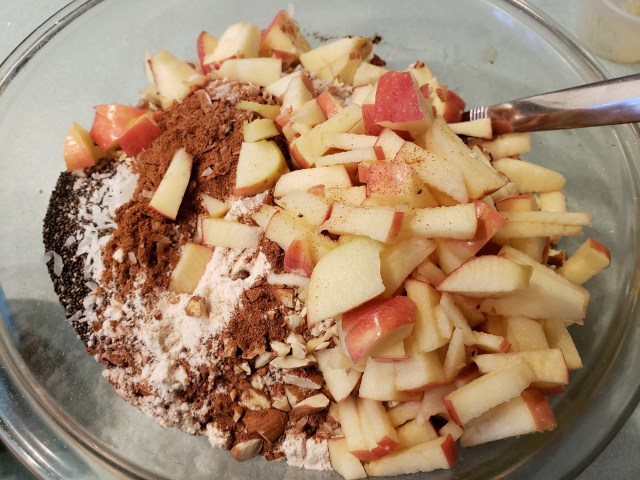
2. In a large bowl, measure out old fashioned oats, chopped almonds, , chopped apples, chia, protein powder and coconut. Mix in the spices, including salt, if using.
3. In a small bowl, combine honey, coconut oil and apple sauce.
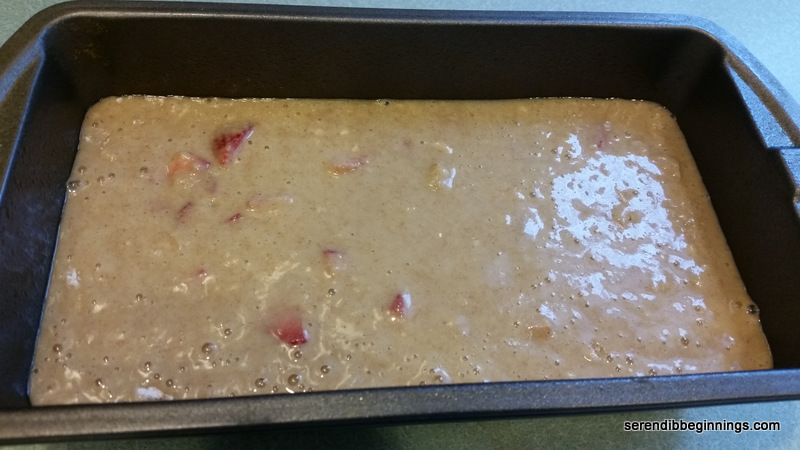
4. Add the honey mixture to the oats mixture and mix thoroughly to ensure all ingredients are well coated.
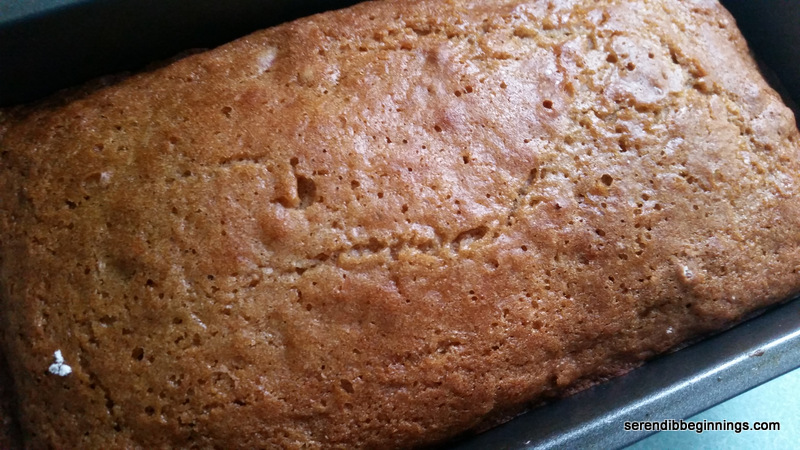
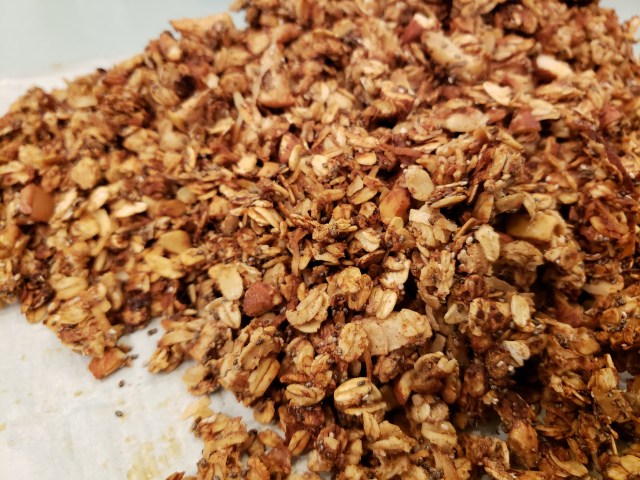
5. Transfer the granola mix on to the pan and spread the mixture evenly. Place in the preheated oven. Bake for 45-60 minutes lightly turning over the mixture every 15 minutes.
6. Remove the tray from the oven and let the granola cool completely. Transfer to an airtight container.

Hope this granola brightens your morning a little – especially because they truly are low in sugar and fat.

Autumn Pear Muffins

20151103_190809

My calendar says we are into November! That means, we have fallen back an hour and old Mr. Winter is looming closeby! Autumn colors should have vanished by now and the trees should be as bare as a smoky BBQ rib, licked clean! (how I miss summer!); air outside should be crisp and cool prepping our skin for the winter freeze! But, what a treat that the fall foliage is still lurking and the temps are so atypical for November! Seriously, it was in the 70’s one day this week! I am definitely not complaining by the slightest bit! Linger as long as you would like warm temp! The longer you linger, the shorter will be winter! (guess vestiges of my poetry days are still around!)

20151103_170029

I digress. So, yes, the warm temps and abundance of sunshine did the obvious – put me a great baking mood! I was all out of homemade muffins that I could easily pack for kids’ breakfast or snack and decided to bake a batch. It’s autumn after all, so the big question was whether to bake apple or pear muffins! Apple somehow makes you believe, summer just eased into early fall! Pear on the other hand kind of serves as a gentle push that nudges you into winter! Wouldn’t you agree? So, anyway, I had both the fruits in abundance, but caved in for the latter! Yum, my very first attempt at a pear muffin recipe.

20151103_171315  20151103_172052

I figured pears would easily substitute for apples in my usual muffin recipe, but I wanted to try a new one. As much as I would like to say this is my original recipe, it is not. The original is found here. I did make some modifications to give it my own little twist. Original ratios still remain though. I swapped out the milk with buttermilk (my favorite in baked goods) and added a streusel topping. And caramel! The last addition is not recommended at all as it is best done after baking and right before serving. Even though the caramel added another layer of sweetness to a not-overly-sweet muffin, I didn’t have the appearance I was going after! Oh well!

20151103_174417

These muffins are beyond delicious! Super autumny, super delicious, super moist and simply everything a muffin should be! 🙂 So, seriously, if you never tried any of my other recipes at all, you have to try this! It’s that good!

20151103_174428

Autumn Pear Muffins

  • Servings: 12
  • Print

Ingredients
1/2 cup dark brown sugar, lightly packed
1/4 cup sugar
1 stick unsalted butter, softened
2 large eggs
1 teaspoon vanilla extract
1 cup all-purpose flour
1 cup white whole-wheat flour
2 teaspoons baking powder
1/2 teaspoon baking soda
2 teaspoons ground cinnamon
1/2 teaspoon ground nutmeg
1/2 teaspoon salt
1/2 cup buttermilk
3 medium sizes Bosc pears, cut into 1/2′ cubes

Streusel topping
2 tablespoons of the dry mix (see instructions)
1/4 cup old-fashioned oats
1/4 teaspoon ground cinnamon
1 tablespoon brown sugar
Dulce de leche, optional (lessons learned: Drizzle after baking!)
1 tablespoon butter
1 tablespoon chopped crystalized ginger

Preparation:
1. Preheat oven to 425F. Spray a muffin pan or line with baking liners. Set aside.
2. Sift the flours with baking powder baking soda, spices and salt. Take 2 tablespoons of the dry mix and set aside for the streusel topping.
3. Prepare the streusel by mixing all the streusel ingredients till they are crumbly. Set aside.
4. In a large bowl, cream the butter and sugar till light and fluffy.
5. Add eggs, one at a time, mixing well after each addition. Add the vanilla and beat well.
6. Using a rubber spatula, stir 1/3rd the flour, folding lightly. Add half the butter milk. Add the other third of the flour and follow with remaining buttermilk. Fold in the remaining flour with the pears. As with any muffin recipe, don’t overmix! The batter will be quite thick and super delicious looking! 🙂
7. Spoon the batter evenly across all 12 muffin cups. Sprinkle the streusel topping over the batter and lightly press so they stick to the batter. Drizzle some dulce de leche (caramel) over the streusel. Place in the oven, reduce heat to 400F and bake for 22-25 minutes.
8. When the muffins are done, remove from the oven, let stand for 5 minutes, move to cooling rack and let them cool completely. The muffins can be stored in airtight container at room temperature for 3-5 days.

20151017_204609

First and foremost, I must apologize to anyone that visits this blog for my extreme tardiness in posting new recipes lately. I won’t lie – I truly, honestly, sincerely felt so guilty not doing it, but something or the other kept me away. So, here I am, trying to keep up my promise to post the recipe for the simply wonderful and autumny apple muffins that I had posted a picture of earlier this week!

20151017_200721  20151017_200938

Something about fall and the crisp air! As the temperature drops, apples take on a whole new dimension! They somehow make fall the best season and they also try to comfort you into believing winter wont be that terrible after all. I have tried to play around with several recipes, but wanted to try a recipe that not only looked great, but also tasted wonderful! That’s when I stumbled upon this recipe on Sally’s Baking Addiction. She has great recipes on her site – so if you are looking for some comfort recipes, you should visit her site. 🙂

20151017_201535  20151017_204212

So, back to this recipe…true to what she mentions in her recipe, these muffins do rise well, and taste so cake-like and full of apple goodness. I did use some apple cider in the wet ingredients per one of the reader comments and skipped the glaze. Honestly, I don’t think the glaze is really needed except for that picture perfect oozy look! Yum!

20151020_061235

Whip up these muffins this weekend and watch them disappear!

20151020_061331

Autumn Apple Muffins

  • Servings: 12
  • Print

Ingredients
Muffin Batter
1/2 cup unsalted butter, softened to room temperature
1/3 cup dark brown sugar, packed
2 tablespoons granulated sugar
2 large eggs at room temperature
1/2 cup plain, fat free Greek (or regular) yogurt
1 teaspoon ground cinnamon (better the quality, better the cinnamony goodness)
2 teaspoons vanilla extract
1 cup white, whole wheat flour
3/4 cup all-purpose flour
1 teaspoon baking soda
1 teaspoon baking powder
1/2 teaspoon salt
1/4 cup apple cider
2 small Gala apples (or any firm kind), peeled and chopped into 1/4 inch cubes

Crumb Topping
1/4 cup packed dark brown sugar
1/4 cup rolled oats
1 Tablespoon granulated sugar
1 teaspoon ground cinnamon
1/4 cup unsalted butter, melted
1/4 cup all-purpose flour

Preparation
1. Preheat oven to 425F. Line a muffin pan with 12 liners and set aside.
2. Prepare the crumb topping: Combine all ingredients and gently toss together till they are crumbly. Set aside (wow, that was easy!)
3. Using a handheld mixer, cream butter. Add the sugars and beat for another 2-3 minutes.
4. Beat in the eggs, yogurt, ground cinnamon and vanilla extract. Scrape down the sides and bottom of the bowl and set the bowl aside.
5. In a separate bowl, toss together the flours, baking soda, baking powder and salt. Pour the wet ingredients into the dry ingredients and slowly mix with a rubber spatula or whisk. Add the milk, gently stirring to mix in. Small lumps are OK. Fold in the apples.
6. Spoon the muffin batter evenly between the 12 muffin cups. The tins will be quite full, which is great for making tall-domed muffins!
7. Distribute the crumb topping evenly over all the batter, pressing lightly with your hands so the crumbs will stick to the baked muffins.
8. Bake the muffins for 5 minutes at 425°F, then reduce heat to 350F and continue baking for another 20-25 minutes, till the top is golden and muffin tests done.
9. Let the baked muffins stay in the pan for about 5 minutes before removing them to a cooling rack to cool completely. Cooled muffins can be stored at room temperature for about 5 days. These freeze well as well.

Enjoy!

Perfect blueberry muffins

20150517_080442

Berries are a perfect way to start off a sunny morning -even a weekday one! Blueberries, strawberries, raspberries, blackberries….I just love them all!

20150515_064109

I hope you have had the opportunity to try my raspberry scones! They are divine. Although I debated another scone recipe this morning, I went for buttery streusel topped blueberry muffin instead. This recipe is adapted from the original at the Café Sucre Farine. The recipe called for the blissful combination of lemon and blueberries! Heavenly!

20150515_065111

This recipe is so easy – I mean it. Even though the original recipe calls for creaming the butter and sugar, I decided to skip that step, mainly because I have made several batches of muffins before and I felt confident the muffins will turn out just fine without this additional step.

20150517_080431

So, grab yourself the basic ingredients I am sure you already have in your pantry and whip up this recipe in time for a great grab n’ go breakfast.

Perfect Blueberry Muffins

  • Servings: 12
  • Print

Ingredients

Crumb topping

3 tablespoons butter, melted
¼ cup demerara sugar
½ cup all-purpose flour
½ cup oatmeal
¼ cup finely chopped almonds

Muffins
1 cup whole wheat flour
1 cup all-purpose flour
1 ½ teaspoon baking powder
½ teaspoon baking soda
½ teaspoon salt
3 tablespoons butter, melted
¼ cup oil
¾ cup sugar
2 large eggs
¼ cup light sour cream
¼ cup milk mixed with 1 tablespoon lemon juice (set aside for 5 min)
Grated lemon zest from 1 lemon
1 teaspoon vanilla
1 ½ cups frozen wild blueberries
Glaze (Optional)
3 tablespoons lemon juice
1 cup powdered sugar

Preparation
1. Heat the oven to 375F. Spray a 12-cup muffin pan with nonstick cooking spray and set aside. You can also use muffin liners.
2. Prepare the streusel topping by combining all ingredients till crumbly. Set aside.
3. In a large bowl, sift together the flours, salt, baking powder, baking soda and sugar.
4. In a smaller bowl, lightly whisk the eggs. Whisk in the sour cream, curdled milk, oil, melted butter, lemon zest and vanilla.
5. Gently stir in the wet ingredients into the dry mixture just until moistened.
6. Fold in the frozen berries taking care to avoid breaking too many berries. I say this because it is inevitable your batter is going have bluish tint running through it no matter how careful you are! 
7. Spoon the batter into the muffin pan. Don’t level the batter. Top with a generous amount of the streusel topping.
8. Bake the muffins for 5 minutes at 375F. Decrease heat to 350F and continue baking for another 20-25 minutes till the tops are golden and the muffin is cooked through.
9. Remove from the oven, let cool in the pan for 5 minutes. Carefully remove the muffins from the tin and let cool on a wire rack till completely cool.
10. While the muffins are cooling, prepare the glaze (optional) by vigorously stirring together the lemon juice and powdered sugar to a “drippable” consistency (say, like honey).
11. Lightly drizzle over the muffins. Let set.
12. Store muffins tightly covered for up to 5 days.

Super Crown Muffins


20150213_083008

Baking is one of my favorite ways to start my day! It doesn’t matter what day of the week it is – if I get the desire, I jump to action, pulling out the staples while thinking about the flavors or the mix-ins.

20150209_071820Even though they mostly turned out deliciously moist and flavorful, I was never fully impressed with how they looked. For every batch I pulled out of the oven, my hankering for perfecting the beautiful super crowns you see in coffeehouse muffins kept getting stronger! No matter how much I researched on tips and techniques, my heart would sink every time I pulled out a delicious yet flat muffin batch – well, until this week!

20150209_072107

So, you see, I didn’t give up! I kept whipping up batch after batch nearly every week! After all, they do make great after school snack or mid morning pick me upper even if they are flat topped! I tried tweaking an ingredient here and ingredient there, while still trying to keep the end product relatively healthy! Yes, “healthy” is a loosely used term, so let me explain what I mean. These muffins don’t use much added fat (1/4 cup oil for a dozen), use a blend of whole wheat, all purpose and wheat germ, touch of honey and a bit of boost from 1% milk and fat free yogurt! In my opinion, this probably qualifies as relatively healthy compared to what you will pick up at the grocery store or your favorite coffeehouse. And the best part….this recipe is awesome for those of you who want to use few different mix-ins – like the blueberries and chocolate chip versions I made here. Read on to find out more!

20150213_072139

So, unlike what you might read on the internet about having to overfill the muffin pans to achieve the sky-high crown effect, these muffins do just great with about 3/4 fill. They puff up so beautifully that I sometimes catch myself taking a few peeks before they are done! 🙂 And the golden color….You have to try this to experience the joy yourself! So, I hope you will grab couple of mixing bowls and go to task! Enjoy!

20150209_080446  20150209_082600

Super Crown Muffins

  • Servings: 12 muffins
  • Print

Ingredients
1 1/4 cup whole wheat flour
1 cup all purpose flour
1/4 cup toasted wheat germ
1 1/2 teaspoon baking powder
1/2 teaspoon baking soda
1/4 teaspoon salt
2 eggs, lightly beaten
1/4 cup fat free plain yogurt
1/4 cup canola oil
1/4 cup honey
1 cup 1% milk
Add-ins: Chocolate chips, nuts, berries…
Optional: Streusel topping: Combine 2 tablespoons all purpose flour, 1 teaspoon brown sugar, 1/4 cup rolled oats, 1 tablespoon butter, 1/4 teaspoon ground cinnamon

Preparation:
1. Preheat oven to 400F. Grease a 12-well muffin pan and set aside (or alternatively use paper liners)
2. In a large mixing bowl, combine all dry ingredients
3. In a small mixing bowl, combine all the wet ingredients
4. Add the wet ingredients to the dry and gently fold in just until the flour mixture gets moistened. DO NOT OVERMIX!
5. Scoop about a tablespoon of batter into each greased well. Add a few chocolate chips or berries or whatever you choose. Divide rest of the batter evenly among all the wells and top with few more chocolate chips or other add-in of your choice.
6. If using streusel topping, divide it evenly among all the muffins.
7. Bake for about 20 minutes till the crowns are puffed up and beautifully golden!
8. At the end of baking, remove the pan and let the muffins cool for a few minutes before moving them to a cooling rack to cool completely.

You can refrigerate these muffins for 3-5 days. Because of the low fat content, the muffins taste better when you microwave for just a few seconds!

Super Moist Strawberry Bread

20150124_102748

Strawberries?? In January??? Not great, I know! But, they made it into my kitchen and now I needed to find a way to use them up. My kids, who would normally devour them at the first sight, didn’t seem to care too much for them! Perhaps with good reasons!

20150124_103124  20150124_112734

I could have frozen them for future smoothies, but I had an urge for baking last weekend! My quest for a good recipe landed me at glazed strawberry bread. Sally’s Baking Addiction has bunch of great recipes and this one in particular hit the chord for using up my berries.

20150124_124248

I give her full credit for the recipe, although I did alter it a bit with substituting half the flour with whole wheat and adding in lemon zest in lieu of cinnamon. Also, I don’t like to overdo with the glaze, so my glaze is just a light drizzle.

20150124_124333

Like it is mentioned in the original recipe, this is a very moist strawberry cake bread. I will probably reduce the sugar a bit next time around – perhaps by a 1/4 cup. It is a great recipe to keep for a few days – that is if you can resist the temptation. Although I didn’t particularly detect the flavor getting more intense after a day (could be because my berries were not at their prime), the taste was still great after 3 days. Yes, we managed to keep ourselves in check!

20150124_132404

Do give this a try. It will be worth it!

  • Servings: ”12-14
  • Print

Ingredients:
1 cup all purpose flour
1 cup whole wheat flour
1 teaspoon baking soda
1/2 teaspoon salt
1 large egg, preferably at room temperature
3/4 cup granulated sugar
1/4 cup dark brown sugar
1 cup buttermilk (I made mine using vinegar and milk)
1/3 cup canola oil
2 teaspoons vanilla extract
1 teaspoon grated lemon zest
1 and 1/2 cups fresh strawberries, rinsed and diced into 1/4 inch cubes
1 tablespoon flour

Citrus Glaze (optional)
1/2 cup confectioner’s sugar
1 tablespoon heavy cream
1-2 tablespoons lemon juice
1/2 teaspoon grated lemon zest

Preparation:
1. Preheat oven to 350F. Spray a 9″ x 5″ loaf pan with a cooking spray and keep aside.
2. Combine first 4 ingredients in a large bowl and set aside while you mix the rest of the ingredients.
3. Whisk together the sugars and egg until well combined. Add buttermilk, oil, vanilla and lemon zest.
4. Add the wet ingredients to the dry ingredients and gently fold to combine. Take care not to over mix.
5. Toss the chopped strawberries in a tablespoon of flour. Slowly fold in the berries into the batter, leaving a few to top the batter, if desired (as you can see, I did not do that in my attempt).
6. Transfer the batter to the prepared loaf pan and bake on the middle rack for 50-60 minutes. If you see that the top is getting brown too fast, loosely cover the pan with a piece of foil half way through and continue baking.
7. Test for doneness using a toothpick. Remove pan from oven, let cool for about 10 minutes. Invert onto a wire rack and let cool completely.
8. While the bread is cooling, prepare your glaze. Combine all the ingredients for the glaze till they are smooth and of desired consistency. Once the bread is completely cool, drizzle the glaze over the top.

Blueberry Preserves

20140726_181648

OMG friends! I missed posting here! It’s been rough few weeks!

20140726_181558  20140726_181704

It so happened that a mishap occurred with my laptop….it “somehow” got drowned from the bottom and stopped working! Yes, I nearly crumbled into nothingness when I turned on the laptop and it made this whirring sound. My heart sank knowing something was terribly wrong! The screen was black. I almost collapsed thinking of the many photos saved on it! Can they be retrieved somehow? What about my computer time? Sure, I could have used one of the backup units, but somehow I felt I needed to wait till mine got at least some sort of a CPR.

20140726_133734

Long story and ordeal cut short, my laptop did get fixed. Although it took a bit of time (partly because I was too busy preparing for my extended family’s visit and work to bug my husband to do something about it), the unit is back to action – thanks to my brother and my husband!

20140726_133750

So, I couldn’t think of any better recipe to post but a wonderful, delectable, vibrant, fresh from the garden to a jar, blueberry preserve!

20140726_135732   20140726_172051

Yesterday, we had gone blueberry picking. We picked several pounds and after freezing most and saving some for eating fresh, I used up a bunch to make two 16-oz jars of delicious preserves.

20140726_173358  20140726_174758

If you can get past the beautiful hue of the preserve, I assure you that you will be greatly rewarded by the taste of the spread on a lightly buttered toast or spread on a split muffin or scone! Yummmm….so what are you waiting for??!! Grab the few things you need to start twirling the kitchen, will you!

20140726_175055

Bright and Sunny Blueberry Preserve

  • Servings: two 16-oz jars
  • Print

Ingredients
3 1/2 cups of crushed blueberries
2 tablespoons sure-jell low-sugar pectin
1/2 cup granulated sugar
1/2 cup stevia
1 tablespoon unsalted butter

Preparation:
1. Prepare the fruit by crushing rinsed blueberries. Scoop 3 1/2 cups of the crushed fruit and pour into a small sauce pan.
2. Place over medium-low heat and add the pectin.
3. Stir the pectin into the fruit and cook for about 5 minutes.
4. Add the sugar and stevia and continue cooking the fruit for about 20 minutes, stirring frequently.
5. The fruit may start to bubble and froth up. Stir in the butter to help reduce the froth.
6. While the fruit is cooking, place the two jars in a medium pot of simmering water and warm for about 5 minutes.
7. Remove the jars from the water, letting all the water drain out. Scoop the cooked fruits into the jars, leaving about 1/4 inch of head space. Place the lid and the ring and lightly tighten the lids.
8. Place the jars back into the pan with hot water and simmer for about 10 minutes. Make sure the water mark is well below the lid.
9. Remove the jars from the water and transfer the jars to the refrigerator to cool.
10. Check for seal after about 24 hours. You will see that when properly sealed, the lid will be slightly depressed down.

Enjoy!

Cinnamon-Walnut Bundt Cake

20140525_085639

Coffee cakes are great not just in the afternoon with a cup of coffee or tea, but really anytime you have the craving for something sweet. Having said that, these cakes usually are quite unhealthy with lots of sugar and butter. Although this holds true for this original Cooking Light recipe as well, it does give more than 16 servings (so about 1 teaspoon butter per serving and a tablespoon or so of sugar).

20140525_062515

This cake did keep well for at least 5 days (the time it lasted in our household).

Feel free to substitute pecans for the walnuts. Although the original recipe called for all all-purpose flour, substituting at least 1/3 of it with wheat still tasted great!

20140525_064941  20140525_074716

Lastly, this recipe is really quick to put together. So, while your first pot of coffee is brewing, whip up the cake and sip your coffee while enjoying the aroma of the baking cake! 🙂

20140525_085655  20140525_085711

<

p style=”text-align:left;”>

”Cinnamon-Walnut

  • Servings: ”16″
  • Print

Whole Wheat Crepes with Nutella and Berries

20140525_073524

Crepes are a favorite breakfast item in our household. They are very easy to make and can be tailored to each person’s taste with the addition of their favorite fillings and/or spread. These crepes are especially good (and good for you) because they are made with white whole wheat and 1% milk.

20140525_070704

I usually go for Nutella or sweetened cream cheese for the spread and lots of fresh berries, berry compote etc. for the filling. Here is a tip about cream cheese – make your own sweetened cream cheese to limit the amount of sugar. It just takes a tablespoon or so of confectioner’s sugar to sweeten about 1/2 cup of softened cream cheese. Feel free to grate a bit of lemon zest into it with a dash of vanilla!

20140525_073805 20140525_073409 20140525_073423

Crepes can be enjoyed at room temperature. That means, you can cook all the crepes first and then, finish them off later with the spread and filling. Perhaps, you could just set the crepes with the spread(s) and filling(s) and have everyone compile their own! 🙂

Whole wheat crepes with fresh berries

Ingredients
1 cup white whole wheat flour
1 cup 1% milk
3/4 cup water
1 teaspoon vanilla
3 eggs
1/2 teaspoon vanilla extract
1 tablespoon melted butter
1 tablespoon honey
Extra butter or non stick spray for cooking the crepes

Spread
Nutella
Sweetened cream cheese

Fillings
Fresh berries
Banana
Sautéed apples
Mixed berry compote

Preparation
1. Thoroughly blend all of the crepe ingredients through honey in a blender. I used a handheld mixer to whisk the mixture.
2. Let the batter sit for 15 minutes so the air bubbles disappear.
3. Heat a small sauté or frying pan over medium high heat. Either melt a dab of butter or spray with a non-stick spray.
4. Ladle about 1/4 cup of batter and quickly swirl to coat the bottom.
5. Let cook for a minute and flip to the other side. Continue cooking for about 30 seconds or so.
6. Remove crepes to a plate and keep aside till ready to assemble.
7. When ready to assemble, spread a bit of nutella or cream cheese. Fill with fruits or compote of choice or just enjoy plain with just the spread.
8. Finish off with a dusting of confectioner’s sugar.

Berry-licious Scones

20140510_084238

Happy Mother’s day ladies! I hope all you moms out there have a wonderful day tomorrow! I know, I know, we are supposed to stay in bed till breakfast is ready and not worry about anyone spilling hot coffee on themselves or burning their fingers in the stove or oven etc. And your kids ordered you to just take it easy and relax the whole day! THE WHOLE DAY! Yikes!

20140510_072324

Am I the only weird one out there that finds it near impossible to just sit still and watch all the rumblings in the kitchen. You know, I am OK with the family CLEANING, DOING LAUNDRY etc., but when it comes to cooking or any kitchen related task, I think I develop some sort of an anxiety. Hmmm….maybe not so much anxiety, but perhaps a longing to be in there, in my kitchen, where I am always ME!

20140510_072729     20140510_073011

Yes, for the love of my kids, I will let them do what they please on Sunday! But I couldn’t help but share with you a pre-Mother’s day recipe that is likely to be a winner! I came across this recipe at http://www.averiecooks.com. I modified the recipe only slightly by replacing half the flour with white whole wheat. I am starting to fall in love with KAF white whole wheat!

20140510_080415  20140510_082235  20140510_084547

Scones are an indulgence of mine! I especially like the cinnamon-pecan and chocolate chunk ones! Yum. But in honor of Mother’s Day, I wanted to make a batch with berries! Personally I think there is something about Mother’s Day and BERRIES! These berry-licious scones are light, almost muffiny and delicious! I hope you get to make them and enjoy! WARNING: The hardest part of this recipe is waiting for the scones to cool so you could drizzle the lemon glaze and devour it in one inhale! 🙂

20140510_085801  20140510_084238

Berry-licious Scones

  • Servings: 8
  • Print

Ingredients
1 cup all purpose flour
1 cup white whole wheat flour
1/2 cup granulated sugar
1 tablespoon baking powder
1/4 teaspoon salt
1/2 cup unsalted butter
1 large egg
1/2 cup light sour cream
1 tablespoon grated lemon zest
1/2 teaspoon vanilla essence
1 heaping cup mixed berries of your choice (fresh or frozen)
2 tablespoons of coarse or turbinado sugar for sprinkling on top

Lemon Glaze
1/2 cup confectioners’ sugar
1 tablespoon (slightly less) lemon juice

Preparation
1. Preheat oven to 400F. Line a baking sheet with parchment paper and set aside.
2. Mix the flours, sugar, baking powder and salt in a large bowl.
3. Using two forks or pastry cutter, incorporate the cold butter into the dry mix (just like how you prepare a pie crust). Once the butter is sufficiently incorporated, the flour mixture will resemble very coarse crumbs. (This is one of the least favorite tasks in the kitchen for me – for no good reason!)
4. Lightly beat the egg in a small bowl. Stir in the sour cream, vanilla and lemon zest.
5. Fun begins. Gently stir in the wet ingredients into the dry mix just until barely incorporated. Like with muffins, pancake batter etc., over mixing will result in tougher end product. The “dough” will be rather sticky and wet, but avoid the temptation to grab more flour for a CPR!
6. Fold in the berries. If using frozen berries, do not thaw them prior to using.
7. Turn the dough onto a floured work surface (use about couple of tablespoons of flour for the surface) and gently knead to bring the dough together. Just a few movements. If the dough is too sticky to form into a general circle or square, add another tablespoon of flour, but no more.
8. Pat the dough into a circle about ….diameter and ….thick. Alternatively you can form the dough into a square …x….. For circle, cut it into 8 wedges. For square, cut initially into 4 squares and each square diagonally into 2 triangles. You didn’t know you were going to use geometry here, did you? 🙂
9. Using a spatula, transfer the scones to the parchment lined baking sheet. Sprinkle with turbinado or coarse sugar if desired. Bake the scones for about 15-18 minutes till the top is lightly golden.
10. Remove from oven, let cool on the baking sheet for about 5 minutes before moving them to a wire rack to cool completely.
11. GLAZE: Mix the confectioner’s sugar and lemon juice. Drizzle about a teaspoon on top of each scone. Let the glaze set prior to serving.

ENJOY!