Status Update

Hi folks! I hope everyone is gearing up for summer!

It’s been hectic couple of weeks for me. I really miss not posting some yummy recipes here, although I have the pictures ready. What’s the point of pics when I don’t have the text to go with it, right?! And you will be correct! I promise to post a few recipes in the next few days.

I appreciate your patience.

LS

Quinoa Tabbouleh with Chickpeas

Now that the weather is getting warmer (although I wish it would just stay warm and keep getting warmer!), it is time to lighten up the meals a bit. And so enters quinoa – again!

20140515_185111

One of my earliest post is for a slightly different version of quinoa salad. This recipe inspired by a traditional tabbouleh using bulgar goes to show how versatile these little seeds are! Just have a container of cooked quinoa handy and you can make a salad, quinoa breakfast cereal or southwest quinoa patty in a jiffy.

20140515_185136  20140515_185540  20140515_185508

Although the veggies listed under ingredients are what I used for this batch, you can go crazy with your favorites. Chickpeas not only amp up the fiber content, but also make this salad more substantial – a plus in my opinion ‘cos that means you don’t have to rummage through the pantry for a snack soon after dinner. Dressing is very light and refreshing with lemon juice, garlic and a bit of ground cumin. So, what are you waiting for? Grab a large bowl and start tossing in your favorite veggies and quinoa!

20140515_185743  20140515_190248

Quinoa abbouleh with Chickpeas

  • Servings: 4 entrée portions
  • Print

Ingredients
1 1/2 cups of cooked quinoa, cooled
4 cups of cut up fresh salad veggies of your choice
1 15.5 oz can chickpeas, drained and rinsed well
1/4 cup chopped fresh parsley
1/4 cup chopped fresh mint
Zest from half lemon
Juice from half lemon
3 tablespoons extra virgin olive oil
1/4 teaspoon salt (adjust to taste)
1/4 teaspoon ground black pepper
1/2 teaspoon ground cumin, preferably freshly ground
Optional, Pita halves to serve alongside “tabbouleh”

Preparation
1. In a large bowl, combine quinoa, cut up vegetables, chickpeas, lemon zest and fresh herbs. I used broccoli florets, purple cabbage, cucumber and tomato.
2. In a small bowl, combine lemon rest of the ingredients except pita halves. Whisk to make a dressing.
3. Pour the dressing over the quinoa and other “tabbouleh” ingredients and toss to combine.
4. Serve with a pita half or just by itself. Salad will keep refrigerated for next day’s lunch.

TIP: Feel free to sauté the broccoli florets in a tablespoon of olive oil to develop the flavors.

Weeknight Spaghetti in Spicy Diavolo Sauce with Shrimp

20140513_194601

Weeknight meals are tough, even for the most seasoned cook. You are dealing with kids’ after school activities, homework, house work, other errands etc., that even if you love cooking, it sounds like a grueling task! It doesn’t have to be an arduous task if you have a quick, delicious and not to mention rather healthy recipe!

That brings you to this spaghetti dish in a spicy tomato sauce. As an option, you can add in seafood of your choice – shrimp, mussels, lobster meat, or even scallops! I used shrimp in mine because I had it on hand.

20140513_190436

Instead of grabbing a bottled pasta sauce, I wanted to make something from “scratch” – in quotes because I didn’t quite blanch the tomato and crush it. I opted for a can of no-salt added crushed tomato, saving precious time in the kitchen! 🙂 Grated lemon zest, chopped fresh basil and a good sprinkling of crushed red peppers lend a wonderful blend of spicy, citrusy note to the sauce that goes so perfectly well with the seafood. Yum! The sauce itself is a keeper even for a simple vegetarian meal!

20140513_190642  20140513_192928

You can save even more time if you already have leftover cooked pasta of any kind. If you are really in a pinch, use a low-sugar bottled pasta sauce AND add in extra basil, lemon zest and crushed red pepper. By using a can of crushed tomato, you can adjust the salt and other seasonings to your own specifications – now who wouldn’t want a tailored sauce??!!

20140513_192954  20140513_194619

Weeknight Spaghetti in Spicy Diavolo Sauce with Shrimp

  • Servings: 4
  • Print

Ingredients
1/2 package spaghetti of your choice (regular, whole grain etc.)
2 tablespoons extra virgin olive oil
1/4 cup chopped onions
2 cloves garlic, minced finely
1 tablespoon crushed red pepper flakes (adjust to your taste)
1 1/2 cups no-salt added crushed tomato
Grated zest from half lemon
1 teaspoon fresh lemon juice
Kosher salt to taste
3 tablespoons chopped fresh basil
1/2 lb large shrimp, shelled and deveined
1 tablespoon extra virgin olive oil
2 tablespoons freshly chopped parsley for garnish
1/4 cup freshly grated parmesan cheese

Preparation
1. If not using leftover cooked pasta (a time saver), cook pasta according to package directions and set aside.
2. Heat one tablespoon of olive oil in a frying pan over medium high heat and sauté the shrimp till cooked through. Sprinkle with a dash of salt. Remove from pan and set aside, covered to keep warm.
3. Heat a small sauce pan over medium high heat. Add 2 tablespoons of olive oil and sauté onion and garlic.
4. Add crushed red pepper flakes, crushed tomato, basil, lemon zest, lemon juice and salt. Reduce heat to medium low, cover and let simmer for 12-15 minutes till all flavors meld well.
5. Stir in the basil and remove from heat.
6. Toss the pasta with 1/2 cup of sauce and shrimp. Serve on individual plates. Top with remaining sauce distributed among four plates. Garnish with a sprinkling of parsley and freshly grated parmesan cheese. Serve immediately! Bon Apetit

Berry-licious Scones

20140510_084238

Happy Mother’s day ladies! I hope all you moms out there have a wonderful day tomorrow! I know, I know, we are supposed to stay in bed till breakfast is ready and not worry about anyone spilling hot coffee on themselves or burning their fingers in the stove or oven etc. And your kids ordered you to just take it easy and relax the whole day! THE WHOLE DAY! Yikes!

20140510_072324

Am I the only weird one out there that finds it near impossible to just sit still and watch all the rumblings in the kitchen. You know, I am OK with the family CLEANING, DOING LAUNDRY etc., but when it comes to cooking or any kitchen related task, I think I develop some sort of an anxiety. Hmmm….maybe not so much anxiety, but perhaps a longing to be in there, in my kitchen, where I am always ME!

20140510_072729     20140510_073011

Yes, for the love of my kids, I will let them do what they please on Sunday! But I couldn’t help but share with you a pre-Mother’s day recipe that is likely to be a winner! I came across this recipe at http://www.averiecooks.com. I modified the recipe only slightly by replacing half the flour with white whole wheat. I am starting to fall in love with KAF white whole wheat!

20140510_080415  20140510_082235  20140510_084547

Scones are an indulgence of mine! I especially like the cinnamon-pecan and chocolate chunk ones! Yum. But in honor of Mother’s Day, I wanted to make a batch with berries! Personally I think there is something about Mother’s Day and BERRIES! These berry-licious scones are light, almost muffiny and delicious! I hope you get to make them and enjoy! WARNING: The hardest part of this recipe is waiting for the scones to cool so you could drizzle the lemon glaze and devour it in one inhale! 🙂

20140510_085801  20140510_084238

Berry-licious Scones

  • Servings: 8
  • Print

Ingredients
1 cup all purpose flour
1 cup white whole wheat flour
1/2 cup granulated sugar
1 tablespoon baking powder
1/4 teaspoon salt
1/2 cup unsalted butter
1 large egg
1/2 cup light sour cream
1 tablespoon grated lemon zest
1/2 teaspoon vanilla essence
1 heaping cup mixed berries of your choice (fresh or frozen)
2 tablespoons of coarse or turbinado sugar for sprinkling on top

Lemon Glaze
1/2 cup confectioners’ sugar
1 tablespoon (slightly less) lemon juice

Preparation
1. Preheat oven to 400F. Line a baking sheet with parchment paper and set aside.
2. Mix the flours, sugar, baking powder and salt in a large bowl.
3. Using two forks or pastry cutter, incorporate the cold butter into the dry mix (just like how you prepare a pie crust). Once the butter is sufficiently incorporated, the flour mixture will resemble very coarse crumbs. (This is one of the least favorite tasks in the kitchen for me – for no good reason!)
4. Lightly beat the egg in a small bowl. Stir in the sour cream, vanilla and lemon zest.
5. Fun begins. Gently stir in the wet ingredients into the dry mix just until barely incorporated. Like with muffins, pancake batter etc., over mixing will result in tougher end product. The “dough” will be rather sticky and wet, but avoid the temptation to grab more flour for a CPR!
6. Fold in the berries. If using frozen berries, do not thaw them prior to using.
7. Turn the dough onto a floured work surface (use about couple of tablespoons of flour for the surface) and gently knead to bring the dough together. Just a few movements. If the dough is too sticky to form into a general circle or square, add another tablespoon of flour, but no more.
8. Pat the dough into a circle about ….diameter and ….thick. Alternatively you can form the dough into a square …x….. For circle, cut it into 8 wedges. For square, cut initially into 4 squares and each square diagonally into 2 triangles. You didn’t know you were going to use geometry here, did you? 🙂
9. Using a spatula, transfer the scones to the parchment lined baking sheet. Sprinkle with turbinado or coarse sugar if desired. Bake the scones for about 15-18 minutes till the top is lightly golden.
10. Remove from oven, let cool on the baking sheet for about 5 minutes before moving them to a wire rack to cool completely.
11. GLAZE: Mix the confectioner’s sugar and lemon juice. Drizzle about a teaspoon on top of each scone. Let the glaze set prior to serving.

ENJOY!

Fitness update

20140502_154435
It’s been a while since I posted an update on my fitness journey, so I thought it is about time.

After that episode aggravating my lower back couple of months ago, I took about a week off from any fitness routine. Even a very slow walk was painful. Like I mentioned sometime back, I knew I had to find a happy medium to continue to exercise while at the same time listening to the clear clues given by my body.

So, after attempting a training plan to eventually run at 6mph, I tried to ease back to about 5.5mph. After a day of that I realized that was a bit much as well. After a couple of weeks of trial (and yep, error), I found my happy medium at last! It’s no more than 5.3mph. Yes, weird I know. Even a 0.2mph difference has an impact on how my body react! Hmph!

At least I feel good knowing how hard I can push myself and how I should protect my body from any exercise induced injuries. I do focus on ample amount of pre and post workout stretching. Deep stretches for about 5 minutes on each end.

I am continuing to exercise 4-6 days a week and feeling stronger and healthier. So, I say, let’s keep it going!

Grilled Chicken Breasts with Light Alfredo Sauce

20140507_194948Who doesn’t love the creamy deliciousness of Alfredo sauce??!! Yeah, that’s what I thought…everyone does, right! So, you have had Fettucine Alfredo many a time! But how about a grilled chicken breast topped with a lightened Alfredo sauce with notes of garlic and citrus??? We are talking pure indulgence without wreaking havoc with your diet! So, if you are like me and have been on the quest to find a lighter version of this goodness, look no more. I think once you try this recipe, you will agree it’s a keeper.

So, anyway, as you guys already know, typical Alfredo sauce though is loaded with fat (anyone watching their calories out there?). So, Alfredo, like other rich, calorific sauces are usually reserved for extra special occasions, but what if I could enjoy it without any guilt more often than couple of times a year!!

  20140507_185436   20140507_191350  20140507_190405

I do try to make quick white sauces with 1% milk thickened with a roux. Although they impart a slight creaminess, it is definitely not the same as the richer version. This recipe however might change that though once and for all. Little bit of lemon zest, a dollop of reduced fat cream cheese, generous helping of grated parmesan and lots (did I say lots?) of garlic in this sauce provide the satisfying creamy richness without your arteries swelling up with plaque.

20140507_192934  20140507_193032

Drizzle it over grilled chicken just before serving and serve with a side of your favorite vegetable or salad. Trust me, you won’t even miss the bread or other carbs! It is satisfying and will leave you longing to make it again!

20140507_194752  20140507_194930

Grilled Chicken Breasts with Light Alfredo Sauce

  • Servings: 4
  • Print

Ingredients
4 chicken breasts, cut to about 4-6 oz each
salt and pepper to taste
juice from 1/2 lemon
1 clove garlic, finely minced

Sauce
1 1/2 tablespoon butter
3 cloves of garlic, grated or minced finely
1 teaspoon grated lemon zest
1 1/2 tablespoon all purpose flour
1 1/4 cups 1% milk
2 tablespoons reduced fat cream cheese, room temperature
1/2 cup grated parmesan cheese
1/8 cup grated pecorino cheese
3 tablespoons chopped fresh parsley
Salt and freshly ground black pepper to taste
optional – sautéed mushrooms

Preparation
1. Begin by preparing the chicken. Marinate the chicken in a marinade of lemon juice, garlic, olive oil, salt and pepper for about 15-20 minutes.
2. Preheat the grill or a sauté pan at medium high heat. Cook the chicken breasts for 12-14 minutes till juices run clear and meat is cooked through. Remove to a platter, loosely covered with a foil and set aside till you prepare the sauce.
3. In a small sauce pan, melt the butter and sauté the lemon zest and garlic for about 30 seconds. Add the flour and continue to cook, stirring constantly for a minute or so.
4. Stir in the creamed cheese, followed by milk. Stir continuously to break up any lumps. Cook for about 5 minutes till the sauce starts to simmer and thicken up a little.
5. Slowly stir in the grated cheese and season with salt and pepper. Continue to cook for just about a minute or so till the sauce becomes evenly creamy and smooth. Remove from heat and stir in the chopped parsley.
6. Sauce will thicken further as it cools. Therefore, it is best to serve immediately. Spoon desired amount of sauce over the grilled chicken breasts alongside a serving of steamed or sautéed veggies.

NOTE: You will likely have leftover sauce. If so, store in the refrigerator for a day or so. You could thin the sauce by adding bit of milk or cooked pasta water. I mixed my leftover sauce with a tablespoon of homemade light pesto sauce and tossed with cooked pasta for a delicious and quick lunch. My family absolutely loved the leftover as much as their dinner.

Oven-“Fried” Asian Orange Chicken

20140506_195250

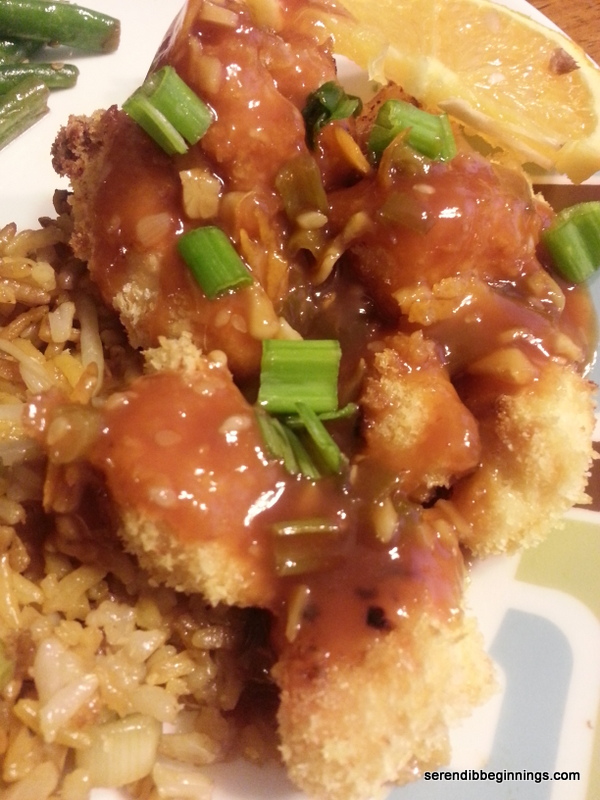
It started with sweet and sour chicken – “it” as in my kids’ introduction to Chinese food! Few years have passed since then and now their all-time favorite dish to order at a Chinese restaurant is orange chicken – crispy fried morsels of bite size chicken pieces that are lightly coated in an orange and soy infused glaze. If you are lucky to have had the opportunity to bite into one of these perfectly prepared chicken pieces, you can easily see why this dish is so popular with kids and adults alike.

20140506_181139

Having said that, not all orange chicken dishes are created equal. Actually not even close! I have had many an encounter with tiny crumbs of chicken clinging to their dear reputation in mounds of soggy breading/batter. There have been instances of good balance between meat and batter, but the meat could have seen better days. And there have been instances when both meat and batter were just right, except for the overload of barely wet dried orange rinds with overly sweet concoction of what is supposed to be a delicious orange sauce.

20140506_190948

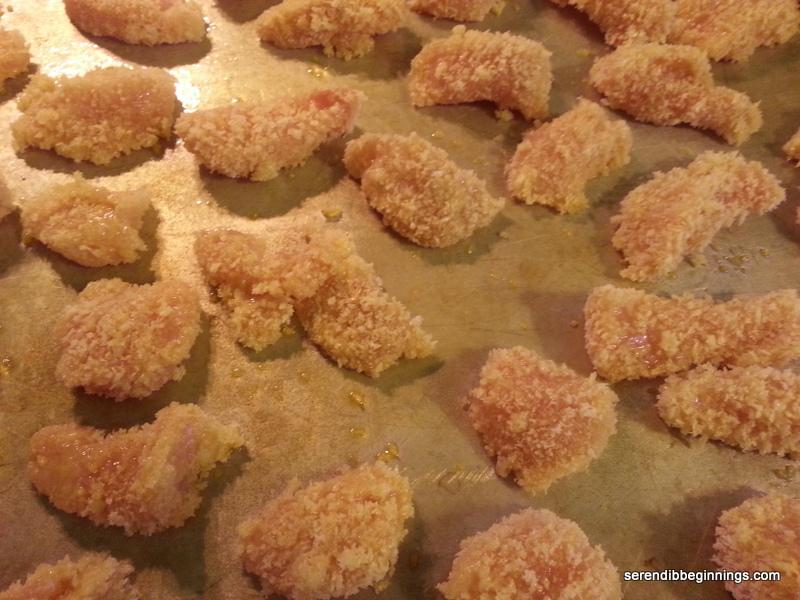
Hmph! So, having had one of those episodes recently, I figured why not make a version at home that will hopefully not only taste better, but better for you as well. Chicken breast, oven “fried” rather than deep fried, just a touch of brown sugar rather than corn syrup or other concoctions??!! Yep, you got it!

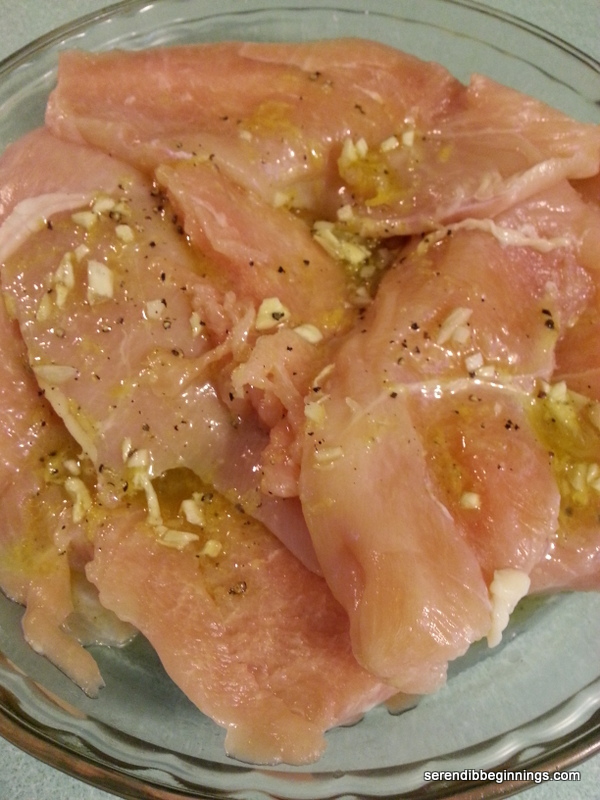
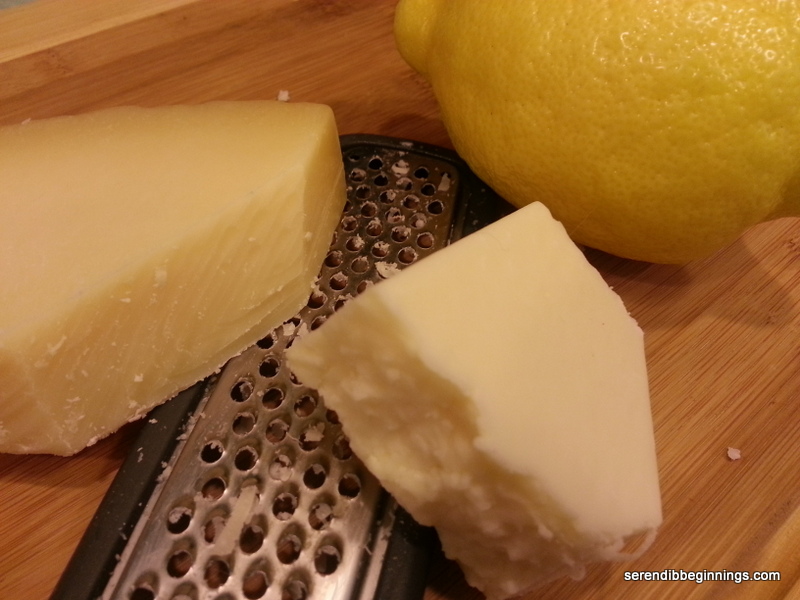
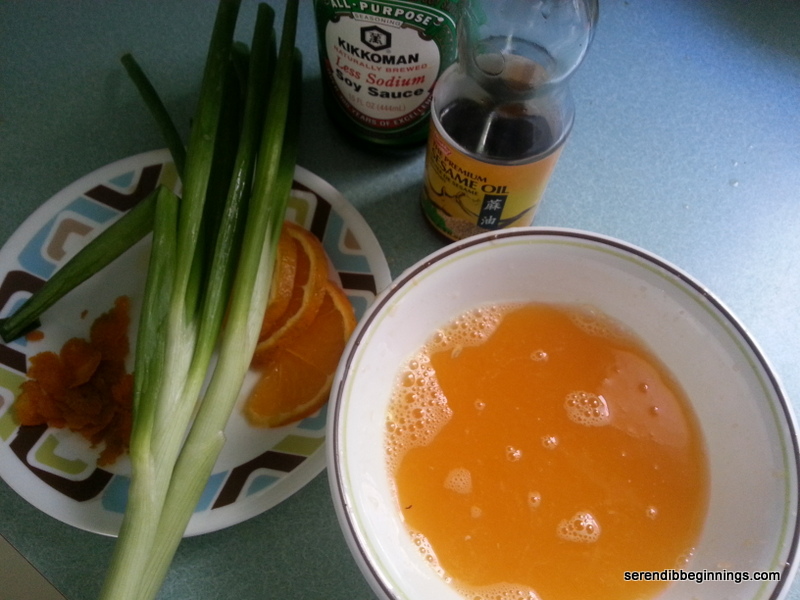
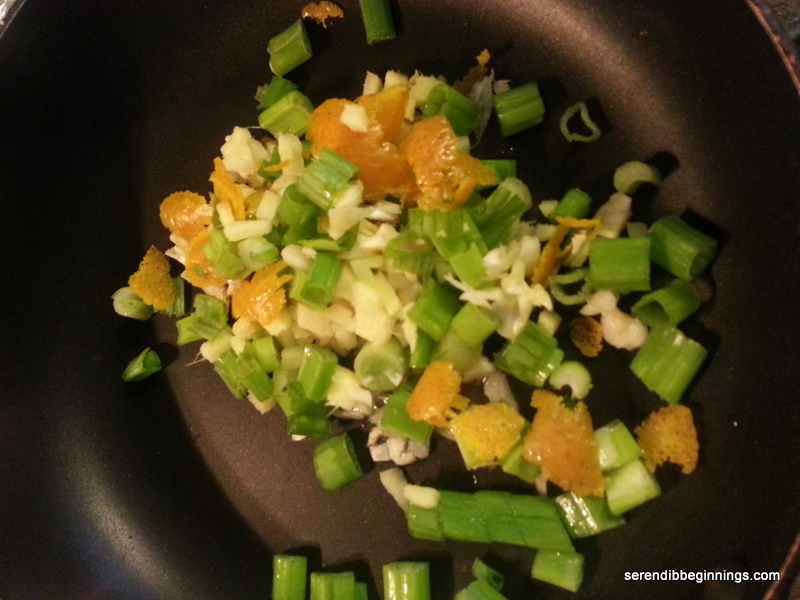
So, armed with all-white chicken meat, fresh oranges (for both the zest and the juice) and panko bread crumbs, I braved myself to trust my senses of taste and smell and recreate a dish that is enjoyed by my family, especially my kids.

20140506_191229  
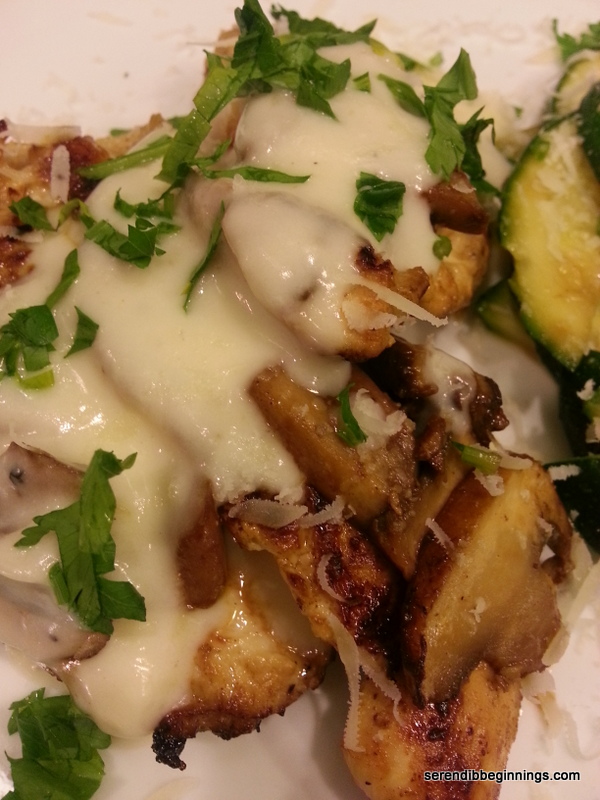
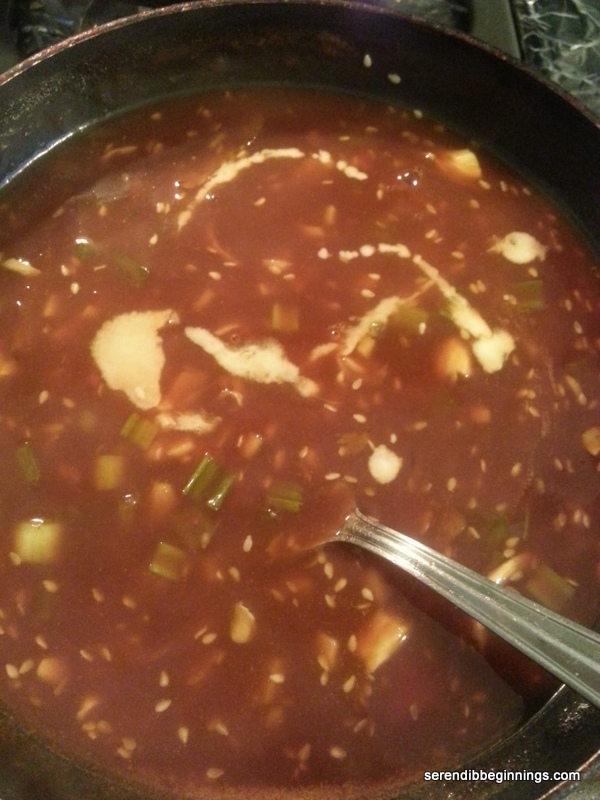
This dish surpassed all my expectations, especially when it came to the texture of the cooked chicken and the perfectly balanced sweet-sour-spicy nature of the sauce/glaze. Panko coating left the chicken pieces crispy and held out quite strong even with the glaze on top. I deep fried a small batch of chicken coated in egg and cornstarch but my kids preferred the oven “fried” version with panko because of its texture and taste! I couldn’t be happier! 🙂

20140506_192122  20140506_195250

So, here is a disclaimer…I have not traveled to the Hunan province of China to really know what this dish is supposed to taste like. So, this is purely based on my experience enjoying crispy battered chicken coated in a citrusy/orange soy glaze. 🙂 Enjoy at your own will!

Quick and Easy Naan Bread

20140501_105501

Everyone that has ever tried or know something about Indian food knows naan. It’s one of those quintessential item found on almost any Indian restaurant menu. Typically, naans are cooked in extremely high heat clay pot “ovens” giving them the characteristic texture and flavor. Having said that, can a version of the flatbread be made in a home kitchen for those of us that don’t have access to a tandoor oven? Of course, and I am going to share an easy recipe here.

20140501_065044  20140501_065428

You will find many naan recipes online – using different flours, with or without egg, with or without yogurt, ghee (clarified butter) etc. I have had my own versions – with/without egg, using all-purpose flour, combination of all-purpose and whole wheat, bread flour etc. I made this recipe for few guests who prefer the taste of all-purpose flour. Feel free to replace half the flour with whole wheat without sacrificing the texture or taste. Also, since this recipe does not use any eggs, it is good for people who don’t/can’t eat eggs.

20140501_070418

A whole cup of yogurt used in this recipe gives the naans a slight tang without being overpowering. Lastly, you can mix in 1 – 2 tablespoons of dried herbs (or about 1/4 cup of chopped fresh herbs) such as mint, cilantro or even green onions or finely minced garlic or curry powder to the dry mix before adding the liquids. I used a mix of dried herbs in mine and have prepared past batches with garlic (yum!).

20140501_103153

These naans can be prepared ahead of time, cooked and frozen. Just dab with a pat of butter and reheat just before serving. Enjoy warm naans with curries, or as a pizza crust, pita etc.

20140501_103940

Quick and Easy Naan Bread

  • Servings: 12 naans
  • Print

Ingredients
5 cups all-purpose flour (or half whole wheat and half all-purpose)
1 teaspoon baking powder
1/2 teaspoon baking soda
1 1/2 teaspoon salt (I used kosher)
2 tablespoons butter, melted (or ghee)
1/4 cup warm water
1/4 cup warm 1% milk
3/4 teaspoon active dry yeast
1 tablespoon honey
1 cup fat free plain yogurt
2 tablespoons crushed dried herbs (I used mint and fenugreek leaves)
Oil for coating the bowl to proof the dough
Additional ghee (clarified butter for cooking the naan), optional

Preparation
1. Mix all dry ingredients (flour through salt) in a large bowl or large, flat container.
2. Stir together warm water, milk, melted butter/ghee, yeast and honey.
3. Add yogurt to the dry ingredients and stir to combine.
4. Add liquid mixture and form into a dough. Turn onto a floured surface and knead for 5-10 minutes till an elastic dough forms. If the dough is too sticky, add a tablespoon or so of flour, but no more.
5. Coat a large bowl with oil and place dough in it. Let proof in a warm place (or in a turned off oven) for 1-2 hours till the dough doubles in size.
6. Break dough into 12 equal size portions and flatten each on a floured surface into an oblong shape (or a circle if you prefer) about 1/4 inch thick.
7. Heat a cast iron pan or a non-stick pan over medium high heat. Cook naans one at a time for 2-3 minutes on each side. Brush with melted butter or ghee and store covered in a kitchen towel.
8. Serve the naans with your favorite curry or make as a pizza or a pita wrap. Enjoy!

Pan-Cooked Southwest Quinoa Patty

20140430_200548

Quinoa has come a long way from its humble beginnings! What used to be a trendy food item of the ultra-health conscious folks, has now become a near staple in many a household – thanks to its nutty texture, delectable taste and most importantly its high nutritional value!

I use quinoa in salads, as a replacement for rice for serving with curries, as breakfast cereal and now as quinoa “burger” or patty.

20140430_200326

You can season these patties with your favorite combination of spices, herbs and other add-ins. I prefer the spicy notes imparted by southwest flavors of peppers, cilantro, citrus etc. and so decided to make these patties with those flavors! I used minced red peppers and zucchini to the patty mix. Needless to say, these ingredients add specks of bright colors and also boost the nutritional value. Addition of cheese not only gives a nice taste, but also helps in the holding power of the patty. As you may already know, cooked quinoa is rather fluffy, individual grains. Even with mashed black beans, you will still need the cheese in there for the best texture. I did make a few without cheese. They came out great, but I had to be extra careful not to break them while flipping or removing from pan. Lastly, even with cheese, be careful handling the patties. They are a bit fragile but so worth it when it comes to taste.

20140430_142723  20140430_143842 20140430_144759

Lastly, you can use any type of quinoa for these patties (red, regular white, a combination etc). Also, you could substitute cannellini beans (or may be even navy beans) for the black beans in this recipe. Since I used regular canned black beans (not unsalted or reduced sodium), I could get away with just 1/2 teaspoon of salt. If you are unsure of the spice amounts, taste the mixture BEFORE adding eggs so you could adjust the seasoning. I did and boy was the mix delicious even at that stage! Would make a yummy dip baked with some cheese on top. Next time!

20140430_144959

The formed patties can be frozen. Just pan “fry” them straight from the freeze under a low temp so the inside gets cooked through without burning the outside.

20140430_150113  20140430_194218

Pan-Cooked Southwest Quinoa Patties

Ingredients
2 to 2 1/4 cups cooked and cooled quinoa
2 eggs
1/4 cup finely minced red onions
1/2 cup finely chopped red pepper
1/4 cup diced zucchini
1 jalapeno pepper, minced finely (remove seeds if desired)
1 1/2 cups black beans, drained and rinsed well
3 cloves of garlic, grated fine
1/4 cup finely chopped cilantro
1 teaspoon ground cumin
1/2 teaspoon ground coriander
1/2 teaspoon salt
1/2 teaspoon paprika
1/4 cup panko bread crumbs
1/2 cup reduced fat sharp cheddar cheese, grated
2 – 3 tablespoons olive oil

Preparation
1. Mix quinoa and all other ingredients EXCEPT oil thoroughly.
2. Divide the mix into 10 equal portions and flatten on parchment lined baking sheet into patties about 4-5″ in diameter and about 1/2″ thick.
3. Place the patties in single layer on a platter and chill for at least 30 minutes. Alternatively, you can just chill the mix and form the patties immediately prior to cooking them. To do this, just take a ball of mix and flatten on palm of your hand and gently and carefully transfer it to the frying pan.
4. Heat a frying pan over medium heat and add a tablespoon of oil. Swirl to coat and place patties in the pan.
5. Cook for about 6-8 minutes. Carefully turn the patties on the other side and continue to cook for another 5-7 minutes. Extended cooking results in a golden and crispy exterior while ensuring the inside is cooked thoroughly.
6. Hold in a warm oven or toaster oven till ready to serve.

TIPS:
1. If serving the patties assembled as burgers, proceeds as you would with any meat patty.
2. If serving at a later time, freeze uncooked patties after their initial “chilling” period in the refrigerator (for easier handling). Wrap individual patties in clear plastic wrap and store in a zip top bag or other airtight container. Pan “fry” frozen patties under low heat to help thaw the inside and increase heat to finish cooking and ensure proper internal temperature.