Croquembouche

20151205_1704561

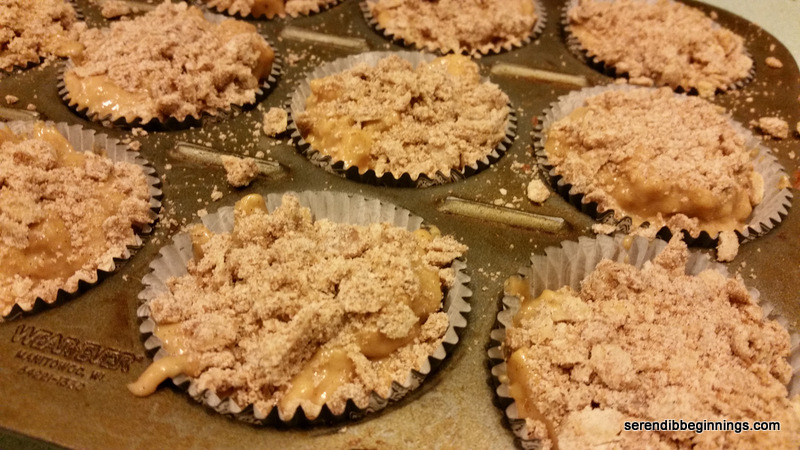
Happy New Year everyone! Wow, we are already done with the much awaited holiday season and about a week into 2016! Seriously, where does the time fly! So, this is to prove the that I did actually work on this recipe at the beginning of the year – to be more precise, a few days into January 2016! Wow, how unexpected life could be!

20151206_1025431

I hope this year is off to a great start for all of you! Did anyone make any lofty resolutions? I didn’t! I am finally in terms with the fact that, you either want to do something or not – regardless of whether it is your latest and greatest resolution or not! Honestly, the timing couldn’t be better! Why would you want to try this absolutely show-stopping creation right after all the indulgence in fine things! Less than 2 weeks before the waists start expanding seem like THE perfect time to share this recipe with you all! PLEASE…I really mean, PLEASE, don’t let the pictures fool you into thinking this recipe is super hard! It really is not! Believe me!

This croquembouche recipe (inspired by a recipe on Food Network) is one such thing! It’s true that you can’t stop with one, but if you want to have your cake and eat it too, then, yes, you can pull together all your willpower and stop with one! It’s a satisfying sweet treat that satisfies your sweet tooth without adding hundreds and hundreds of calories!

OK, before you to the recipe, let me warn you not to get spooked by the ingredient list or the long directions. It’s not all the bad. Breeze through the recipe first to get a feel for how very easy the recipe is so you know what to expect. It’s really a pretty fool-proof recipe with an amazing end result. Also, if you are not keen on making the caramel, you can easily skip it! The taste will still be amazing without the caramel coating.

DARN, how I wish I had taken a picture of the little baby after the first bite, revealing the delicious, creamy filling inside! (Note to self: It’s likely you will make this again this holiday season, so can you please post a picture showing the yumming filling(s) inside?)

Croquembouche

  • Servings: 12?
  • Print

Ingredients
¼ oz packet unflavored gelatin
4 cups milk
1 teaspoon vanilla essence
12 large egg yolks
1 cup sugar
6 tablespoons cornstarch
¼ teaspoon salt
5 tablespoons unsalted butter
½ cup semi sweet or dark chocolate chips
1 tablespoon instant coffee
1½ cup heavy cream
10 tablespoons unsalted butter, cut into pieces
1 ½ teaspoon sugar
½ teaspoon salt
1 ½ cups all purpose flour
6 large eggs
3 cups sugar
3 tablespoons light corn syrup

Preparation

1. Begin by preparing the cream filling. Sprinkle the gelatin over ¼ cup of cold water in a small bowl and let it soften (bloom).
2. Measure out the milk in a heavy bottom pan. Add the vanilla and bring a simmer over medium high heat. Once the milk starts to simmer, remove from heat and set aside.
3. Whisk the egg yolks, 1 cup sugar, cornstarch and ¼ teaspoon salt in a medium bowl until smooth. Gradually whisk one-third of the milk into the egg mixture to temper the yolks. Add rest of the milk and whisk together. Return the pan over medium heat and cook the mixture while constantly whisking the mixture.
4. Cook the custard till the mixture boils and thickens. This will take about 5 to 6 minutes. Continue cooking till the mixture turns into custard consistency. Remove the pan from the heat and stir in the butter, a tablespoon at a time. Add in the softened gelatin.
5. Microwave the chocolate chips for 30 seconds, stir and heat again in 30 second increment till the chocolate is fully melted and smooth. Dissolve the instant coffee in 2 tablespoons of hot water. Stir in the coffee and chocolate into ½ the custard filling. Keep the other half plain. Cover both the bowls with plastic wrap with the wrap touching the surface to prevent any film from forming on top and chill the custard for 2 hours.
6. When ready to fill the puffs, whip the heavy cream into soft peaks. Fold half of it into the vanilla filling and the other half into the chocolate filling.
7. Transfer each filling to a large pastry bag with a 1/4-inch tip and set aside.
8. Prepare the pastry puffs while the custard is cooling. Preheat the oven to 450F.
9. Bring 1 ½ cups of water, remaining butter, sugar and salt to a simmer in medium saucepan. When the butter melts completely, remove the pan from the heat and stir in the flour with a wooden spoon to make a paste. Return the pan to heat and cook stirring constantly till the mixture pulls from the side and turns shiny. Remove from heat and let cool slightly.
10. Transfer the paste to a stand mixer with the paddle attachment and start mixing on medium low speed for about a minute. Beat in the eggs, one at a time till fully incorporated.
11. Transfer the dough to a large pastry bag with a 1/2-inch tip. Line 2 baking sheets with parchment paper and pipe 1 1/2-inch balls of dough onto the paper. You should get about 40 plus dollops.
12. Smooth out any pointy tips of the piped dollops with a wet finger. Bake for about 15-20 minutes, till the dough is puffed. Lower the temperature to 350f and bake until the puffs are golden and feel light. Turn off the oven and keep the puffs inside for another 10 minutes or so. Remove the puffs to a cooling rack and let cool completely.
13. Assemble the croquembouche as close to serving time as possible. Fill half the puffs with chocolate cream and the other half with vanilla by piping the cream from the bottom. You can lightly push in the piping from the bottom and squeeze the filling till the puff feels pretty full. Take care to avoid overfilling so the custard doesn’t explode out of the puffs.
14. Let the filled puffs chill in the refrigerator for 30 minutes or so.
15. To assemble the puffs as a tower, you need to make the caramel. Mix the 3 cups of sugar, corn syrup and 1 cup water in a saucepan, cover and bring to a boil over high heat. Boil the syrup till it turns deep amber. Take care not to burn the caramel. Another way to do this is to use a candy thermometer and boil the syrup till it reaches hard candy stage.
16. Immediately dip the bottom of the saucepan in a large bowl of ice water for a few seconds to stop the cooking. Let cool for a couple of minutes. The syrup should still be quite liquidy.
17. Partially dip each filled puff into the caramel and let the excess drip off. Arrange the puffs around the circle. If the caramel hardens, microwave until soft, 45 seconds.
18. Fill the base circle with more puffs for stability, then continue building a conical tower of smaller circles.
19. Dip the tip of a fork into the caramel and wave it around the tower, letting the syrup fall in strands around it. If the syrup is on the liquidy side, the syrup might not form the web look you are after. Let the syrup cool slightly and drizzle it slowly so it will cling better to the puffs and create the web look.

20151017_204609

First and foremost, I must apologize to anyone that visits this blog for my extreme tardiness in posting new recipes lately. I won’t lie – I truly, honestly, sincerely felt so guilty not doing it, but something or the other kept me away. So, here I am, trying to keep up my promise to post the recipe for the simply wonderful and autumny apple muffins that I had posted a picture of earlier this week!

20151017_200721  20151017_200938

Something about fall and the crisp air! As the temperature drops, apples take on a whole new dimension! They somehow make fall the best season and they also try to comfort you into believing winter wont be that terrible after all. I have tried to play around with several recipes, but wanted to try a recipe that not only looked great, but also tasted wonderful! That’s when I stumbled upon this recipe on Sally’s Baking Addiction. She has great recipes on her site – so if you are looking for some comfort recipes, you should visit her site. 🙂

20151017_201535  20151017_204212

So, back to this recipe…true to what she mentions in her recipe, these muffins do rise well, and taste so cake-like and full of apple goodness. I did use some apple cider in the wet ingredients per one of the reader comments and skipped the glaze. Honestly, I don’t think the glaze is really needed except for that picture perfect oozy look! Yum!

20151020_061235

Whip up these muffins this weekend and watch them disappear!

20151020_061331

Autumn Apple Muffins

  • Servings: 12
  • Print

Ingredients
Muffin Batter
1/2 cup unsalted butter, softened to room temperature
1/3 cup dark brown sugar, packed
2 tablespoons granulated sugar
2 large eggs at room temperature
1/2 cup plain, fat free Greek (or regular) yogurt
1 teaspoon ground cinnamon (better the quality, better the cinnamony goodness)
2 teaspoons vanilla extract
1 cup white, whole wheat flour
3/4 cup all-purpose flour
1 teaspoon baking soda
1 teaspoon baking powder
1/2 teaspoon salt
1/4 cup apple cider
2 small Gala apples (or any firm kind), peeled and chopped into 1/4 inch cubes

Crumb Topping
1/4 cup packed dark brown sugar
1/4 cup rolled oats
1 Tablespoon granulated sugar
1 teaspoon ground cinnamon
1/4 cup unsalted butter, melted
1/4 cup all-purpose flour

Preparation
1. Preheat oven to 425F. Line a muffin pan with 12 liners and set aside.
2. Prepare the crumb topping: Combine all ingredients and gently toss together till they are crumbly. Set aside (wow, that was easy!)
3. Using a handheld mixer, cream butter. Add the sugars and beat for another 2-3 minutes.
4. Beat in the eggs, yogurt, ground cinnamon and vanilla extract. Scrape down the sides and bottom of the bowl and set the bowl aside.
5. In a separate bowl, toss together the flours, baking soda, baking powder and salt. Pour the wet ingredients into the dry ingredients and slowly mix with a rubber spatula or whisk. Add the milk, gently stirring to mix in. Small lumps are OK. Fold in the apples.
6. Spoon the muffin batter evenly between the 12 muffin cups. The tins will be quite full, which is great for making tall-domed muffins!
7. Distribute the crumb topping evenly over all the batter, pressing lightly with your hands so the crumbs will stick to the baked muffins.
8. Bake the muffins for 5 minutes at 425°F, then reduce heat to 350F and continue baking for another 20-25 minutes, till the top is golden and muffin tests done.
9. Let the baked muffins stay in the pan for about 5 minutes before removing them to a cooling rack to cool completely. Cooled muffins can be stored at room temperature for about 5 days. These freeze well as well.

Enjoy!

Perfect blueberry muffins

20150517_080442

Berries are a perfect way to start off a sunny morning -even a weekday one! Blueberries, strawberries, raspberries, blackberries….I just love them all!

20150515_064109

I hope you have had the opportunity to try my raspberry scones! They are divine. Although I debated another scone recipe this morning, I went for buttery streusel topped blueberry muffin instead. This recipe is adapted from the original at the Café Sucre Farine. The recipe called for the blissful combination of lemon and blueberries! Heavenly!

20150515_065111

This recipe is so easy – I mean it. Even though the original recipe calls for creaming the butter and sugar, I decided to skip that step, mainly because I have made several batches of muffins before and I felt confident the muffins will turn out just fine without this additional step.

20150517_080431

So, grab yourself the basic ingredients I am sure you already have in your pantry and whip up this recipe in time for a great grab n’ go breakfast.

Perfect Blueberry Muffins

  • Servings: 12
  • Print

Ingredients

Crumb topping

3 tablespoons butter, melted
¼ cup demerara sugar
½ cup all-purpose flour
½ cup oatmeal
¼ cup finely chopped almonds

Muffins
1 cup whole wheat flour
1 cup all-purpose flour
1 ½ teaspoon baking powder
½ teaspoon baking soda
½ teaspoon salt
3 tablespoons butter, melted
¼ cup oil
¾ cup sugar
2 large eggs
¼ cup light sour cream
¼ cup milk mixed with 1 tablespoon lemon juice (set aside for 5 min)
Grated lemon zest from 1 lemon
1 teaspoon vanilla
1 ½ cups frozen wild blueberries
Glaze (Optional)
3 tablespoons lemon juice
1 cup powdered sugar

Preparation
1. Heat the oven to 375F. Spray a 12-cup muffin pan with nonstick cooking spray and set aside. You can also use muffin liners.
2. Prepare the streusel topping by combining all ingredients till crumbly. Set aside.
3. In a large bowl, sift together the flours, salt, baking powder, baking soda and sugar.
4. In a smaller bowl, lightly whisk the eggs. Whisk in the sour cream, curdled milk, oil, melted butter, lemon zest and vanilla.
5. Gently stir in the wet ingredients into the dry mixture just until moistened.
6. Fold in the frozen berries taking care to avoid breaking too many berries. I say this because it is inevitable your batter is going have bluish tint running through it no matter how careful you are! 
7. Spoon the batter into the muffin pan. Don’t level the batter. Top with a generous amount of the streusel topping.
8. Bake the muffins for 5 minutes at 375F. Decrease heat to 350F and continue baking for another 20-25 minutes till the tops are golden and the muffin is cooked through.
9. Remove from the oven, let cool in the pan for 5 minutes. Carefully remove the muffins from the tin and let cool on a wire rack till completely cool.
10. While the muffins are cooling, prepare the glaze (optional) by vigorously stirring together the lemon juice and powdered sugar to a “drippable” consistency (say, like honey).
11. Lightly drizzle over the muffins. Let set.
12. Store muffins tightly covered for up to 5 days.

Super Moist Strawberry Bread

20150124_102748

Strawberries?? In January??? Not great, I know! But, they made it into my kitchen and now I needed to find a way to use them up. My kids, who would normally devour them at the first sight, didn’t seem to care too much for them! Perhaps with good reasons!

20150124_103124  20150124_112734

I could have frozen them for future smoothies, but I had an urge for baking last weekend! My quest for a good recipe landed me at glazed strawberry bread. Sally’s Baking Addiction has bunch of great recipes and this one in particular hit the chord for using up my berries.

20150124_124248

I give her full credit for the recipe, although I did alter it a bit with substituting half the flour with whole wheat and adding in lemon zest in lieu of cinnamon. Also, I don’t like to overdo with the glaze, so my glaze is just a light drizzle.

20150124_124333

Like it is mentioned in the original recipe, this is a very moist strawberry cake bread. I will probably reduce the sugar a bit next time around – perhaps by a 1/4 cup. It is a great recipe to keep for a few days – that is if you can resist the temptation. Although I didn’t particularly detect the flavor getting more intense after a day (could be because my berries were not at their prime), the taste was still great after 3 days. Yes, we managed to keep ourselves in check!

20150124_132404

Do give this a try. It will be worth it!

  • Servings: ”12-14
  • Print

Ingredients:
1 cup all purpose flour
1 cup whole wheat flour
1 teaspoon baking soda
1/2 teaspoon salt
1 large egg, preferably at room temperature
3/4 cup granulated sugar
1/4 cup dark brown sugar
1 cup buttermilk (I made mine using vinegar and milk)
1/3 cup canola oil
2 teaspoons vanilla extract
1 teaspoon grated lemon zest
1 and 1/2 cups fresh strawberries, rinsed and diced into 1/4 inch cubes
1 tablespoon flour

Citrus Glaze (optional)
1/2 cup confectioner’s sugar
1 tablespoon heavy cream
1-2 tablespoons lemon juice
1/2 teaspoon grated lemon zest

Preparation:
1. Preheat oven to 350F. Spray a 9″ x 5″ loaf pan with a cooking spray and keep aside.
2. Combine first 4 ingredients in a large bowl and set aside while you mix the rest of the ingredients.
3. Whisk together the sugars and egg until well combined. Add buttermilk, oil, vanilla and lemon zest.
4. Add the wet ingredients to the dry ingredients and gently fold to combine. Take care not to over mix.
5. Toss the chopped strawberries in a tablespoon of flour. Slowly fold in the berries into the batter, leaving a few to top the batter, if desired (as you can see, I did not do that in my attempt).
6. Transfer the batter to the prepared loaf pan and bake on the middle rack for 50-60 minutes. If you see that the top is getting brown too fast, loosely cover the pan with a piece of foil half way through and continue baking.
7. Test for doneness using a toothpick. Remove pan from oven, let cool for about 10 minutes. Invert onto a wire rack and let cool completely.
8. While the bread is cooling, prepare your glaze. Combine all the ingredients for the glaze till they are smooth and of desired consistency. Once the bread is completely cool, drizzle the glaze over the top.

Berry-licious Scones

20140510_084238

Happy Mother’s day ladies! I hope all you moms out there have a wonderful day tomorrow! I know, I know, we are supposed to stay in bed till breakfast is ready and not worry about anyone spilling hot coffee on themselves or burning their fingers in the stove or oven etc. And your kids ordered you to just take it easy and relax the whole day! THE WHOLE DAY! Yikes!

20140510_072324

Am I the only weird one out there that finds it near impossible to just sit still and watch all the rumblings in the kitchen. You know, I am OK with the family CLEANING, DOING LAUNDRY etc., but when it comes to cooking or any kitchen related task, I think I develop some sort of an anxiety. Hmmm….maybe not so much anxiety, but perhaps a longing to be in there, in my kitchen, where I am always ME!

20140510_072729     20140510_073011

Yes, for the love of my kids, I will let them do what they please on Sunday! But I couldn’t help but share with you a pre-Mother’s day recipe that is likely to be a winner! I came across this recipe at http://www.averiecooks.com. I modified the recipe only slightly by replacing half the flour with white whole wheat. I am starting to fall in love with KAF white whole wheat!

20140510_080415  20140510_082235  20140510_084547

Scones are an indulgence of mine! I especially like the cinnamon-pecan and chocolate chunk ones! Yum. But in honor of Mother’s Day, I wanted to make a batch with berries! Personally I think there is something about Mother’s Day and BERRIES! These berry-licious scones are light, almost muffiny and delicious! I hope you get to make them and enjoy! WARNING: The hardest part of this recipe is waiting for the scones to cool so you could drizzle the lemon glaze and devour it in one inhale! 🙂

20140510_085801  20140510_084238

Berry-licious Scones

  • Servings: 8
  • Print

Ingredients
1 cup all purpose flour
1 cup white whole wheat flour
1/2 cup granulated sugar
1 tablespoon baking powder
1/4 teaspoon salt
1/2 cup unsalted butter
1 large egg
1/2 cup light sour cream
1 tablespoon grated lemon zest
1/2 teaspoon vanilla essence
1 heaping cup mixed berries of your choice (fresh or frozen)
2 tablespoons of coarse or turbinado sugar for sprinkling on top

Lemon Glaze
1/2 cup confectioners’ sugar
1 tablespoon (slightly less) lemon juice

Preparation
1. Preheat oven to 400F. Line a baking sheet with parchment paper and set aside.
2. Mix the flours, sugar, baking powder and salt in a large bowl.
3. Using two forks or pastry cutter, incorporate the cold butter into the dry mix (just like how you prepare a pie crust). Once the butter is sufficiently incorporated, the flour mixture will resemble very coarse crumbs. (This is one of the least favorite tasks in the kitchen for me – for no good reason!)
4. Lightly beat the egg in a small bowl. Stir in the sour cream, vanilla and lemon zest.
5. Fun begins. Gently stir in the wet ingredients into the dry mix just until barely incorporated. Like with muffins, pancake batter etc., over mixing will result in tougher end product. The “dough” will be rather sticky and wet, but avoid the temptation to grab more flour for a CPR!
6. Fold in the berries. If using frozen berries, do not thaw them prior to using.
7. Turn the dough onto a floured work surface (use about couple of tablespoons of flour for the surface) and gently knead to bring the dough together. Just a few movements. If the dough is too sticky to form into a general circle or square, add another tablespoon of flour, but no more.
8. Pat the dough into a circle about ….diameter and ….thick. Alternatively you can form the dough into a square …x….. For circle, cut it into 8 wedges. For square, cut initially into 4 squares and each square diagonally into 2 triangles. You didn’t know you were going to use geometry here, did you? 🙂
9. Using a spatula, transfer the scones to the parchment lined baking sheet. Sprinkle with turbinado or coarse sugar if desired. Bake the scones for about 15-18 minutes till the top is lightly golden.
10. Remove from oven, let cool on the baking sheet for about 5 minutes before moving them to a wire rack to cool completely.
11. GLAZE: Mix the confectioner’s sugar and lemon juice. Drizzle about a teaspoon on top of each scone. Let the glaze set prior to serving.

ENJOY!

Layered Cherry Coffee Cake

20140424_191000

Last night was one of those busy evenings when I was trying to make multiple treats almost simultaneously – occasionally confusing myself as to which sifted flour mixture went with which recipe! 🙂 All fun though! I ended up baking a batch of funfetti sugar cookies, low sugar almond-orange biscotti and this amazing layered cherry coffee cake.

20140424_185010  20140424_185716

You see, I have had this canned lite cherry pie filling in the pantry for couple of months waiting for me to do something with it. I would think of many ideas, but never really took the next step to actually making them. So, in an effort to bake some sort of a little breakfast treat, I looked for ideas when I came across this amazing recipe (courtesy Rose Garden Inn Bed and Breakfast). I made a few minor changes such as using lite cherry pie filling, light sour cream and half white whole wheat flour. Also, I toned down the topping by using half the sugar and just about 1/3 cup of flour.

20140424_191110  20140424_191238

I have to make a special note about this recipe/batter. My batter was very thick, so after starting to spread half the batter in the 13″X9″ pan, I started to wonder if I should scoop it out and bake as layered muffins. It just didn’t seem like enough batter. Also, after layering the cherry filling, the top batter layer was even more challenging. As you see in my pictures, there are swirls of red from trying to smooth out the batter to cover the entire top surface of the cake. I figured if the taste is good, who cares about the looks. However, to my pure joy and satisfaction, the cake baked perfectly.

20140424_191809  20140424_201546

I am planning to make this again over summer with fresh summer berries lightly coated in sugar instead of pie filling and also baking them in individual muffins cups/liners. Who knows, maybe I will even replacing all of the flour with white/regular whole wheat. Can’t wait! In the meantime though, I hope you guys give this a try at your earliest! It will make even an April showers day seem enjoyable!

20140425_065911  20140425_070010

Layered Cherry Coffee Cake

  • Servings: 13x9 cake
  • Print

Cake Ingredients1/2 cup (1 stick) unsalted butter, softened
1 cup granulated sugar
2 eggs
1 cup light sour cream
1/2 teaspoon almond extract
1 teaspoon vanilla extract
1 cup all-purpose flour
1 cup white whole wheat flour
1/2 teaspoon salt
1 1/2 teaspoons baking powder
1/2 teaspoon baking soda
1 can lite (low sugar) cherry pie filling

Cake Topping
1/4 cup granulated sugar
1/3 cup all-purpose flour
1/2 cup chopped pecans
2 tablespoons butter

Preparation
1. Preheat oven to 350F. Lightly grease and flour a 13″ x 9″ baking pan and set aside.
2. Sift flours with salt, baking powder and baking soda.
3. Cream butter. Add sugar and beat till creamy and light, adding eggs one at a time.
4. Add sour cream and extracts and mix well.
5. Slowly add dry ingredients, mixing well to incorporate. You can use a spatula or your electric beater on low setting.
6. Spread half the batter in the prepared pan, smoothing with a butter knife or spatula to cover the bottom. This will be a thin layer.
7. Spread the pie filling over the batter. Follow with the remaining batter, again smoothing to cover the pie filling.
8. Combine all topping ingredients to resemble bread crumbs and spread over the top of the cake.
9. Bake for 50-55 minutes till cake is done.