Spicy Chili Chicken

Honestly, no matter how hard I try to eat healthy food, there comes a time (more often than I would like) when I just crave the comfort of something spicy, yummy, finger-licking, lip smacking good, yet come with a not so healthy label. One of those dishes is chili chicken.

cc4

I am sure there are as many variations of the dish as there are cooks and kitchens. So, this recipe is of course an original concocted in my kitchen, and enjoyed my many.

(Disclaimer: I did not intend to really post this recipe, so I did not take too many pictures! Talking about pictures, I need to “grow” some patience to fiddle with the settings on my Galaxy or use an actual camera! One of these days! Anyway, the taste and flavor profile of the dish convinced me to take couple of quick pictures to actually post this recipe!)

cc1

This dish, unlike some other recipes you might have seen online is very straightforward. Ingredients are just chicken, few basic spices, lots of cayenne powder, a splash of apple cider vinegar and a coating of Thai sweet soy sauce. That’s it guys! So, you ask me what makes this slip from the relatively healthy domain into the not so healthy one…well, it’s kind of the liberal use of oil and cornstarch. You could definitely cut down on the oil and cornstarch or completely eliminate the latter, but the texture will be a bit different. So, I suggest you try the recipe as is the first time and tweak for the subsequent tries – because I know you will want to make it again!

cc2

Spicy Chili Chicken

  • Servings: 4-6
  • Print

Ingredients:
8 chicken thighs, bone in (you can use boneless as well)
1 teaspoon ground turmeric
1 tablespoon curry powder
2 tablespoons ground cayenne (or to taste)
1 teaspoon salt (adjust to taste)
1 tablespoon apple cider vinegar
6 cloves of garlic, minced or grated finely
4-6 Thai chili peppers or other spicy pepper like jalapeno, sliced lengthwise
1 sprig of curry leaves (if available)
3 tablespoons canola or other light flavored oil
3 tablespoons cornstarch
1 – 2 tablespoons sweet Thai soy sauce

Preparation:
1. Remove skin of the chicken, and cut into 4 or 5 pieces. Place in a large bowl.
2. Add all spices, through garlic to the chicken and mix thoroughly to coat. Cover and set aside for 30 minutes.
3. Heat the oil in a large non-stick pan. To this, add the chili and curry leaves, if using. Toss in oil for few seconds.
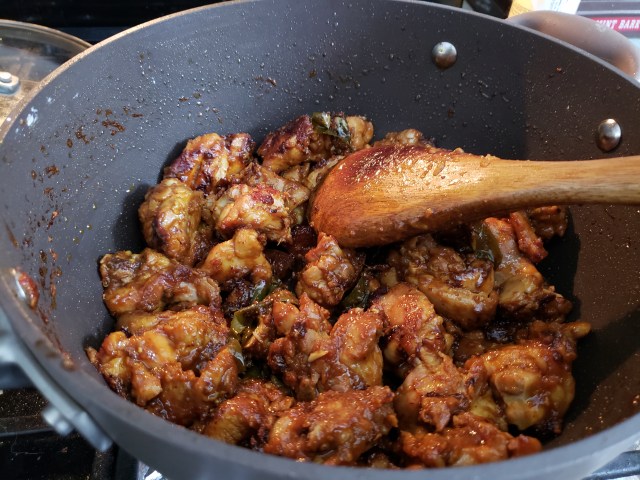
4. Add the chicken, mix well, cover and cook under high heat for 15 minutes, turning the chicken pieces occasionally.
5. Sprinkle the cornstarch. Mix well to coat.
6. Cover the pan and continue to cook for another 15 minutes, turning occasionally. By now, the chicken pieces will be cooked all the way through and there will not be any liquid remaining. If there is some liquid remaining, remove lid, reduce heat and continue to cook till the all liquid evaporates.
7. Add the soy sauce and toss well. Cook for another 2 minutes.

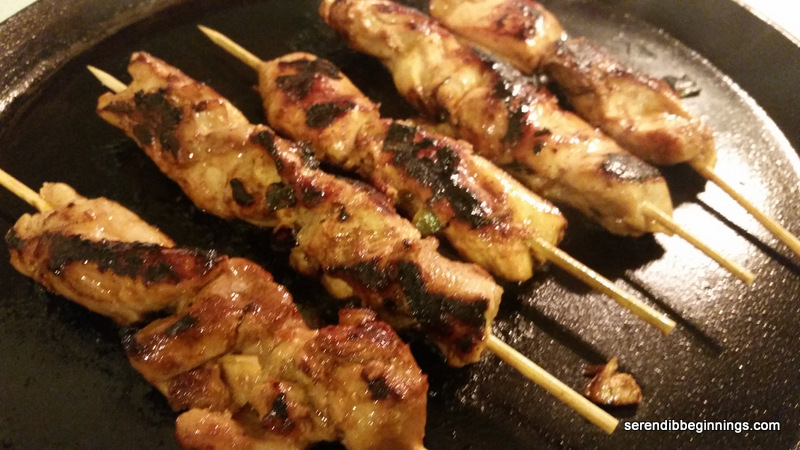
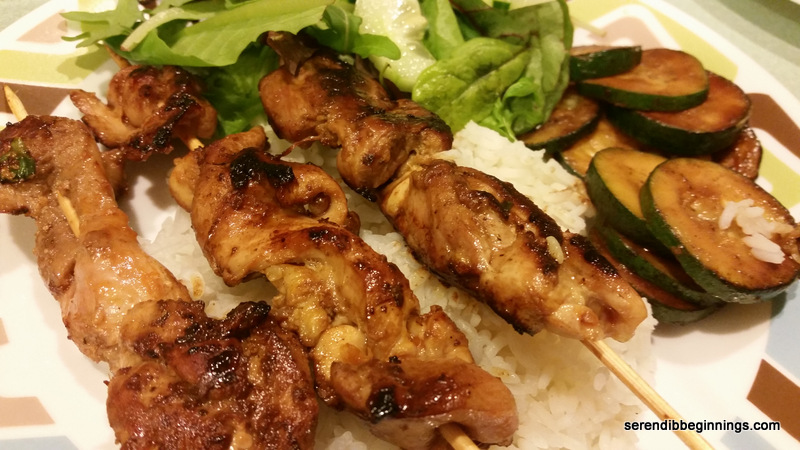
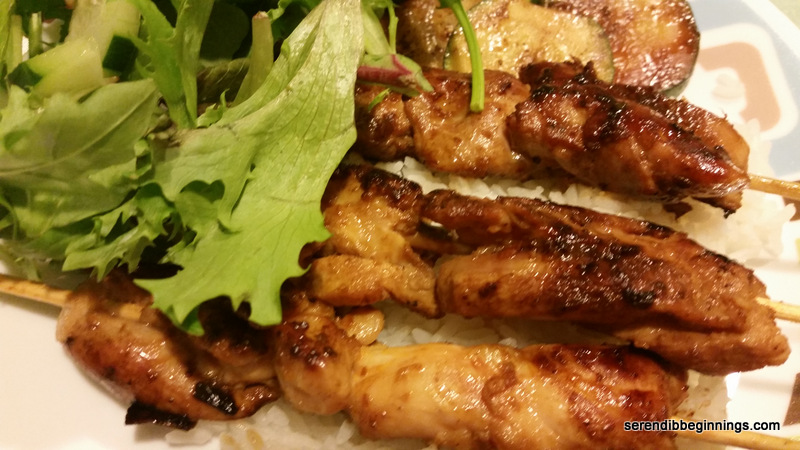
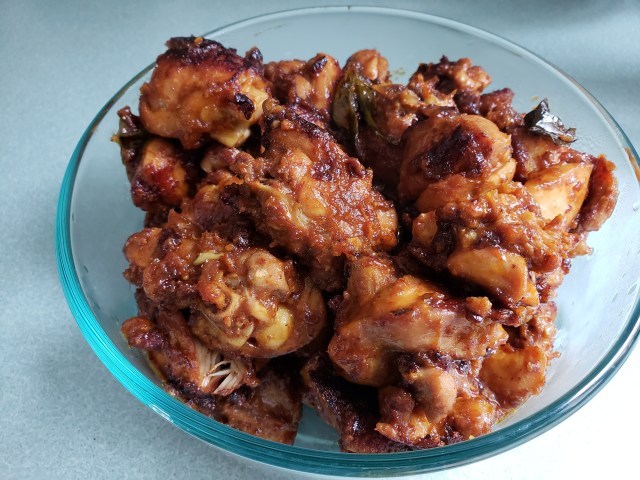
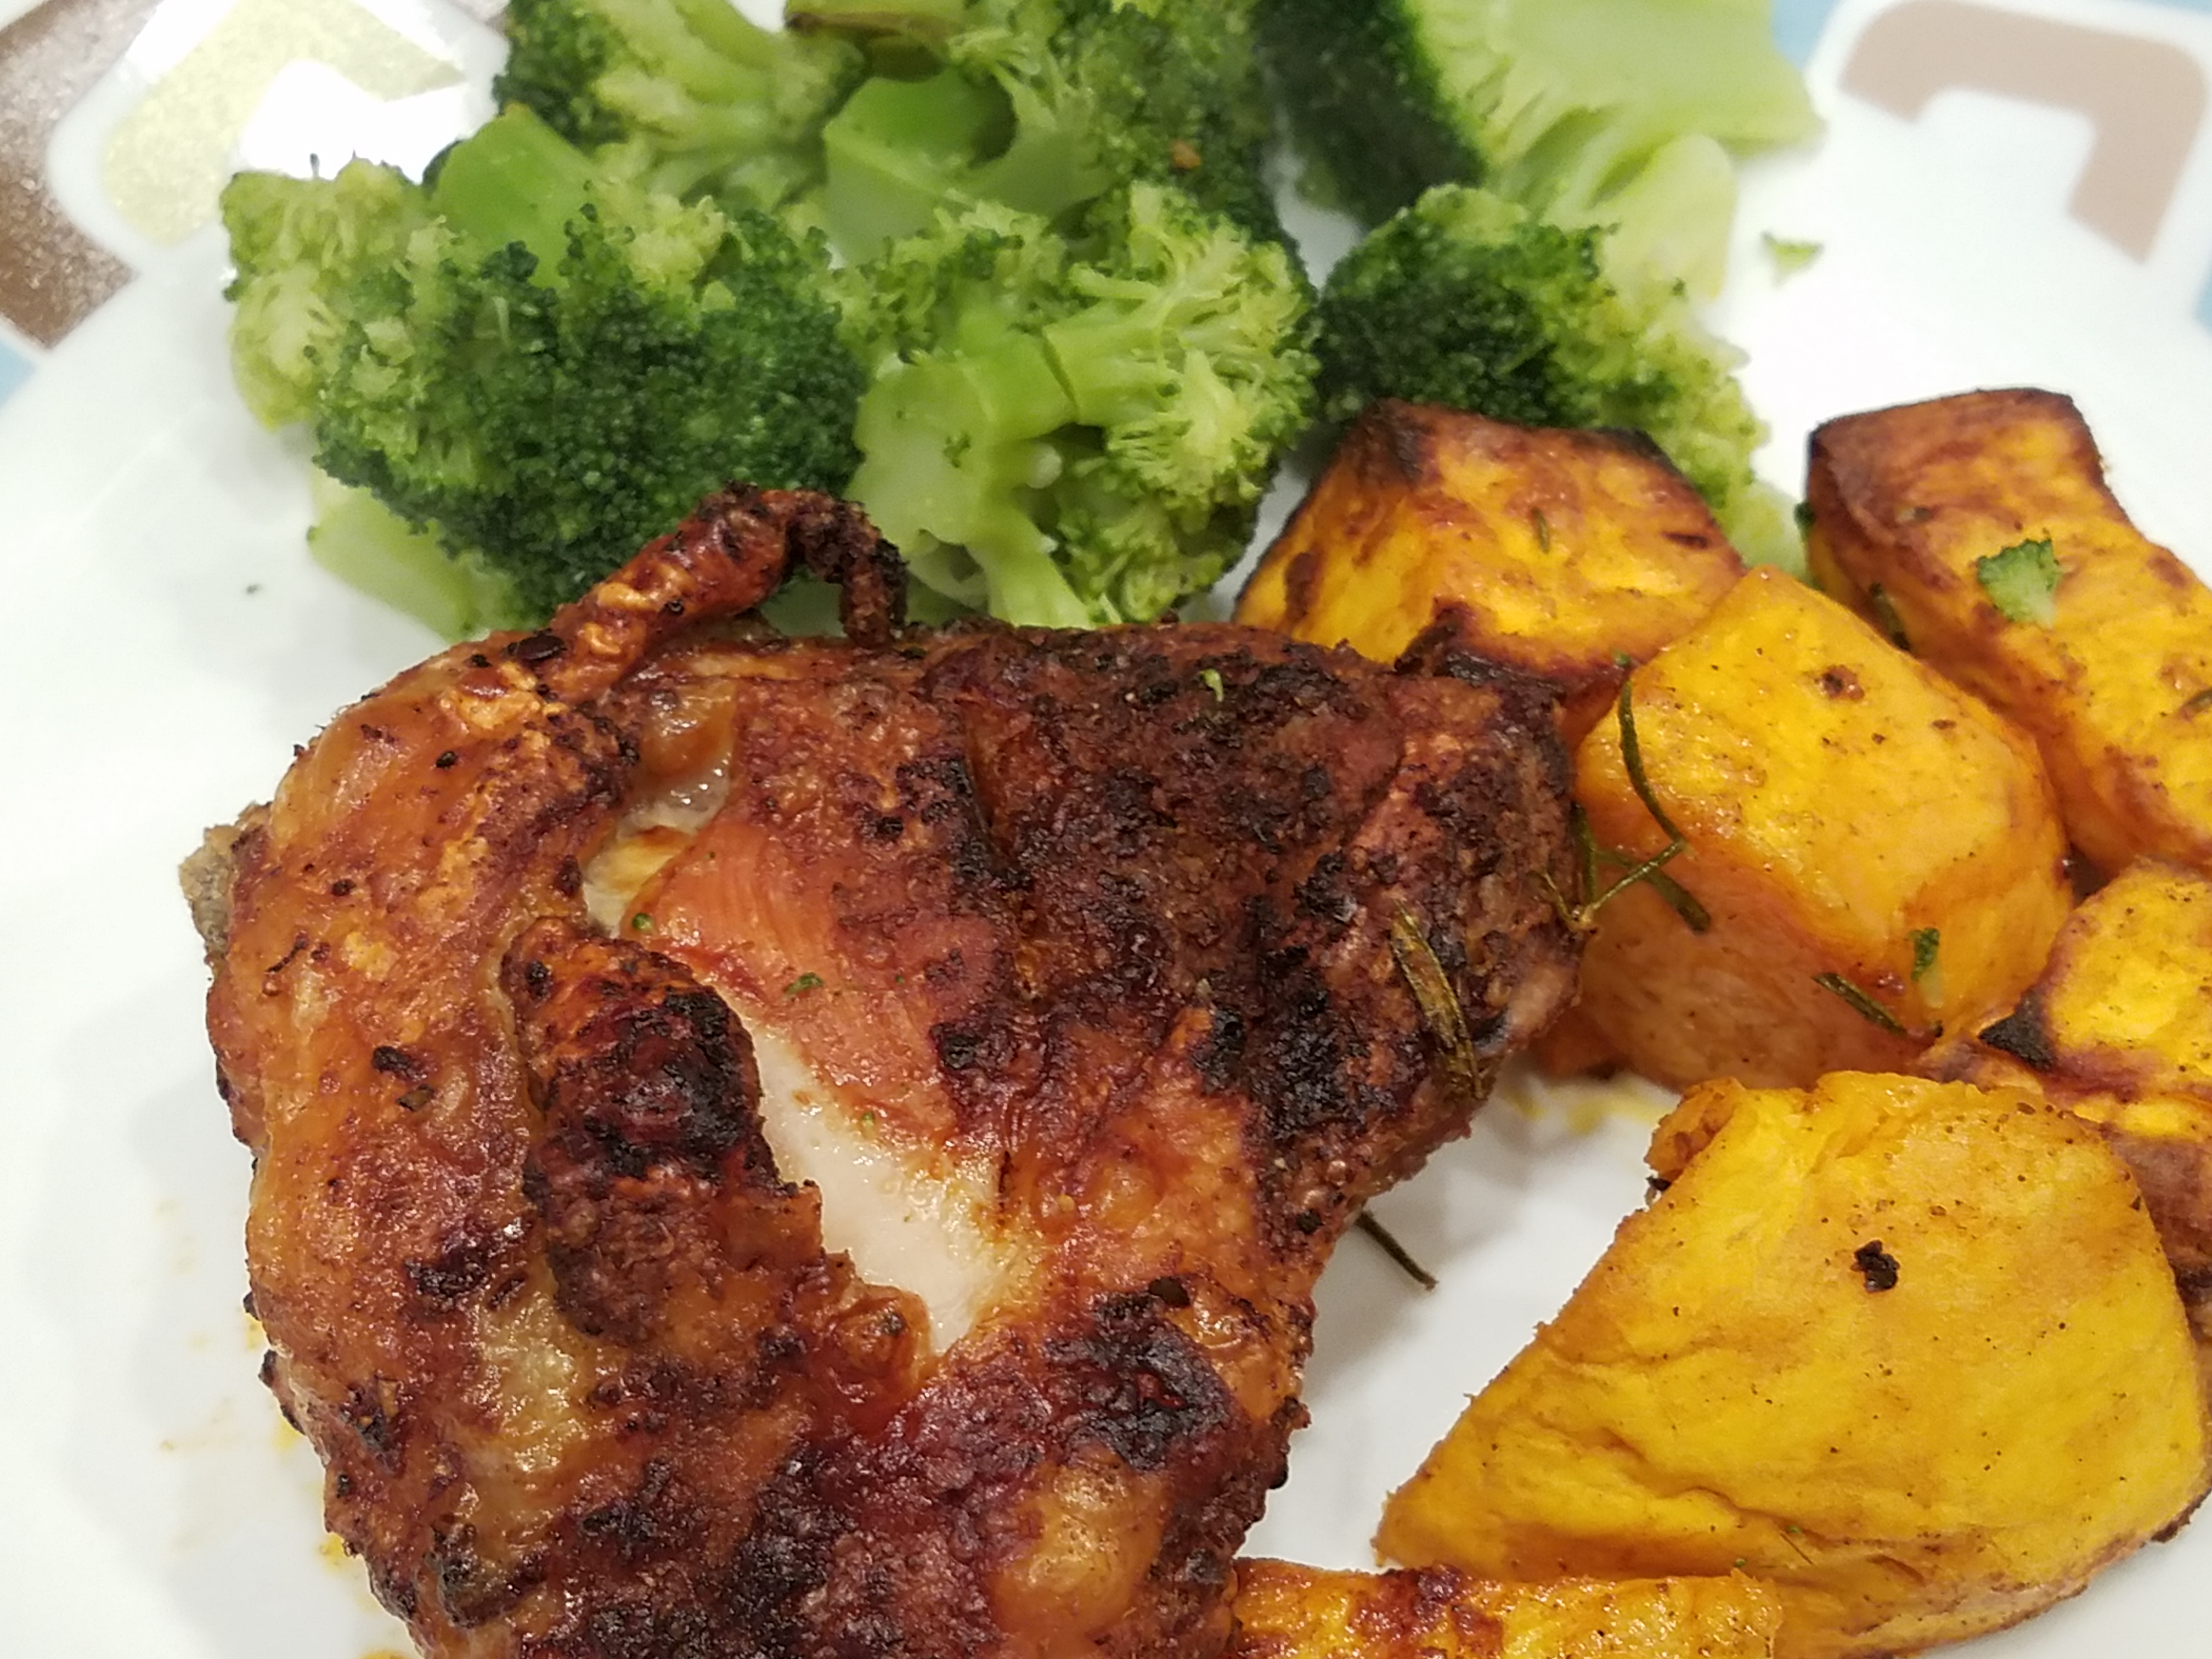
The chicken can be served as an appetizer (a welcome change from chicken wings) or with steamed rice or noodles and veggies for a complete meal. And, oh, the chicken tastes great cold too.

Sweet and Tangy Turkey Meatballs

20190203_161112
What is it about a blend of tastes – sweet and tangy, sweet and spicy…Flavor combos like these are always extra intriguing to the palette! Such was the inspiration for this dish…healthier ground turkey, seasoned with a blend of spicy jalapeno (mmm…would love to try the recipe with habanero next time around), sweet mango, citrusy note of lemon zest and freshness of cilantro!

This recipe is a nice change from the traditional beef meatballs in red tomato sauce, or if you are a bit more adventurous Swedish meatballs! While you could serve these meatballs as little cocktail bites, mixed with some veggies like carrot and simmered in some liquid, these could also double as a topper for some hot cooked rice or pasta. These would even be great with a side of steamed veggies if you want to go light on the carbs!

20190203_155046

These meatballs are super easy to whip together. Yeah, it takes a bit of a prep – sauteing the onion and peppers, making the meatballs, browning them, and then simmering them in the sauce, but the effort, in my opinion, is worth it! They are very tender and delicious, with just a little note of heat and sweetness.

20190203_180058

Sweet and Tangy Turkey Meatballs

  • Servings: 4-5
  • Print

Ingredients
1 lb lean ground turkey
1 tablespoon oil, additional 2 tablespoons
3 cloves of garlic
1/4 cup of finely chopped red onion
1 jalapeno, finely chopped
1/4 cup old fashioned oats
1/4 cup finely chopped sweet, ripe mango
1 tablespoon lime zest
1-2 tablespoons finely minced cilantro
1/2 teaspoon salt
1 egg, lightly beaten
1/3 cup plain breadcrumbs
1 large carrot, chopped (about 2 cups)
1/3 cup orange marmalade

Preparation:
1. Heat one tablespoon oil in a skillet and saute onion, garlic and jalapeno till golden. Take care not to burn. Add the oatmeal and continue to cook for another 2 minutes.
2. In a medium bowl, combine turkey, sauted mixture from above and all remain ingredients through breadcrumbs.
3. Form into 1″ balls.
4. Heat 2 tablespoons of oil in a large skillet and brown the meatballs on all sides. Remove to a platter. Note that the meatballs will not be cooked all the way through, so please resist the temptation to bite into one (though you will really be tempted!)
5. In a medium sauce pan,add a teaspoon of oil and saute the carrots for 5 minutes. Add 1/2 cup of water and a bit of salt to taste. Stir in the orange marmalade and drop the meatballs into the pan. Gently toss to coat, cover and cook for 15 minutes, till the carrot is tender and sauce is a little thick.
6. Serve the meatball with rice, pasta or steamed veggies.

Air Fryer Chicken Thighs and Sweet Potato

20181112_193850

I know instant pots are all the rage now. I have heard of people who own these in various sizes! Not me…at least not yet. I haven’t jumped on that bandwagon yet – and even if/when I do, I am quite confident I will not be owning more than one. So, for now, I do own an air fryer (have been for maybe a year now).

You may wonder what I have used it for. In all honesty, my husband has used it more often than I have – and definitely it is not to make anything meal worthy! He has only ever made frozen fries in them. They taste great, but I figured there should be other applications of the gadget than just for crisping up frozen food. So, I started experimenting, first with vegetables seasoned with salt and ever so slightly drizzled with oil. My favorite…eggplant slices and broccoli! Yum! Then, I got to thinking…and googling.

20181112_185717

Damn! You can even make desserts in an air fryer! Wow! Anyway, I wanted to attempt a main dish, and hence was born this chicken and sweet potato recipe.

Honestly, you can use any seasoning for the chicken thighs (or drumstick or cut up breast). I happened to stumble upon harissa seasoning at a local TJMaxx (love the store for the interesting finds) and decided to try it. Harissa seasoning has complex spice notes with good amount of heat, so use it according to your taste. I needed to add salt because the bottle I bought did not have any.

After about 30+ minutes in the air fryer, the chicken thighs were super crispy on the outside (thanks to the skin) and juicy and delicious inside. Sweet potato took on a nice flavor from the chicken as well. The best compliment was “Hon, I am sorry, I don’t think I can eat the bone!” So, if you own an airfryer, you have to try this recipe. If not, either buy one or try the recipe in a 450F oven.

20181112_193858

Air Fryer Chicken Thighs with Sweet Potato

  • Servings: 4
  • Print

Ingredients:

4 chicken thighs, excess fat trimmed, but with skin

1 tablespoon plus 1 teaspoon harissa seasoning

1 teaspoon salt, divided

2 medium sweet potato (or regular potato)

2 tablespoons oil, divided

Preparation:

  1. Preheat the air fryer to 375F.
  2. Score the skin side of the chicken thighs deeply with a sharp knife. Season with a blend of 1 tablespoon harissa and 1/2 teaspoon salt (or more to taste). Make sure seasoning gets into the cut slashes. Drizzle both sides with a tablespoon of oil.
  3. Place chicken thighs, skin side down in the air fryer and cook for 10 minutes.
  4. While the chicken is cooking, peel and cut the sweet potato into large chunks, about 1″ wide. Toss with remaining salt, harissa and oil.
  5. Remove the chicken thighs from the fryer and set aside on a plate.
  6. Add the sweet potato to the air fryer and top with the chicken, this time with skin side up.
  7. Cook for another 25 minutes or more till the chicken and sweet potato are cooked through and the top of the chicken is browned and crispy.
  8. Transfer to serving plates and serve with other sides or vegetables for a wholesome, delicious dinner.

Oven-Fried Chicken Thighs

I am not going to make yet another apology for being ridiculously tardy with my postings, so I will just jump to the recipe at hand!

20180219_184133[1]
Do you like fried chicken? Me neither! It’s not that it’s not yummy or satisfying. It sure is! The reason I don’t like it is because it is so damn bad for you…like looking at it on your plate makes you want to grab your chest like you can somehow feel the arteries getting clogged! Real fried chicken is definitely full of fat and calories – store-bought/ commercially prepared chunks likely brim with thousands of calories and more than a few days worth of saturated fat. So, yes, I don’t like them. I never order these from restaurants, but on a rare occasion, I do fantasize about biting into one with no regrets!

20180219_173312[1] 20180219_173428[1]

Hence, this attempt at making an oven-fried version, which will not make it to any healthy dish list, but at least satisfies one’s annual craving for fried chicken without a whole lot of guilt. I wanted to emphasize a few words in the previous sentence as this chicken is still an indulgence in my opinion. Although I carefully trimmed out most of the excess fat and good portion of the skin, there is still some of that bad stuff on the chicken. In addition, even though I skipped the deep frying, there is still some oil drizzled on the chicken before baking. So, all in all, please do indulge and enjoy this dish, but try with all your might to only make it on a rare occasion or two.

With that out of the way, this chicken is truly delicious. Marinating the meat in seasoned buttermilk (in my case, 1% milk soured with a bit of white vinegar) for 24 hours goes a long way in making sure the chicken tastes well seasoned and comes out juicy and delicious. Seasoning the flour mixture adds another layer of seasoning that makes the exterior of the chicken delectable as well. I debated going with just all-purpose flour, but then opted for a “house blend” of all-purpose, cornmeal, rice flour and cornstarch. In case you are wondering how I came up with this blend, honestly, 100% on a whim. I figured rice flour and cornstarch tend to make things crispy,cornmeal adds bit of a textural element and all-purpose flour, well, it’s “all-purpose”. I think this is a keeper! After all the waiting around with the marinating and long baking time, this recipe proved to be a winner. And the chicken tastes great even the next day!

20180219_184138[1]

Oven-Fried Chicken Thighs

Ingredients:
8 chicken thighs, excess fat and skin trimmed carefully; deeply score the skin side
Marinade:
1 cup buttermilk (or sour milk made with a cup of milk and 1 tablespoon vinegar)
1 teaspoon salt
Cayenne powder to taste (I used about 3/4 teaspoon)
few grinds of freshly ground black pepper
1/2 teaspoon each, onion powder and garlic powder
Flour mixture
1/4 cup each all-purpose flour, rice flour, cornmeal and cornflour
Cayenne powder to taste (I used about 1/2 teaspoon extra hot)
1/2 teaspoon salt
Generous sprinkle of freshly ground black pepper
1/4 teaspoon onion powder
1/2 teaspoon garlic powder
1/2 teaspoon paprika
2 tablespoons minced fresh parsley leaves
2 tablespoons canola oil
cooking spray

Preparation:
1. Blend all marinade ingredients. Pour over chicken thighs arranged in a baking dish, cover with plastic wrap and refrigerate overnight or up to 24 hours.
2. Preheat oven to 425F.
3. In a medium bowl, combine the flours with ingredients through parsley leaves.
4. Remove chicken pieces from the marinade. Blot dry (I skipped this step because I was in a mad dash to the next step for no real good reason).
5. Toss the chicken pieces one at a time in the flour mixture until well coated. I even made sure some of the flour mixture got in between the slits on the skin side.
6. Arrange the coated chicken pieces on a baking tray lined with aluminum foil, skin side up.
7. Cover the chicken pieces with a good coating of cooking spray. Drizzle the oil evenly over all the chicken pieces.
8. Bake for 40 to 45 minutes till juices run clear and the chicken is cooked through.
9. Serve with sides of your choice (Tip: a good serving of vegetable should at least take some of the guilt off!) Enjoy!

Pan-Grilled Tilapia with Garlic Rainbow Chard

20151031_194819

I love greens! Spinach, kale, collard, mustard…but I had never tried chard before! So, I was super excited when a colleague brought in a couple of bags of “excess” produce that she had from her membership in the CSA (Community Supported Agriculture). My “loot bag” included a large earthy turnip, a big bag of peppery arugula and a beautiful bunch of sweet rainbow chard! I must say, there is something about the rainbow chard…its deep green leaves with colorful veins and stems in purple, orange and green is definitely a thing of beauty!

20151031_190421  20151031_190625

Driving home, I made a mental note of how I was going to use up all that beautiful, fresh produce! I decided on South Indian style mixed vegetable and lentil stew (sambar) with the turnip, thin crust pizza (I used a prebaked crust made of whole wheat and kamut flours) with pesto, mushrooms and arugula and…tilapia with rainbow chard sautéed in extra-virgin olive oil with a healthy doze of minced garlic!

20151031_191206  20151031_192149

This tilapia/rainbow chard dinner is a snap to prepare. It requires very few ingredients and takes about the same time as watching a pot of water come to boil and cooking a box of pasta! Instead of a bowl of plain, cooked pasta in less than 20 minutes, you get a beautifully plated! I sort of missed the summer BBQ flavors and opted to go with that for this dish! The chard is super simple to make – just garlic, pinch of salt and bit of olive oil! I think the green is so delicate that anything beyond this simple combo might just overpower its natural flavor and taste!

20151031_194847

Isn’t everyone talking about the health benefits of eating fish! So, go for it! Grab yourself a few filets and whip up this dinner in a snap!

Pan-Grilled Tilapia with Garlic Rainbow Chard

  • Servings: 4
  • Print

Ingredients
4 Tilapia filets, skin removed
1 tablespoon BBQ seasoning or other seasoning of your choice
1 tablespoon olive oil
1 bunch of rainbow chard, chopped up
3 large cloves of garlic, finely minced
1 tablespoon extra virgin olive oil
Pinch of salt

Preparation
1. Lay the tilapia filets on a large plate and coat both sides with the BBQ seasoning.
2. Heat a tablespoon of oil in a large skillet over medium high heat.
3. Place the fish in the hot skillet and “grill” for 4-5 minutes on each side. The fish is done when you can flake it easily with a fork.
4. Wipe down the pan and return to heat. Add the remaining tablespoon of oil. Add the rainbow chard and garlic and saute for 3-4 minutes.
5. Serve the fish immediately over a serving of sautéed chard for a simple, healthy and delicious meal!

Easy Basil Fried Rice

20150822_130033

I love food! I guess that’s quite obvious by now! But seriously, I do enjoy a variety of cuisine – sambols and rotis from my homeland, Sri Lanka, pasta dishes characteristic of Italy, slow rendered duck breast and macarons from France, tacos and fajitas from south of the border, curries and rice dishes from India, Pakistan, China, Thailand….And the list goes on!

20150822_120328

Each cuisine is unique and unparalleled with incredible flavor combinations, textures, colors and taste! I have a bit of a special fondness for Thai dishes – perhaps it’s the coconut milk and ample use of green chili. So, I had this craving for a yummy Thai fried rice, but without having to go for takeout.

20150822_122203

I was pretty sure I had the basic ingredients handy – basil, fish sauce, palm sugar, rice, eggs and a medley of vegetables. A quick look through the refrigerator and pantry confirmed my hunch! So, after perusing through a few recipes for inspiration, I decided to use my own pseudo blend of Thai seasonings! I figured even it didn’t taste Thai at all, it will still be pretty darn good. And good it was! In fact, it was probably better than good. My family loved it and both my kids (one who hates fish sauce and the other who has a pretty discerning taste for fried rice) actually verbally acknowledged that the rice was good. That, in my books, is a pretty big win!

20150822_122415  20150822_123131

This rice is especially good, made with a day old rice kept in the refrigerator. If you are like me and have a freshly cooked batch, just spread 2 cups of the cooked rice on a plate and chill till you prepare the ingredients. It worked fine. I think day-old rice just helps to keep the kernels separate – like in restaurants.

20150822_125958

Easy Basil Fried Rice

  • Servings: 4
  • Print

Ingredients
2 cups cooked rice, preferably a day old kept overnight in the refrigerator
2 tablespoons canola oil
2 cups of chopped vegetables of your choice (I used carrots, onions, savoy cabbage and celery)
2 eggs
1/4 cup roughly chopped basil leaves

Seasoning:
1 tablespoon fish sauce
1 tablespoon soy sauce
1 tablespoon minced ginger
2 large cloves of garlic, minced
2 tablespoons ketchup (I used tomato sauce)
1 tablespoon sugar (I used palm sugar)
1 tablespoon rice vinegar
Sprinkling of crushed red peppers, optional

Preparation
1. In a small bowl, combine all the seasoning ingredients. Set aside.
2. Heat a large saute pan or wok over high heat. Add the oil and saute the vegetables for 3-5 minutes.
3. Add the rice and seasoning mix. Toss to mix thoroughly. Spread the rice and vegetables across the pan to allow them “fry” a bit more” – another 3 minutes or so.
4. Push the rice and vegetables to the edge of the pan, creating a well in the center for the eggs.
5. Lightly beat the eggs and pour in the center of the pan. Let set and scramble. Mix the egg with the rice and vegetables.
6. Remove from heat and serve with meat or vegetable stir fry and/or an Asian cucumber salad.

Comfort Pasta with Kale and Ground Beef

20150126_114856

What is it with pasta and the gazillion ways in which you can prepare them! They truly are a star pantry item!

I know I said I am going to try to get back on my healthy wagon, so I think you will appreciate this recipe. Yes, yes, it’s almost the end of January when most of the resolutions fall to the wayside. But, after trying this recipe, eating healthy may not be that difficult after all.

20150126_122005

This recipe is pretty simple, something I concocted while recovering from a mini version of the flu (thankfully short-lived due to Tamiflu). I didn’t quite have the energy to spend an hour in the kitchen, but at the same time didn’t want to be bed sofa-ridden for another meal. So, there I lay making a mental rundown on the items I had on hand, especially the pound of extra lean beef I was going to make chili with before I fell sick.

20150126_122422

So, now that the chili making was off the table till next weekend, I figured I should use up the beef in some form rather than freezing it. Pasta dish it will be! Kale, carrots, mushrooms, beef and a touch of cream and garlic! Simple, yet comforting enough!

20150126_130434

What are you waiting for? Grab the handful of ingredients this recipe calls for and whip up this dish while the pasta cooks! Yes, it is that simple! Go ahead and try it, you might actually end up planning to make it again soon!

20150126_130444

  • Servings: ”4″
  • Print

Ingredients
1/2 package pasta of your choice (I used penne)
1 tablespoon olive oil
2 large cloves of garlic, minced
1/4 cup finely chopped onion
1/2 pound lean (or extra-lean) ground beef
1 small bunch kale, rinsed and broken into small pieces
1 large carrot, peeled and cut into small cubes
2 cups of slices mushrooms
1 teaspoon Italian seasoning
dash of ground black pepper
Salt to taste
1/4 teaspoon freshly grated nutmeg
2 tablespoons of cream
1/4 cup grated parmesan
crushed red pepper, optional

Preparation
1. Bring a large pot of water to boil. Season with salt and cook pasta per directions.
2. In a large pot, heat a tablespoon of olive oil. Saute garlic and onion till translucent.
3. Add ground beef and brown the meat, breaking up any large clumps.
4. Add the carrots and continue cooking for another 5 minutes.
5. Now, add the kale and mushrooms and saute for another 3-5 minutes.
6. Season with Italian seasoning, black pepper and salt per your taste.
7. Add the cream and grate the nutmeg.
8. Toss with pasta and serve with a sprinkling of parmesan and crushed red pepper, if desired.

Soy Glazed Chicken on a Stick

20141210_195057

Anything on a stick seems to elevate to the top when it comes to perfect finger foods that are enjoyed by all – although not all of them are good for you (was your first thought corndog??!). But this recipe is truly not that bad at all – especially if you use chicken breast although I used bones, skinless thighs!

I don’t know if this belongs to the true “chicken satay” category. I probably have most of the satay marinade ingredients in this, but this is more of a general Asian flavor than any one particular cuisine. Marinade consists of sweet soy sauce (it is like molasses – dark and thick), regular soy sauce, dark sesame oil, ginger, garlic, honey, rice wine vinegar and green onions.

20141210_201947

There is not much to this recipe. Hardest part is probably cleaning the chicken to remove all excess fat and slicing them into long strips. Other than that, you just let the chicken (on the stick) marinate for a while and cook! Don’t discard the marinade. Boil it up to make a delicious dipping sauce for your chicken on a stick!

20141210_202016

Soy Glazed Chicken on a Stick

  • Servings: 4
  • Print

Ingredients
4 large boneless, skinless chicken thighs
4 tablespoons sweet dark soy sauce
1 tablespoon reduced-sodium soy sauce
1 tablespoon honey
2 tablespoons rice wine vinegar
1 teaspoon dark sesame oil
1 tablespoon minced ginger
1 tablespoon minced garlic
2 green onions, thinly sliced
1 teaspoon crushed red pepper
Cooking spray
12 short bamboo skewers
1 tablespoon peanut butter, optional (for sauce)

Preparation:
1. Begin by preparing the chicken. Trim off excess fat and slice into long strips, about 1″ wide. Thread the chicken pieces through the skewers. Set aside in a shallow dish while you prepare the meat. Alternatively, you can marinate the chicken and then thread through the skewers.
2. Prepare the marinade pan by mixing all the ingredients from dark soy sauce through crushed red pepper. Pour over the chicken, cover with plastic wrap and let marinate for about 15-20 minutes.
3. Heat a skillet over medium heat. Remove the skewers from the marinade and drain the marinade into a small sauce pan. Place the skewers in a single layer and cook for 5 minutes on each side. Test for doneness. Alternatively, you can grill the chicken as well.
4. Add about 1/4 cup of water to the marinade along with the peanut butter (if using). Bring to a slow simmer and continue cooking for about 3-5 minutes. If the sauce looks too thin, you can thicken it by adding a bit of cornstarch. Taste the sauce and adjust salt/sweetness per your taste.
5. Serve the chicken with the sauce and a side of rice or salad.

Light and Healthy Chicken Parmesan


20141124_195238


Chicken parm and eggplant parm (have you tried them as a layered “lasagna”??? OMG, it’s a savory heaven!) are among my favorite dishes. If I could indulge in them several times a week, I am almost certain I would! What do you expect, it is breaded CHEESY! I only wish the real version was healthier!

20141124_192544  20141124_192550

That is….just until I tried experimenting with this recipe last week! I figured if I could crisp up the chicken without deep frying and replace the regular cheese with a reduced fat version, I will be half way there! So, that’s what I did!

20141124_192554  20141124_194330

I used a light coating of breadcrumbs to crisp up the chicken. After pan frying them in a coating of extra virgin olive oil, I topped them with little bit of good quality pasta sauce and reduced fat mozzarella cheese and voila, I couldn’t feel better eating it or serving it to my family!

So, grab a few pieces of boneless, skinless thighs (excess fat removed as best as you could) or breasts and few basic ingredients and start whipping up these babies! You will be glad you did!

20141124_195303

[Recipe title=”Light and Healthy Chicken Parmesan” Servings=”4″ Prep time=”45 minutes”]

Ingredients
8 small boneless, skinless chicken thighs, fat trimmed off
Salt and pepper to taste
1/2 – 3/4 cup Italian-style bread crumbs
1/8 cup grated parmesan cheese
1/2 teaspoon garlic powder
1/2 teaspoon dried Italian herbs, crushed
1/4 teaspoon ground black pepper
1 egg, lightly beaten with a tablespoon of water
1/2 teaspoon crushed red pepper
1/4 teaspoon ground black pepper
2-3 tablespoons of extra virgin olive oil
1/4 cup grated parmesan cheese
1/2 cup reduced fat grated mozzarella cheese
1 cup good quality pasta sauce

Preparation
1. In a shallow dish, combine bread crumbs, 1/8 cup parmesan, garlic powder, Italian herbs and black pepper.
2. In another shallow dish, whisk together the egg, crushed red pepper and black pepper.
3. Dip chicken thighs in egg mixture and coat with bread crumbs.
4. Heat a skillet over medium heat. Lightly coat with olive oil.
5. Add chicken pieces in a single layer and cook for 5-6 minutes on each side till the chicken is completely cooked through. Depending on the thickness of each piece, cooking time may vary a little.
6. While the chicken pieces get cooked, heat the pasta sauce in a small pan and keep warm.
8. As soon as all the chicken pieces are cooked, serve immediately over some pasta. Top the chicken with pasta sauce and cheeses and serve hot.

TIP: As an alternative, you can also assemble the chicken as a chicken parm sandwich.

[/recipe]

Weeknight Eggplant-Ricotta Rollups

20141125_202914

Eggplant is by far one of my favorite vegetables. Until recently, I preferred the Asian kinds, Italian white kind and Indian kinds, but not so much the chunky American type – you know which ones I am talking about, right? The huge blackish purple giants that you see commonly at supermarkets. One of the main reasons is because I simply didn’t like their texture. To me, they had too much water in them. And their skin was too tough and they tasted rubbery most of the time! That is until recently, when I figured out how to make them less chewy, more delicate and better tasting!

20141125_200200

This recipe utilizes few of the tips I incorporate whenever I work with this particular type of eggplant. Peeling the eggplant first and slicing them thin lengthwise helps in making them softer and more flavorful during the cooking process. This recipe seriously is definitely a keeper for wholesome weeknight dinners, provided you have the main ingredients – eggplant and ricotta.

20141125_200156  20141125_200150

Steps are simple – slice and precook the eggplant, spread cheese mixture on each slice and roll it up, place them in a skillet with a good quality pasta sauce, top with any remaining cheese and grated mozzarella and let simmer. Voila! In less than 10 minutes, you will be able to open the lid and scoop out the cheesy, hearty eggplant-ricotta rollups onto your plate to devour!

20141125_200838  20141125_202002

Enjoy!

TIME SAVING TIP: You can pre-cook the eggplant slices ahead of time to save precious minutes!

Weeknight Eggplant-Ricotta Rollups

  • Servings: 4
  • Print

Ingredients
1 large eggplant, cut into 1/4″ thick slices lengthwise
2 – 3 tablespoons of extra virgin olive oil
1 cup part-skim ricotta cheese
1/4 cup grated parmesan
3 tablespoons chopped parsley, basil and oregano (or 1 tablespoon dried Italian herbs)
1 teaspoon finely minced garlic
salt and pepper to taste
1/4 cup reduced fat grated mozzarella
1 cup good quality pasta sauce
Any remaining cheese mixture
1/4 cup reduced fat grated mozzarella

Preparation:
1. Preheat a frying pan over medium high heat and coat with olive oil.
2. Cook eggplant slices in single layer till they are soft and golden. Set aside.
3. In a small bowl, mix together the ricotta, parmesan, herbs, garlic, salt/pepper and 1/4 cup mozzarella.
4. Spread about a heaping tablespoon of cheese mixture on the eggplant slices and roll them up.
5. Heat a skillet over medium high heat and add the pasta sauce.
6. Place the rolled eggplant slices in a single layer and top with any remaining cheese mixture. Top mix remaining 1/4 cup mozzarella cheese and cover.
7. Reduce heat to medium and let simmer for about 10 minutes till it gets hot and bubbly.
8. Serve immediately with a side salad or another dish of your choice.