Arepas with chicken and plantains

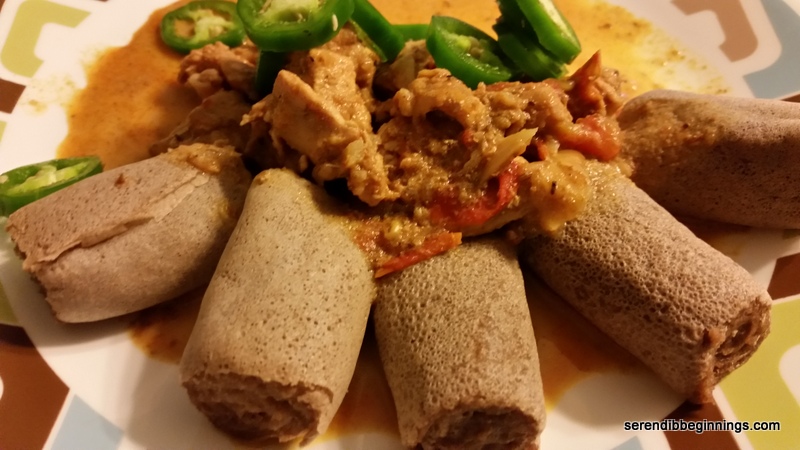
Here is a simple, yet satisfying recipe with a South American twist – arepas with chicken and veggie stew (of course, accompanied by sauteed plantains).

20180806_204012[1]

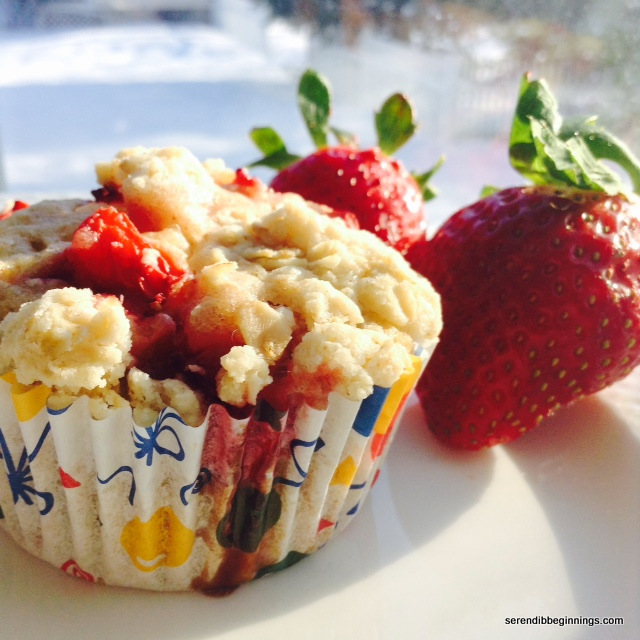
I tried my first taste of an arepa not from a restaurant or at someone’s house – let alone in Columbia or Venezuela. I tried my first taste of it from one of many wonderful food carts in New Haven, CT. I am not really sure how an authentic arepa is supposed to taste, but what I tried few weeks ago was intriguing enough for me to do an online search for an arepa recipe. The arepa I tasted looked like a perfectly shaped pancake, though it was about 1/4 inch or so thick. It was soft and sweet and provided a pretty good balance to the savory meat and vegetables served alongside. So, reading through the recipes, I wasn’t quite sure if they were going to result in the version of arepa I tried, or the one that it was supposed to taste like. Only a native can confirm for me, I guess!

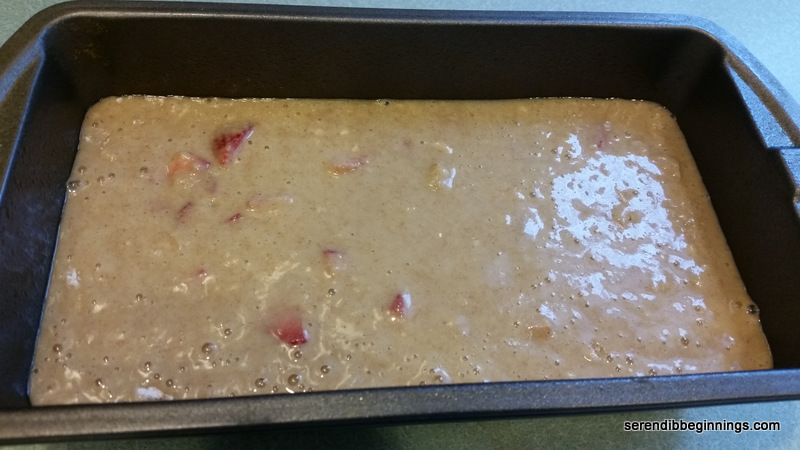
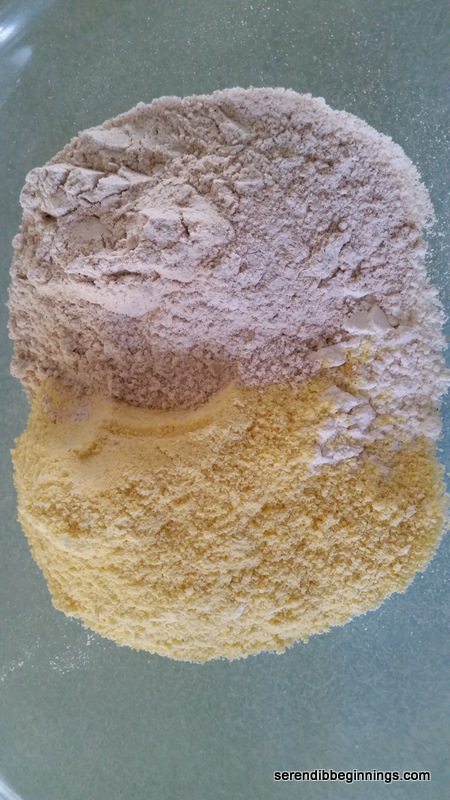
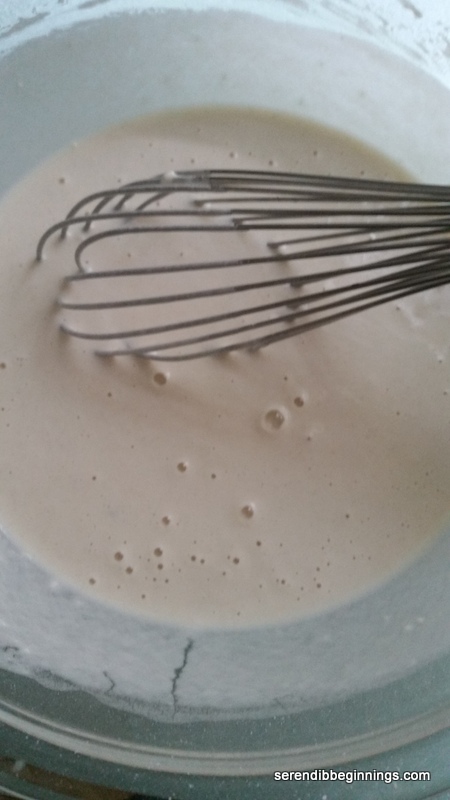
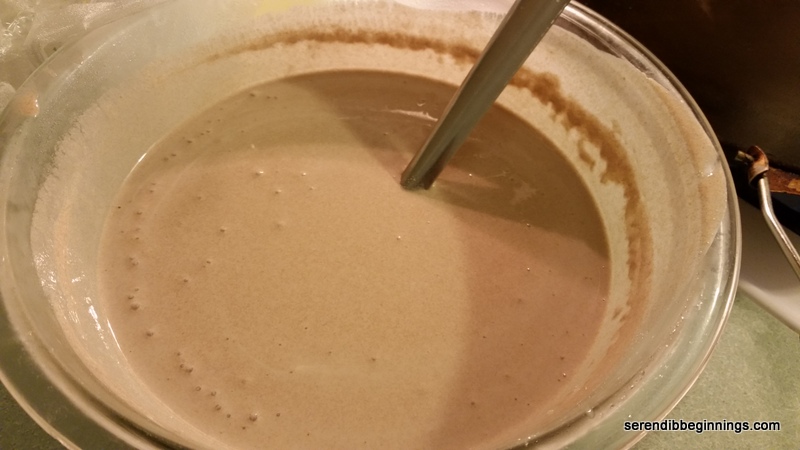
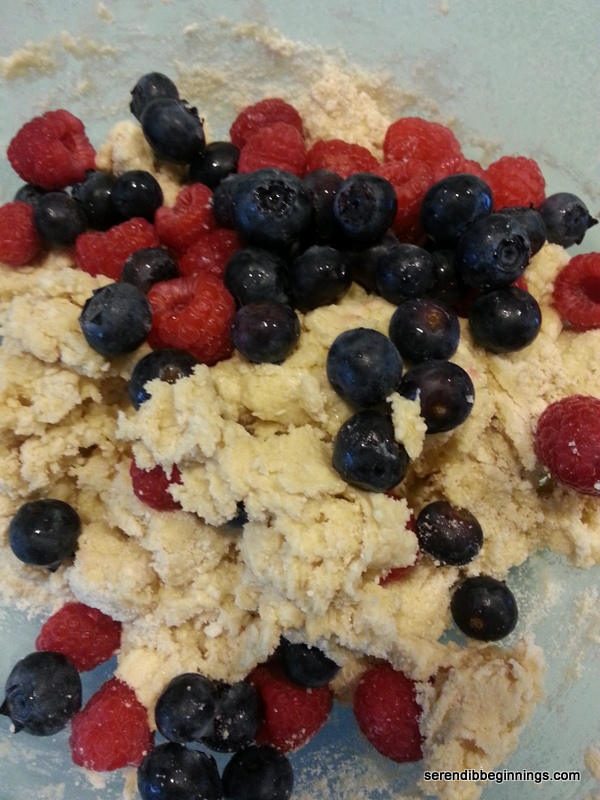
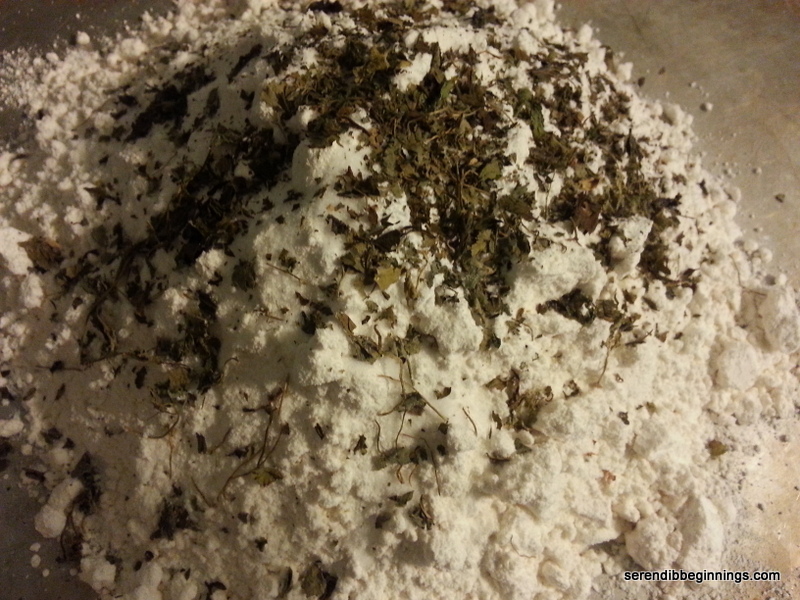
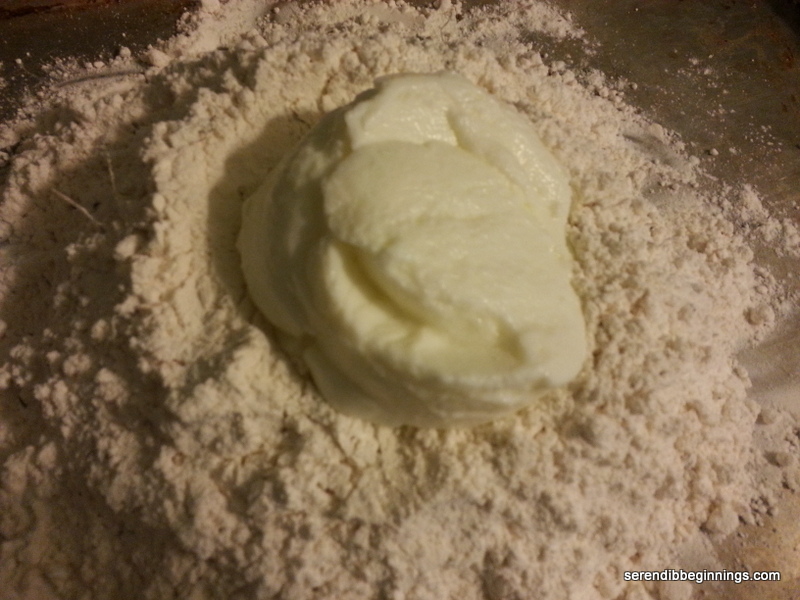
Anyway, the first thing I learned while reading through the recipes was there are different types of cornmeal/corn flour. The yellow cornmeal I was familiar with is NOT what you use to make arepas. You need precooked corn flour. Arepa flour is finer, and the at least the brand I bought (PAN) was definitely more white than yellow. After considering a few recipes, I settled for one that appealed to me for whatever reason. This one used a mixture of flour, grated cheese and sugar mixed with hot milk and melted butter.

20180805_191308[1]

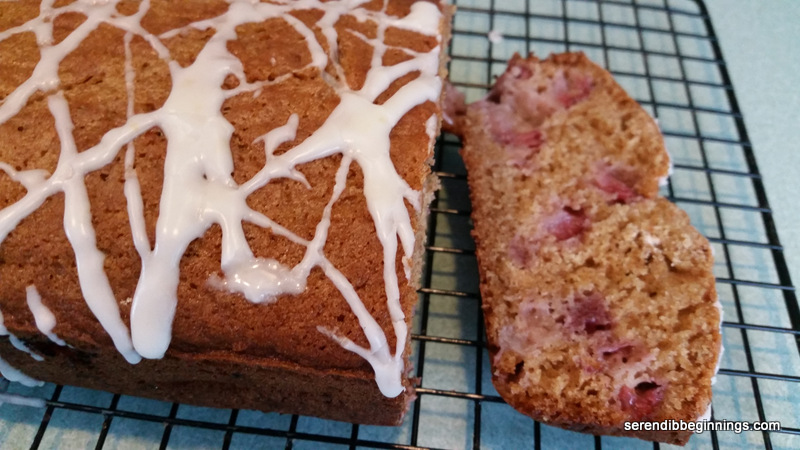
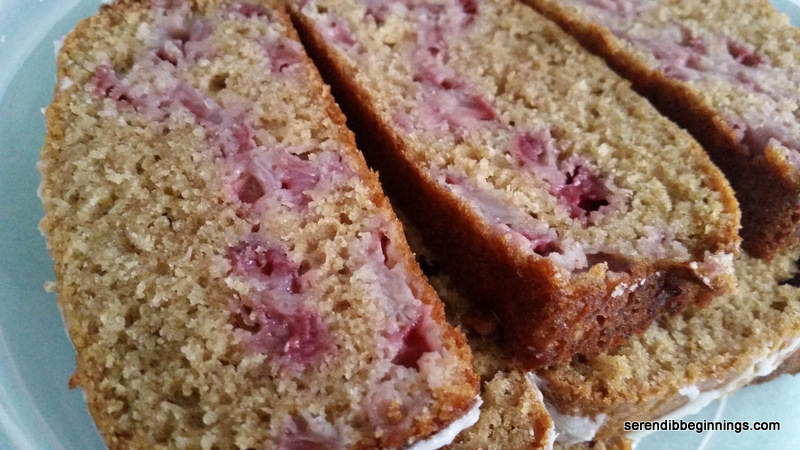
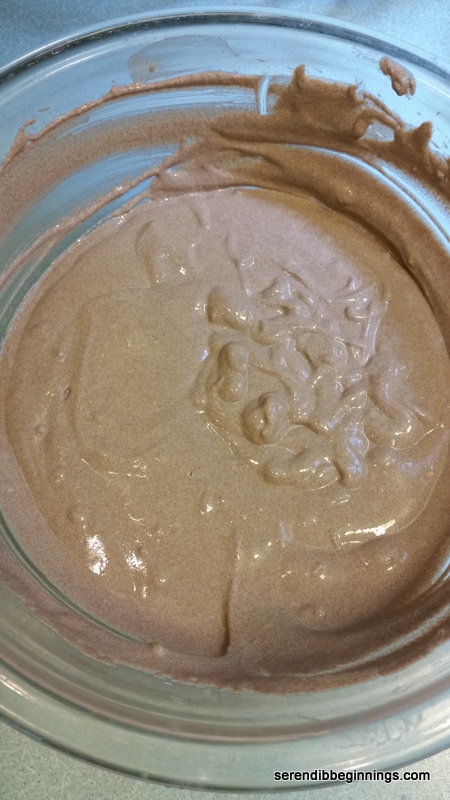
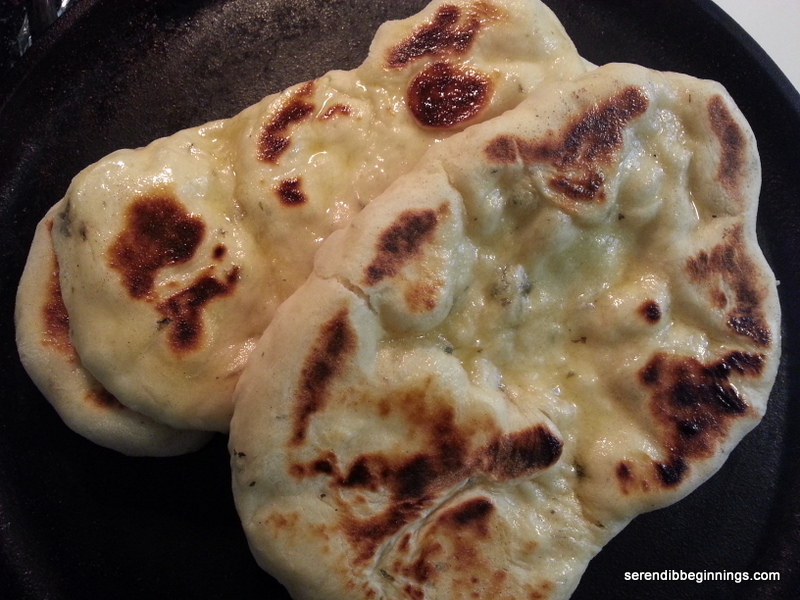
You are right…I couldn’t get myself to use the whole 1/3rd cup sugar or the 6 tablespoons of butter the recipe called for. I used a little less than 1/4 cup sugar and about 2 tablespoons butter. I also used only 1% milk. Last modification to the original recipe was the omission of the cheese slice to make arepa sandwiches. So, either follow mine if you want a lighter version, or go with the original recipe at this site. With lower sugar and butter, the arepas tasted best freshly made. You also have to warm any leftover arepas so soften them as they do get firm when refrigerated.

20180806_204005[1]

Arepas

  • Servings: 6-8 arepas
  • Print

Ingredients:
1 cup 1% milk
2 tablespoons butter
1 cup arepa flour
1/4 teaspoon salt
1/4 cup sugar
1 cup ground frozen corn kernels (I didn’t use any in my recipe)
1 cup mozzarella cheese, shredded

Preparation:

  1. Bring milk to a light boil, and add cubes of butter to melt.
  2. If using frozen corn, add it to a food processor and pulse till coarse. Set aside.
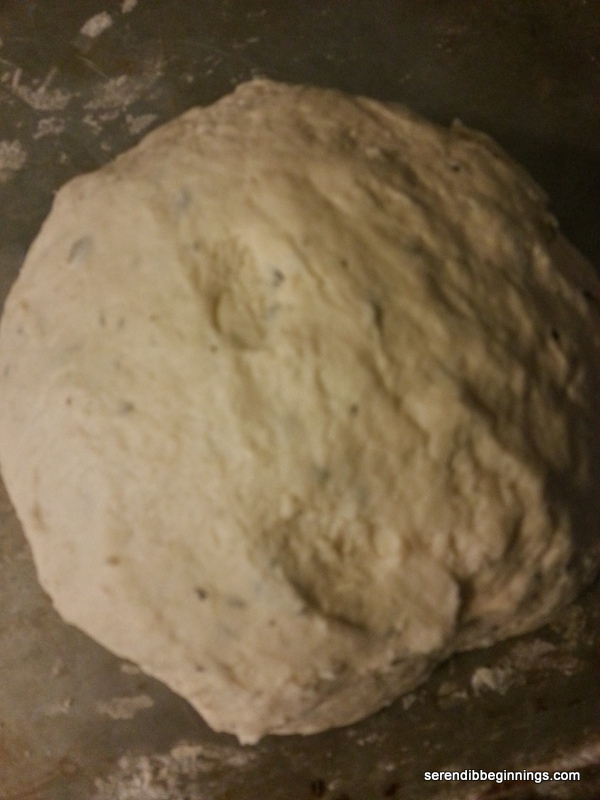
  3. In a medium bowl, mix the arepa flour, salt and sugar. Add the mik/butter mixture and mix to make a smooth, but sticky dough.
  4. If  using pulverized corn, mix it into the dough along with grated mozzarella cheese.
  5. Bring the dough together in a ball, and refrigerate for about an hour.
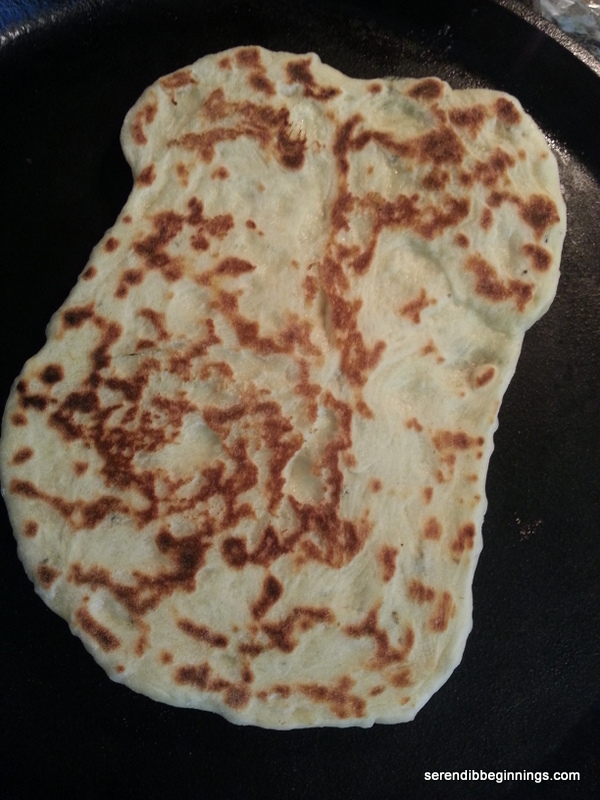
  6. Roll out arepa dough into a 1/2 inch thick sheet and cut with a 3″ circle cookie cutter, or do what I did: take golf ball sized dough, pat it into a disc.
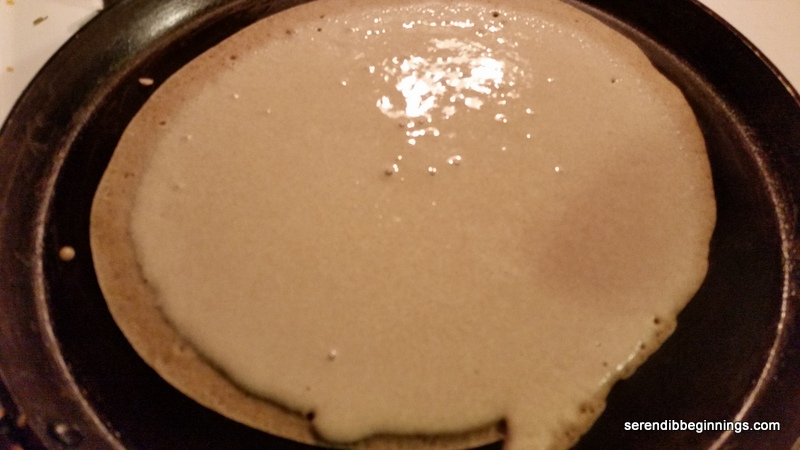
  7. Cook arepas on a buttered skillet till golden brown on each side. Note: Due to lower sugar and fat content in my dough, my arepas did not brown as much as the original recipe might have.
  8. Serve freshly cooked arepas with a meat dish of your choice. I served mine with a spicy chicken and veggie stew and a side of sauteed plantains!

Autumn Pear Muffins

20151103_190809

My calendar says we are into November! That means, we have fallen back an hour and old Mr. Winter is looming closeby! Autumn colors should have vanished by now and the trees should be as bare as a smoky BBQ rib, licked clean! (how I miss summer!); air outside should be crisp and cool prepping our skin for the winter freeze! But, what a treat that the fall foliage is still lurking and the temps are so atypical for November! Seriously, it was in the 70’s one day this week! I am definitely not complaining by the slightest bit! Linger as long as you would like warm temp! The longer you linger, the shorter will be winter! (guess vestiges of my poetry days are still around!)

20151103_170029

I digress. So, yes, the warm temps and abundance of sunshine did the obvious – put me a great baking mood! I was all out of homemade muffins that I could easily pack for kids’ breakfast or snack and decided to bake a batch. It’s autumn after all, so the big question was whether to bake apple or pear muffins! Apple somehow makes you believe, summer just eased into early fall! Pear on the other hand kind of serves as a gentle push that nudges you into winter! Wouldn’t you agree? So, anyway, I had both the fruits in abundance, but caved in for the latter! Yum, my very first attempt at a pear muffin recipe.

20151103_171315  20151103_172052

I figured pears would easily substitute for apples in my usual muffin recipe, but I wanted to try a new one. As much as I would like to say this is my original recipe, it is not. The original is found here. I did make some modifications to give it my own little twist. Original ratios still remain though. I swapped out the milk with buttermilk (my favorite in baked goods) and added a streusel topping. And caramel! The last addition is not recommended at all as it is best done after baking and right before serving. Even though the caramel added another layer of sweetness to a not-overly-sweet muffin, I didn’t have the appearance I was going after! Oh well!

20151103_174417

These muffins are beyond delicious! Super autumny, super delicious, super moist and simply everything a muffin should be! 🙂 So, seriously, if you never tried any of my other recipes at all, you have to try this! It’s that good!

20151103_174428

Autumn Pear Muffins

  • Servings: 12
  • Print

Ingredients
1/2 cup dark brown sugar, lightly packed
1/4 cup sugar
1 stick unsalted butter, softened
2 large eggs
1 teaspoon vanilla extract
1 cup all-purpose flour
1 cup white whole-wheat flour
2 teaspoons baking powder
1/2 teaspoon baking soda
2 teaspoons ground cinnamon
1/2 teaspoon ground nutmeg
1/2 teaspoon salt
1/2 cup buttermilk
3 medium sizes Bosc pears, cut into 1/2′ cubes

Streusel topping
2 tablespoons of the dry mix (see instructions)
1/4 cup old-fashioned oats
1/4 teaspoon ground cinnamon
1 tablespoon brown sugar
Dulce de leche, optional (lessons learned: Drizzle after baking!)
1 tablespoon butter
1 tablespoon chopped crystalized ginger

Preparation:
1. Preheat oven to 425F. Spray a muffin pan or line with baking liners. Set aside.
2. Sift the flours with baking powder baking soda, spices and salt. Take 2 tablespoons of the dry mix and set aside for the streusel topping.
3. Prepare the streusel by mixing all the streusel ingredients till they are crumbly. Set aside.
4. In a large bowl, cream the butter and sugar till light and fluffy.
5. Add eggs, one at a time, mixing well after each addition. Add the vanilla and beat well.
6. Using a rubber spatula, stir 1/3rd the flour, folding lightly. Add half the butter milk. Add the other third of the flour and follow with remaining buttermilk. Fold in the remaining flour with the pears. As with any muffin recipe, don’t overmix! The batter will be quite thick and super delicious looking! 🙂
7. Spoon the batter evenly across all 12 muffin cups. Sprinkle the streusel topping over the batter and lightly press so they stick to the batter. Drizzle some dulce de leche (caramel) over the streusel. Place in the oven, reduce heat to 400F and bake for 22-25 minutes.
8. When the muffins are done, remove from the oven, let stand for 5 minutes, move to cooling rack and let them cool completely. The muffins can be stored in airtight container at room temperature for 3-5 days.

Perfect blueberry muffins

20150517_080442

Berries are a perfect way to start off a sunny morning -even a weekday one! Blueberries, strawberries, raspberries, blackberries….I just love them all!

20150515_064109

I hope you have had the opportunity to try my raspberry scones! They are divine. Although I debated another scone recipe this morning, I went for buttery streusel topped blueberry muffin instead. This recipe is adapted from the original at the Café Sucre Farine. The recipe called for the blissful combination of lemon and blueberries! Heavenly!

20150515_065111

This recipe is so easy – I mean it. Even though the original recipe calls for creaming the butter and sugar, I decided to skip that step, mainly because I have made several batches of muffins before and I felt confident the muffins will turn out just fine without this additional step.

20150517_080431

So, grab yourself the basic ingredients I am sure you already have in your pantry and whip up this recipe in time for a great grab n’ go breakfast.

Perfect Blueberry Muffins

  • Servings: 12
  • Print

Ingredients

Crumb topping

3 tablespoons butter, melted
¼ cup demerara sugar
½ cup all-purpose flour
½ cup oatmeal
¼ cup finely chopped almonds

Muffins
1 cup whole wheat flour
1 cup all-purpose flour
1 ½ teaspoon baking powder
½ teaspoon baking soda
½ teaspoon salt
3 tablespoons butter, melted
¼ cup oil
¾ cup sugar
2 large eggs
¼ cup light sour cream
¼ cup milk mixed with 1 tablespoon lemon juice (set aside for 5 min)
Grated lemon zest from 1 lemon
1 teaspoon vanilla
1 ½ cups frozen wild blueberries
Glaze (Optional)
3 tablespoons lemon juice
1 cup powdered sugar

Preparation
1. Heat the oven to 375F. Spray a 12-cup muffin pan with nonstick cooking spray and set aside. You can also use muffin liners.
2. Prepare the streusel topping by combining all ingredients till crumbly. Set aside.
3. In a large bowl, sift together the flours, salt, baking powder, baking soda and sugar.
4. In a smaller bowl, lightly whisk the eggs. Whisk in the sour cream, curdled milk, oil, melted butter, lemon zest and vanilla.
5. Gently stir in the wet ingredients into the dry mixture just until moistened.
6. Fold in the frozen berries taking care to avoid breaking too many berries. I say this because it is inevitable your batter is going have bluish tint running through it no matter how careful you are! 
7. Spoon the batter into the muffin pan. Don’t level the batter. Top with a generous amount of the streusel topping.
8. Bake the muffins for 5 minutes at 375F. Decrease heat to 350F and continue baking for another 20-25 minutes till the tops are golden and the muffin is cooked through.
9. Remove from the oven, let cool in the pan for 5 minutes. Carefully remove the muffins from the tin and let cool on a wire rack till completely cool.
10. While the muffins are cooling, prepare the glaze (optional) by vigorously stirring together the lemon juice and powdered sugar to a “drippable” consistency (say, like honey).
11. Lightly drizzle over the muffins. Let set.
12. Store muffins tightly covered for up to 5 days.

Strawberry Cheesecke Muffins

20150308_154736

Ahh….the first, albeit distant hint of spring is in the air! At least I want to think so! Yes, I did enjoy the snow fall we had just last week, but this sunshine and warm temps are making me want to spring forward to the warm weather!

20150308_155127

Today was a gorgeous day! Lots of sunshine flooding the house and it is almost too warm to have the pellet stove running! At times like this, my mind wanders aimlessly about the multitude of possibilities to create something wonderful and delicious. I had totally delicious, caramely baked sweet potato, two pounds of gorgeous, juicy, vibrant red strawberries, especially with tons of actual ripe fruit flavor, lots of flour and yeast and other basic baking must haves.

20150308_160052  20150308_160554

So, I decided to whip up two totally different recipes….Strawberry Cheesecake Muffins (yes, had to use up some leftover cream cheese too) and sweet potato yeast bread! Yum! First up…..THE muffins!

20150308_170957

There are three parts to this recipe from Patty’s Food. I made couple of modifications by replacing half the all-purpose flour with whole wheat, reducing the amount of sugar to less than 1/2 cup and replacing half the flour in the streusel topping with old-fashioned oats.

20150308_170832

These muffins are super delicious. Because of the whole wheat in them, they are not as airy as regular muffins, but the flavor of the berries and the subtle citrus flavor from the cheesecake filling are more than enough to want to indulge in another one! And maybe you should!

strawberry muffin

  • Servings: ”12
  • Print

Ingredients:

For the muffin batter
1 cup whole wheat flour
1 cup all-purpose flour
2 teaspoon baking powder
1/4 teaspoon salt
1/2 cup (or less granulated sugar)
1/4 cup oil
1 extra large egg, lightly beaten
1 cup 1% or 2 % milk
2 cups diced sweet strawberries
1 teaspoon vanilla

For the cheesecake filling
4 oz reduced fat cream cheese, softened
grated rind of 1/2 lime or lemon
1/2 teaspoon vanilla
2 tablespoons beaten egg (from above)
3 tablespoons granulated sugar

For the streusel topping
2 tablespoons cold butter
3 tablespoons rolled oats
3 tablespoons all-purpose flour
2 tablespoons granulated sugar

Preparation:
1. Preheat oven to 350F. Line a muffin tray with paper liners and set aside.
2. Prepare streusel topping by combining all the ingredients till they are crumbly. Set aside.
3. Prepare the cheesecake filling by thoroughly combining all the ingredients. Set aside.
4. Begin the preparation of the muffin batter by sifting all the dry ingredients into a bowl.
5. Combine egg, oil, milk and vanilla.
6. Add the dry ingredients to wet mix and gently fold to combine. Do not over mix.
7. Scoop a tablespoon of batter into each of the muffin wells. Drop a dollop of the cheesecake mixture on top of the batter.
8. Divide the chopped strawberries in half. Evenly distribute one half of the strawberries over the cheesecake mix. Divide the rest of the muffin batter evenly among all the muffin cups.
9. Sprinkle rest of the strawberries over the batter, followed by the streusel topping.
10. Bake for 25-27 minutes. Remove from oven and let cool completely.

Super Moist Strawberry Bread

20150124_102748

Strawberries?? In January??? Not great, I know! But, they made it into my kitchen and now I needed to find a way to use them up. My kids, who would normally devour them at the first sight, didn’t seem to care too much for them! Perhaps with good reasons!

20150124_103124  20150124_112734

I could have frozen them for future smoothies, but I had an urge for baking last weekend! My quest for a good recipe landed me at glazed strawberry bread. Sally’s Baking Addiction has bunch of great recipes and this one in particular hit the chord for using up my berries.

20150124_124248

I give her full credit for the recipe, although I did alter it a bit with substituting half the flour with whole wheat and adding in lemon zest in lieu of cinnamon. Also, I don’t like to overdo with the glaze, so my glaze is just a light drizzle.

20150124_124333

Like it is mentioned in the original recipe, this is a very moist strawberry cake bread. I will probably reduce the sugar a bit next time around – perhaps by a 1/4 cup. It is a great recipe to keep for a few days – that is if you can resist the temptation. Although I didn’t particularly detect the flavor getting more intense after a day (could be because my berries were not at their prime), the taste was still great after 3 days. Yes, we managed to keep ourselves in check!

20150124_132404

Do give this a try. It will be worth it!

  • Servings: ”12-14
  • Print

Ingredients:
1 cup all purpose flour
1 cup whole wheat flour
1 teaspoon baking soda
1/2 teaspoon salt
1 large egg, preferably at room temperature
3/4 cup granulated sugar
1/4 cup dark brown sugar
1 cup buttermilk (I made mine using vinegar and milk)
1/3 cup canola oil
2 teaspoons vanilla extract
1 teaspoon grated lemon zest
1 and 1/2 cups fresh strawberries, rinsed and diced into 1/4 inch cubes
1 tablespoon flour

Citrus Glaze (optional)
1/2 cup confectioner’s sugar
1 tablespoon heavy cream
1-2 tablespoons lemon juice
1/2 teaspoon grated lemon zest

Preparation:
1. Preheat oven to 350F. Spray a 9″ x 5″ loaf pan with a cooking spray and keep aside.
2. Combine first 4 ingredients in a large bowl and set aside while you mix the rest of the ingredients.
3. Whisk together the sugars and egg until well combined. Add buttermilk, oil, vanilla and lemon zest.
4. Add the wet ingredients to the dry ingredients and gently fold to combine. Take care not to over mix.
5. Toss the chopped strawberries in a tablespoon of flour. Slowly fold in the berries into the batter, leaving a few to top the batter, if desired (as you can see, I did not do that in my attempt).
6. Transfer the batter to the prepared loaf pan and bake on the middle rack for 50-60 minutes. If you see that the top is getting brown too fast, loosely cover the pan with a piece of foil half way through and continue baking.
7. Test for doneness using a toothpick. Remove pan from oven, let cool for about 10 minutes. Invert onto a wire rack and let cool completely.
8. While the bread is cooling, prepare your glaze. Combine all the ingredients for the glaze till they are smooth and of desired consistency. Once the bread is completely cool, drizzle the glaze over the top.

Tri-Flour Fluffy Pancake


20141213_103246

Happy New Year everyone! It’s been almost a year since I started with this blog! It’s been a whirlwind of an year, wouldn’t you agree! Anyway, as I start the first weekend of 2015, I couldn’t help but start with a post on an all-time favorite breakfast time! Pancakes! Yes, sure, it takes a bit of time in the kitchen, but don’t you think it is so worth it when you dig your fork into the pillowy soft yumminess!

20141213_100358

On those lazy mornings when I do have some time to linger over a good breakfast, I try to alternate between pancakes and waffles. I especially like pancakes because I don’t have to fuss with them like I need to with waffles! Also, I personally think there are countless more recipes for pancakes than waffles! So, for someone who likes frequent changes, pancakes are probably a better choice than waffles – although I guess you could top a basic waffle with a zillion different toppings. 🙂

20141213_103142

So, this recipe is one of those recipes I happened to try out when I was seeking a change from the mundane basic pancake. This one uses an equal blend of whole wheat flour, all-purpose flour and fine yellow cornmeal. The pancake is made pillowy soft with the addition of sour cream and yogurt. And yes, it gets a touch of sweetness from honey!

Feel free to add in grated lemon zest and a squeeze of lemon for a lemony twist to these flapjacks! And top them off with a squeeze of lemon and powdered sugar! Just for this one, please move over syrup!

20150102_060426

Tri-Flour Fluffy Pancakes

  • Servings: 4-6
  • Print

Ingredients
1/2 cup whole-wheat flour
1/2 cup all-purpose flour
1/2 cup fine yellow cornmeal
2 tablespoons honey
1 1/4 teaspoon baking powder
1/2 teaspoon baking soda
1/2 teaspoon salt
3/4 cup fat free plain yogurt
1/4 cup reduced fat sour cream
1 cup 1% milk
2 tablespoons unsalted butter, melted
1 large egg, lightly beaten
1 teaspoon lemon zest and 1 tablespoon lemon juice, optional

Preparation
1. Mix together all the dry ingredients and set aside.
2. In a large bowl, combine all the wet ingredients until well combined (tip: mix honey with melted butter first as yogurt, sour cream and milk will be too cold to incorporate it well)
3. Gently mix the wet and dry ingredients. If using lemon zest and juice, add them now as well. Don’t over mix, batter will be lumpy.
4. Let the batter sit while you preheat a griddle over medium heat.
5. When hot, dab with a touch of butter or spray with non-stick cooking spray. Add about 1/4 cup of batter per pancake and cook for 3 minutes. When the edges look set, flip and cook on the other side for another 3 minutes or so.
6. Stack the pancakes while you cook rest of the batter. Serve warm with your favorite syrup or a squeeze of lemon juice and powdered sugar.

Enjoy!

Ethiopian Injera

20140825_193016

I know, I know, it’s been a long while again since my last post! I really need to get my time management down so I could post here at least weekly. Now that summer is wrapping up (gosh, how did it go by so fast??!), I hope things will get into more of a routine and I will be able to spend a bit more time in the kitchen and online here on my blog.

20140823_145147  20140823_145735

That brings me to this post. There is a little story behind wanting to make injera, sort of a thin and soft pancake with a slight tang. It is very commonly eaten in Ethiopia (and perhaps surrounding nations?). From what I gather from the web, the large pancake is placed on the plate and various meats and veggies and served on top of it. Once you eat the last bit of injera, I gather your meal is officially over. Anyway, back to my story!

20140824_082019  20140825_191014

You see I have never eaten from a food cart, up until this summer. There are about 25 or so food carts that glorify a stretch of street by my office and I decided to give it a try! My first ever experience! And I decided to try Ethiopian food. Yum! When I was asked rice or injera, I quickly chose the latter not knowing how it was going to taste. Since I have not previously eaten Ethiopian food, I am not sure if what I tried that day was truly authentic, but it left me wanting to finally open up the package of teff flour I had sitting in my pantry – still in its sealed packaging!

20140824_081954

Injera is traditionally made from teff, which is a gluten free grain. Recipes using it call for nothing but teff, water, yeast and may be injera starter, much like a sourdough starter. I did a quick version of the dish with just few hours of fermenting and I didn’t like the outcome. It tasted OK, but didn’t have the tangy taste.

20140825_191334

So, I decided to try again, but this time letting it ferment for longer period (2 – 3 DAYS!). I came across a recipe online that had the vibe of being a better product. Since I was too excited to bookmark it, I will try to remember to update this post if/when I find the link again. This time around, it did taste better, but I felt a bit guilty about sacrificing the goodness of teff with the addition of all-purpose flour. My family enjoyed it so I will definitely make it again, but replace most of the all-purpose flour with additional teff or some other grain flour.

20140825_191820  20140825_193016

Serve the injera bread rolled up or as a layer for your curries and salad. It is definitely a good switch from rice! So, I hope you don’t let the long fermentation process discourage you from trying out this recipe! Active work time is probably only about 30 minutes. So, give it a try, I think you will enjoy it!

20140825_193028

Ethiopian Injera

  • Servings: Sixteen 10-inch Injeras
  • Print

Ingredients
1 1/2 cups all-purpose flour
1 teaspoon yeast
1/4 cup warm water
1/2 teaspoon sugar
1 teaspoon baking powder
1 to 1 1/2 cups water
2 cups teff flour
1/3 – 1/2 cup water
Additional water to cover the teff dough

Preparation
1. Day 1 – Dissolve yeast and sugar in the warm water. Let sit for 5 minutes.
2. Scoop the all-purpose flour into a large bowl. Stir in the baking powder. Add the yeast mixture and just enough water to make a pancake consistency batter. Cover with a plastic wrap and set aside to begin the fermentation process.
3. In a medium bowl, add just enough water to the teff flour and make a very thick dough – similar to a pastry dough. Knead for 3-5 minutes. Now flatten the dough in the bowl and add enough water to just cover it. Cover with a plastic wrap and let sit on the countertop till later part of the day.
4. After about 8 hours or so, uncover the teff bowl and mix in the water with the moist dough. It will result in a very thick batter.
5. Add the teff batter to the larger bowl and mix well. Cover the bowl with the plastic wrap and let ferment on countertop till the next day.
6. On the morning of day 2, give the batter a good stir and let ferment again, covered.
7. You can make the injera for dinner on day 2 or place the batter in the refrigerator for cooking it later. (I placed in refrigerator for dinner on day 3).
8. Ideally you will want to cook injera in a large flat frying pan with a lid. In the absence of one, do a makeshift lid like did. Heat a large pan over medium high heat. Rub with a bit of oil and pour about 1/2 cup of batter. Quickly swirl the pan to make the batter spread to a thin pancake. Cover with the largest lid you have and let cook for 2 minutes or so.
9. When cooked, you can either serve it fresh with meats and vegetables on top or you can roll it like a swiss roll and cut into slices like in the picture. You can still unroll the pancake to scoop the curries in.

Enjoy!

Cinnamon-Walnut Bundt Cake

20140525_085639

Coffee cakes are great not just in the afternoon with a cup of coffee or tea, but really anytime you have the craving for something sweet. Having said that, these cakes usually are quite unhealthy with lots of sugar and butter. Although this holds true for this original Cooking Light recipe as well, it does give more than 16 servings (so about 1 teaspoon butter per serving and a tablespoon or so of sugar).

20140525_062515

This cake did keep well for at least 5 days (the time it lasted in our household).

Feel free to substitute pecans for the walnuts. Although the original recipe called for all all-purpose flour, substituting at least 1/3 of it with wheat still tasted great!

20140525_064941  20140525_074716

Lastly, this recipe is really quick to put together. So, while your first pot of coffee is brewing, whip up the cake and sip your coffee while enjoying the aroma of the baking cake! 🙂

20140525_085655  20140525_085711

<

p style=”text-align:left;”>

”Cinnamon-Walnut

  • Servings: ”16″
  • Print

Berry-licious Scones

20140510_084238

Happy Mother’s day ladies! I hope all you moms out there have a wonderful day tomorrow! I know, I know, we are supposed to stay in bed till breakfast is ready and not worry about anyone spilling hot coffee on themselves or burning their fingers in the stove or oven etc. And your kids ordered you to just take it easy and relax the whole day! THE WHOLE DAY! Yikes!

20140510_072324

Am I the only weird one out there that finds it near impossible to just sit still and watch all the rumblings in the kitchen. You know, I am OK with the family CLEANING, DOING LAUNDRY etc., but when it comes to cooking or any kitchen related task, I think I develop some sort of an anxiety. Hmmm….maybe not so much anxiety, but perhaps a longing to be in there, in my kitchen, where I am always ME!

20140510_072729     20140510_073011

Yes, for the love of my kids, I will let them do what they please on Sunday! But I couldn’t help but share with you a pre-Mother’s day recipe that is likely to be a winner! I came across this recipe at http://www.averiecooks.com. I modified the recipe only slightly by replacing half the flour with white whole wheat. I am starting to fall in love with KAF white whole wheat!

20140510_080415  20140510_082235  20140510_084547

Scones are an indulgence of mine! I especially like the cinnamon-pecan and chocolate chunk ones! Yum. But in honor of Mother’s Day, I wanted to make a batch with berries! Personally I think there is something about Mother’s Day and BERRIES! These berry-licious scones are light, almost muffiny and delicious! I hope you get to make them and enjoy! WARNING: The hardest part of this recipe is waiting for the scones to cool so you could drizzle the lemon glaze and devour it in one inhale! 🙂

20140510_085801  20140510_084238

Berry-licious Scones

  • Servings: 8
  • Print

Ingredients
1 cup all purpose flour
1 cup white whole wheat flour
1/2 cup granulated sugar
1 tablespoon baking powder
1/4 teaspoon salt
1/2 cup unsalted butter
1 large egg
1/2 cup light sour cream
1 tablespoon grated lemon zest
1/2 teaspoon vanilla essence
1 heaping cup mixed berries of your choice (fresh or frozen)
2 tablespoons of coarse or turbinado sugar for sprinkling on top

Lemon Glaze
1/2 cup confectioners’ sugar
1 tablespoon (slightly less) lemon juice

Preparation
1. Preheat oven to 400F. Line a baking sheet with parchment paper and set aside.
2. Mix the flours, sugar, baking powder and salt in a large bowl.
3. Using two forks or pastry cutter, incorporate the cold butter into the dry mix (just like how you prepare a pie crust). Once the butter is sufficiently incorporated, the flour mixture will resemble very coarse crumbs. (This is one of the least favorite tasks in the kitchen for me – for no good reason!)
4. Lightly beat the egg in a small bowl. Stir in the sour cream, vanilla and lemon zest.
5. Fun begins. Gently stir in the wet ingredients into the dry mix just until barely incorporated. Like with muffins, pancake batter etc., over mixing will result in tougher end product. The “dough” will be rather sticky and wet, but avoid the temptation to grab more flour for a CPR!
6. Fold in the berries. If using frozen berries, do not thaw them prior to using.
7. Turn the dough onto a floured work surface (use about couple of tablespoons of flour for the surface) and gently knead to bring the dough together. Just a few movements. If the dough is too sticky to form into a general circle or square, add another tablespoon of flour, but no more.
8. Pat the dough into a circle about ….diameter and ….thick. Alternatively you can form the dough into a square …x….. For circle, cut it into 8 wedges. For square, cut initially into 4 squares and each square diagonally into 2 triangles. You didn’t know you were going to use geometry here, did you? 🙂
9. Using a spatula, transfer the scones to the parchment lined baking sheet. Sprinkle with turbinado or coarse sugar if desired. Bake the scones for about 15-18 minutes till the top is lightly golden.
10. Remove from oven, let cool on the baking sheet for about 5 minutes before moving them to a wire rack to cool completely.
11. GLAZE: Mix the confectioner’s sugar and lemon juice. Drizzle about a teaspoon on top of each scone. Let the glaze set prior to serving.

ENJOY!

Quick and Easy Naan Bread

20140501_105501

Everyone that has ever tried or know something about Indian food knows naan. It’s one of those quintessential item found on almost any Indian restaurant menu. Typically, naans are cooked in extremely high heat clay pot “ovens” giving them the characteristic texture and flavor. Having said that, can a version of the flatbread be made in a home kitchen for those of us that don’t have access to a tandoor oven? Of course, and I am going to share an easy recipe here.

20140501_065044  20140501_065428

You will find many naan recipes online – using different flours, with or without egg, with or without yogurt, ghee (clarified butter) etc. I have had my own versions – with/without egg, using all-purpose flour, combination of all-purpose and whole wheat, bread flour etc. I made this recipe for few guests who prefer the taste of all-purpose flour. Feel free to replace half the flour with whole wheat without sacrificing the texture or taste. Also, since this recipe does not use any eggs, it is good for people who don’t/can’t eat eggs.

20140501_070418

A whole cup of yogurt used in this recipe gives the naans a slight tang without being overpowering. Lastly, you can mix in 1 – 2 tablespoons of dried herbs (or about 1/4 cup of chopped fresh herbs) such as mint, cilantro or even green onions or finely minced garlic or curry powder to the dry mix before adding the liquids. I used a mix of dried herbs in mine and have prepared past batches with garlic (yum!).

20140501_103153

These naans can be prepared ahead of time, cooked and frozen. Just dab with a pat of butter and reheat just before serving. Enjoy warm naans with curries, or as a pizza crust, pita etc.

20140501_103940

Quick and Easy Naan Bread

  • Servings: 12 naans
  • Print

Ingredients
5 cups all-purpose flour (or half whole wheat and half all-purpose)
1 teaspoon baking powder
1/2 teaspoon baking soda
1 1/2 teaspoon salt (I used kosher)
2 tablespoons butter, melted (or ghee)
1/4 cup warm water
1/4 cup warm 1% milk
3/4 teaspoon active dry yeast
1 tablespoon honey
1 cup fat free plain yogurt
2 tablespoons crushed dried herbs (I used mint and fenugreek leaves)
Oil for coating the bowl to proof the dough
Additional ghee (clarified butter for cooking the naan), optional

Preparation
1. Mix all dry ingredients (flour through salt) in a large bowl or large, flat container.
2. Stir together warm water, milk, melted butter/ghee, yeast and honey.
3. Add yogurt to the dry ingredients and stir to combine.
4. Add liquid mixture and form into a dough. Turn onto a floured surface and knead for 5-10 minutes till an elastic dough forms. If the dough is too sticky, add a tablespoon or so of flour, but no more.
5. Coat a large bowl with oil and place dough in it. Let proof in a warm place (or in a turned off oven) for 1-2 hours till the dough doubles in size.
6. Break dough into 12 equal size portions and flatten each on a floured surface into an oblong shape (or a circle if you prefer) about 1/4 inch thick.
7. Heat a cast iron pan or a non-stick pan over medium high heat. Cook naans one at a time for 2-3 minutes on each side. Brush with melted butter or ghee and store covered in a kitchen towel.
8. Serve the naans with your favorite curry or make as a pizza or a pita wrap. Enjoy!