Bibimbap-Style Beef Dinner

20140627_120929

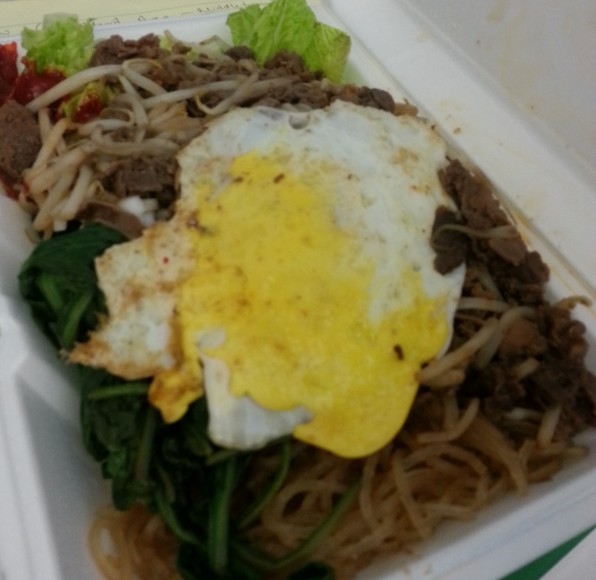
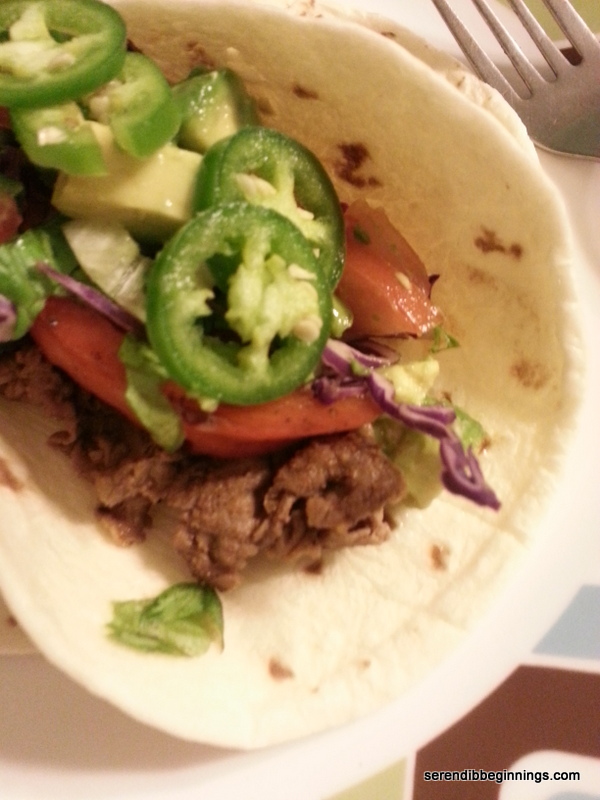
OK, so I debated a while about what to name this recipe, which was inspired by a lovely lunch I got from a food cart last week! It was made by someone who has been making it all his life! So, although the idea is similar, I couldn’t bear to belittle the authenticity of the dish by calling it bibimbab. Hence the name you see here! “Bibimbap-Style Beef Dinner”

20140629_184812  20140629_184800

For ingredients, I guess you could pretty much use a variety of your favorite veggies (raw, steamed or sautéed) and stir-fried beef or pork with steamed rice and cooked seasoned glass noodles. Going back to my food cart reference, I almost didn’t order the bibimbap because the dish was topped with a soft-set egg. I am not a runny yolk person. So,  yes, I was a coward and ordered my egg fully cooked.

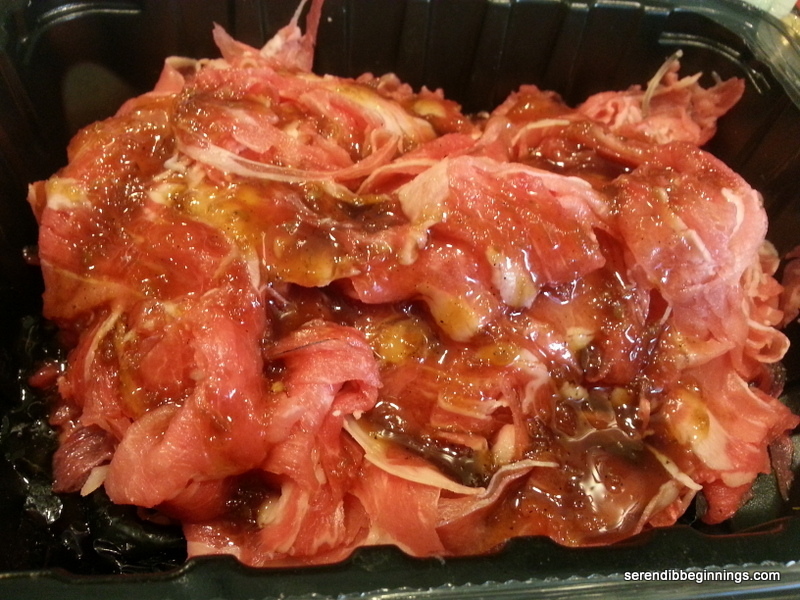
For this recipe, I used a small bunch of spinach and carrots for veggies. I wish I had bean sprouts, maybe next time! Spinach was just boiled in its own liquids and carrot was briefly sautéed in a small amount of oil. I seasoned the shaved beef in some Korean marinade and sautéed in small batches.

20140629_184747

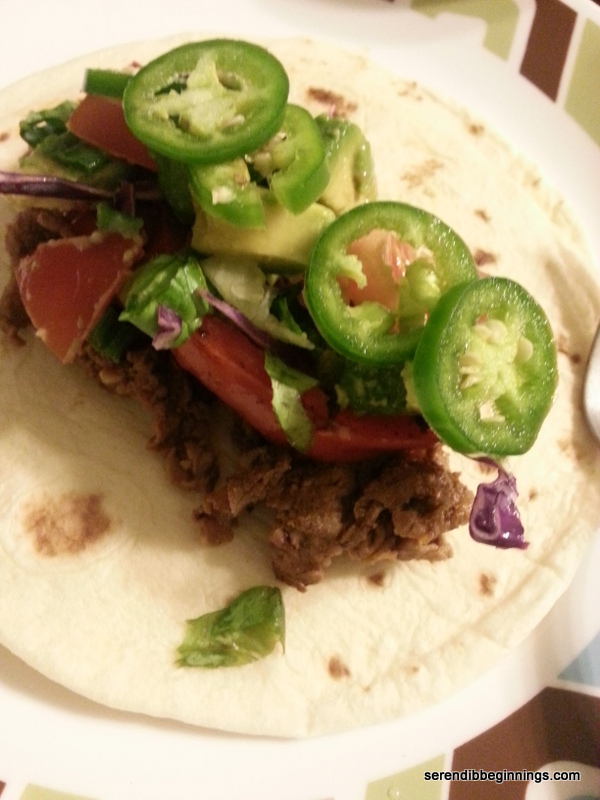
Drizzle a bit of toasted sesame oil and sprinkle a bit of toasted sesame seeds on your served dish and you will have yourself something that may just satisfy your craving for bibimbap until your next visit to a Korean restaurant or a food cart! 🙂

bibimbap

Bibimbap-Style Beef Dinner

  • Servings: 4
  • Print

Ingredients
1/2 lb shaved beef
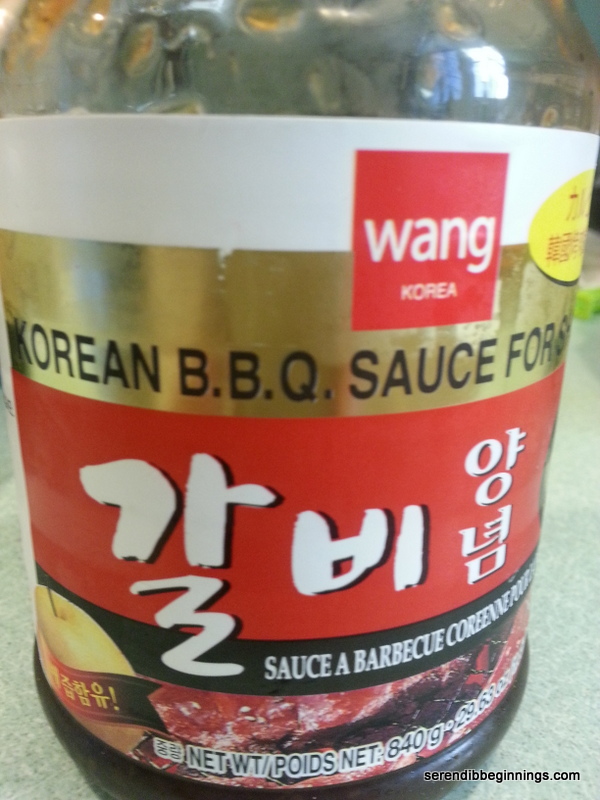
1/4 cup Korean meat marinade (bottled)*
1 small bunch fresh spinach
1 teaspoon soy sauce
2 medium carrots, julienned
2 cups lettuce leaves, torn into bite size pieces
1 tablespoon toasted sesame seeds
3/4 cup cooked glass noodles
2 tablespoons toasted sesame oil
1/2 cup bottle kimchi, optional
1 jalapeno, sliced thin, optional
1/4 cup sliced red onions, optional
1 cup cooked rice
4 eggs

Preparation:
1. Season the beef with the meat marinade and set aside while you prepare the vegetables.
2. Prepare the glass noodles according to package directions. Add 1/4 teaspoon of toasted sesame oil and 1 teaspoon of Korean marinade. Set aside.
3. In a medium pan, steam the spinach leaves. Drain off the liquid and season with 1 teaspoon low-sodium soy sauce. Set aside.
4. Wipe the pan and add a teaspoon of oil. Saute the carrots for 2 minutes till they are crisp tender. Season with salt, if desired. Set aside.
5. Heat the pan over high heat and add a tablespoon of oil. Saute half the meat for about 3 minutes till it is cooked through. Remove to a platter and repeat with the remaining meat.
6. Pan fry eggs according to your taste.
7. Divide the meat, vegetables, rice and noodles among 4 plates. Add kimchi, jalapeno and onions, if desired. Lastly, top with an egg and drizzle a few drops of toasted sesame oil over the vegetables and meat.

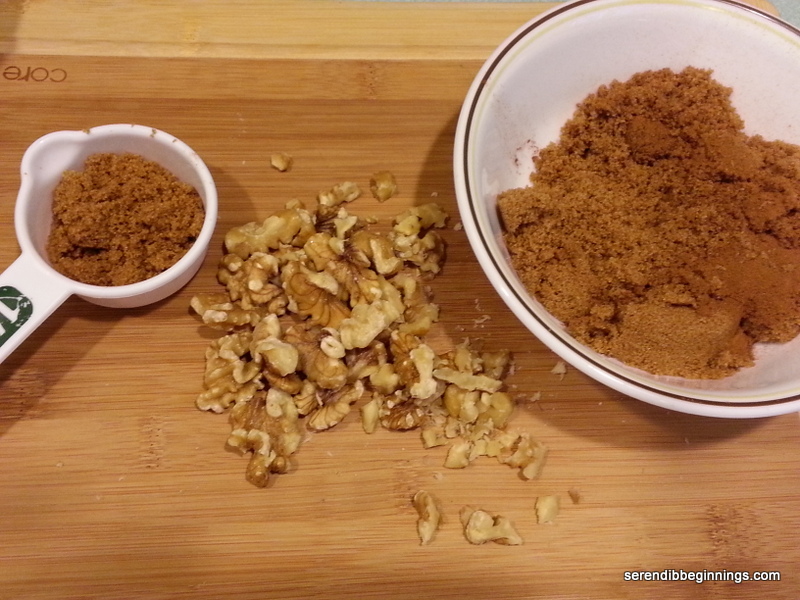
* NOTE: If Korean barbeque sauce is not available, feel free to substitute equal amount of light soy sauce, 1 clove of minced garlic and 1 tablespoon dark brown sugar (or palm sugar)

Broiled Salmon with Cool Yogurt-Dill Sauce

20140623_190233

Salmon is a great fish for broiling, poaching, baking, pan-frying……pretty much any way you want to prepare it! Although it is a great tasting fish by itself or with just a touch of salt and pepper, it does transform into something extraordinary when you add seasoning and spices! I love to make it with an Asian twist with soy sauce, ginger and sesame! That’s usually a frequent go-to recipe! But, I wanted to try something more summery for dinner the other night.

20140623_190106     20140623_190901

A simple salt and pepper seasoned salmon broiled to perfection topped with a cool yogurt-dill sauce with notes of garlic and lemon juice! Yum, I know!

20140623_192758

Since this happened to be a weeknight dinner I scrambled to put together in few minutes, I forgot to take the many pictures I usually do with my recipes! I apologize! But, I hope the picture of the served dinner just in time before I devoured it makes up for it! 🙂

20140623_192147

Although salmon is the main character, I think the supporting role wins by leaps and bounds! Yeah, I am talking about the yogurt sauce that you whip up in less than 5 minutes!

20140623_192834

Broiled Salmon with Cool Yogurt-Dill Sauce

  • Servings: 4
  • Print

Ingredients
1-lb skinless salmon fillet
dash of salt
freshly ground pepper to taste
1 teaspoon extra virgin olive oil
1/2 cup plain fat free yogurt
1 tablespoon Dijon mustard
1 tablespoon honey
3-4 tablespoons chopped fresh dill
1 clove of garlic, finely minced
Juice from 1/2 lemon

Preparation
1. Preheat broiler at high (525F); Line a baking dish with aluminum foil and place the salmon filet in it.
2. Sprinkle salt and pepper on salmon filet; Drizzle the olive oil on top.
3. Place the salmon pan about 6 inches from the broiler and broil for about 15-20 minutes till the salmon is cooked through. This will depend on the thickness of the fish and heat distribution. Fish should flake easily with the fork when done.
4. While the salmon is cooking, combine rest of the ingredients in a small bowl and set aside in the refrigerator till ready to serve.
5. When salmon is done, serve it immediately topped with the sauce.

NOTE: If you don’t like your sauce sweet, feel free to add a bit of crushed red pepper or reduce the amount of honey.]

Berry Delicious Strawberry Sauce

20140621_170213

You can spoon it over a scoop of vanilla ice cream, drizzle over freshly made waffles, use it to dunk pancake bits cooked in ebelskiver pan or use it in whatever else you like! I am talking about a simple yet berry delicious strawberry sauce!

20140622_073742

So, you already saw my post about my first ever strawberry preserve recipe! So, here is another recipe using the gorgeous berries! Feel free to cut down the sugar as much as you want – less sugar you use, chunkier the sauce will be, but I promise you, it will still be super delish!

20140622_073706  20140622_073848  20140622_073958

All you need for this recipe is a good amount of fresh berries, bit of sugar and a splash of water! Yes, just three ingredients!

20140622_081539

Berry Delicious Strawberry Sauce

  • Servings: About 1 1/4 cups
  • Print

Ingredients
2 heaping cups fresh strawberries, washed, hulled and patted dry
1/4 cup sugar
1/4 cup water

Preparation
1. Combine sugar and water in a small pan and bring to a simmer.
2. Add 1/2 the strawberries to the pan to lightly soften the berries. Scoop the berries out of the sugar syrup and set aside in a small bowl.
3. Repeat with remaining berries.
4. Bring the syrup to a low boil and continue cooking till it reduces to a syrupy consistency. If any juices accumulate in the bowl with the berries, strain into the simmering sauce.
5. When syrup is your preferred consistency, turn the heat off and pour over the berries.
6. Chill the sauce in the refrigerator till ready to use.


Easy Summer Berry Preserve

20140622_205233

Warm weather is here and that means strawberries! Bright, red, juicy berries so full of flavor and nutrition that you can enjoy in many ways! That brings me to canning!

I have long admired the talent, passion and patience of folks who make it their summer mission to not only source season’s freshest produce, but also take the time to prepare and preserve them for months to come! When we visited our friends last winter, we had the opportunity to sample some homemade jams and preserves! They tasted so pure and delicious! Best of all, they were free of commercial preservatives and had significantly less added sugar. My friend insisted it was so simple to make! OK!

Since then, I sort of dabbled with the thought of trying my hands at making some homemade jam myself but kept putting it off! So, when the strawberry season came around, I just had to take the plunge! So, we went to the local farm to pick some berries. Ahh….what an enjoyable experience! From toddlers to grandparents, it was an afternoon of fun for everyone!

20140621_173134

After a bit of crawling around on piles of hay and red fingers, I managed to keep the family working long enough to pile on about 10 lbs of berries! That was the easy part! Seriously! The hardest part is setting aside the time to sort through, rinse, hull, blot and prepare the fruits!

20140621_170213

Since this is the first time making preserves, I wanted to make just enough to fill a few 16-oz jars!

After seeing how much added sugar is in a traditional homemade or store bought jam/preserve, I wanted to control the amount of sugar in my recipe. I heard from a fellow shopper in the pectin aisle that stevia has a weird taste and flavor and she uses raw turbinado sugar to reduce the amount of added sugar. After a bit of contemplation and a quick Google session, I decided to try a combination of few sweeteners – raw turbinado, stevia and regular refined sugar! So, after grabbing a small jar of pectin (for low/no sugar recipes), a large bag of stevia (swallow) and a pouch of turbinado, I raced to get a few canning jars! Armed with a dozen Canning jars, I started to feel like a pro!

20140622_202822         20140622_202853

Once you clean and prepare the fruits (or if you are lucky, recruit family and friends to do it for you!), rest of the process is very quick and easy.

After a few minutes of cooking, you are ready to scoop into sterilized jars and seal for later! See, I told you the cooking process is easy!

20140622_203526

NOTE ABOUT TASTE/TEXTURE: After opening many a jar of store-bought jelly and preserves, the look of this preserve closely resembles other low-sugar versions you get at the store. It’s not as “glossy” looking as regular sugar versions, but I didn’t mind it much. It tastes great and most importantly it was a winner with my kids!

20140622_205246

This recipe is a winner even for the most challenged cook! So, give this a try and see for yourself! You still have a few days left of the strawberry season in your local area, so make it a berry fun weekend!

Easy Summer Berry Preserve

  • Servings: 3 16-oz jars
  • Print

Ingredients
4 cups of crushed fresh berries
1/2 cup refined sugar
1/2 cup raw turbinado sugar
1/2 cup stevia
3/4 cup water or strawberry juice
6 tablespoons fruit pectin for low/no sugar recipe
1 teaspoon butter, optional
3 16-oz canning jars with lids

Preparation
1. Wash the canning jars and the two-part lids with dish soap and warm water. Bring a large, wide pan of water to a low simmer and place the jars and the lids. Keep them in the water till the preserve is ready to be poured in.
2. Scoop the crushed berries, sugars and water into a large, heavy bottom pan and place over medium heat.
3. Add the pectin, while continuously stirring so as not to allow the pectin to clump up.
4. Stir in the butter. Increase the heat to medium high and bring the mixture to a rolling boil.
5. Continue to maintain the boil for 2-3 minutes and turn off heat.
6. Using tongs, carefully remove one jar at a time and spoon (or funnel) in the hot preserves, leaving about 1/4″ – 1/2″ space at the top. Using tongs, remove the flat lid from the water and place on the jar. Wipe away any spills from the rim and sides and seal using the lid rings. Repeat with remaining preserves.
7. Place the filled jars into a water bath with boiling water for 10 minutes. Turn off heat, wipe down the jars and place in the refrigerator.
8. Check for seal after about 24 hours. Lid should not have any bounce when you press on top. Your bottled preserves are ready for storage or giving away as gifts.

Creamy ricotta sausage pasta

20140610_201301

Hey guys, I have a question for you…what is the most versatile thing in your pantry? Hmm…so you too think it is pasta! Oh, good, then we are on the same page!

20140610_193407

What is not to love about it, right? It cooks so fast, could be made into a both cold and hot dishes, tastes great with or without meat and comes in many shapes, sizes and varieties! So, yes, I guess they are one of the best things to have around in the pantry, right!

20140610_193626  20140610_193909

Anyway, I am glad I had one of those boxes in the pantry the other night! Some cooked pasta tossed with sausage, ricotta, tomato sauce and few other ingredients made for a wonderful dinner after a busy day at work!

20140610_194402

Adding vegetables into this dish makes for a true one-pot dish that provides a well-balanced meal. Kids will likely eat right through without realizing they are actually eating vegetables! A win, right!

20140610_201333

Why don’t you try it out and share your comments!

Creamy ricotta sausage pasta

  • Servings: 4
  • Print

Ingredients
1/2 package of your favorite pasta, cooked according to directions
4 links of reduced fat sausage of your choice, sliced 1/4 inch thick
2 tablespoons olive oil
1/4 cup chopped onions
3 large cloves, finely minced
2 cups thinly sliced kale
1 cup sweet peppers thinly sliced
1 cup tomato sauce
2 tablespoons basil leaves, thinly sliced
1 teaspoon crushed red peppers
1/4 teaspoon crushed oregano
salt and pepper to taste
1/2 cup part-skim ricotta cheese

Preparation
1. Heat a large non-stick frying pan and lightly brown the sliced sausages.
2. Remove the sausages and keep aside. In the same pan, add the olive oil and cook the onions and garlic for 2 – 3 minutes.
3. Add the veggies and continue cooking for about 5-7 minutes. Add back the sausage.
4. Stir in the tomato sauce, herbs, crushed red peppers, salt and pepper and simmer for 5 minutes.
5. Gently stir in the ricotta cheese. Toss in the pasta.
6. Serve immediately sprinkled with a bit of mozzarella or parmesan!

Creamy and Spicy Southwestern Chicken Chili

20140609_190218
If you have read this blog before, you know I love chili! I make it with beef, ground turkey or chunks of chicken – each one with its unique taste of the moment! This particular chicken chili is made using leftover barbequed chicken rubbed with chipotle chili seasoning and garlic and I must say it was pretty darn good. Now that the warm weather is here to stay at least for the next few months, I thought this could be a recipe to use up your leftover chicken from your backyard barbeque.

20140609_183032

This recipe really doesn’t take long to put together at all and it takes very few ingredients, especially because the chicken was well seasoned. If you don’t have spiced leftover chicken, you can substitute any grilled chicken (as long it was not basted in bbq sauce) and add a bit of southwestern or chipotle seasoning.

20140609_183101

I added beans and some veggies to make this more wholesome. Feel free to toss in diced sweet bell peppers, carrots, celery etc. along with your favorite beans to make this filling and nutritious.

20140609_185748

Stirring in some sour cream towards the end of the cooking makes this dish creamy and a bit tangy which adds to the complexity of the taste. I hope you give this a try!

20140609_190407

Creamy and Spicy Southwestern-Style Chicken Chili

  • Servings: 4
  • Print

Ingredients
2 cups diced/shredded leftover cooked spiced chicken
1 cup diced celery
1/2 cup diced carrots
1/2 cup diced sweet peppers
1 cup thinly sliced kale, stems removed
1/4 cup finely chopped onions
1/2 jalapeno, finely chopped (optional)
2 cloves garlic, finely minced
2 tablespoons olive oil
1/4 cup light sour cream
1 8oz can tomato sauce
1 can kidney beans, drained and rinsed well
Additional chipotle pepper rub or other southwestern seasoning to taste (optional)
1/4 cup chopped cilantro

Optional toppings
Grated Mexican blend cheese
Diced avocado
Crushed tortilla chips
Sour cream

Preparation
1. Heat olive oil in a medium pot. Add onion and garlic and cook for 2-3 minutes.
2. Add celery, kale, carrot and peppers and continue cooking for 5 minutes.
3. Add the chicken, additional seasoning if desired, beans and tomato sauce and simmer for 10-15 minutes over medium heat.
4. Adjust seasoning and remove from heat.
5. Serve immediately with your favorite toppings.

(See, I told you it is an easy recipe!)

Easy Weeknight Beef Fajita


20140604_190829

No matter how well you think you planned for the week ahead, don’t you have those days when all that so-called planning amounts to nothing? Yesterday was one of those days for me! 6:40pm and no idea what to serve for dinner! Hmph, not a good feeling.

20140604_203023

As usual, I first do a mental inventory of what ingredients I had on hand that could be quickly transformed into a meal that the family will enjoy. Yes, I had chicken in the freezer, but I didn’t have the patience to deal with the defrosting process! Ahhh…..then I reached for the shaved beef. Really, I don’t think they are not all that bad for you! Their fat content is significantly lower than a typical burger and they are so versatile.

20140604_190348

You could transform this super thinly sliced meat into a cheesy Philly steak sandwich, spicy fajitas or a stir fry with Asian veggies. But this time around, I gravitated towards a spicy fajita with the typical toppings – a simple avocado/tomato relish, shredded lettuce and purple cabbage (yes, yes, purple cabbage is one of my obsessions now a days, so I throw them fresh into whatever I can!), salsa, sour cream and …..no cheese (ran out of cheese! :-O).

20140604_191047    20140604_192335

With minimal preparation and immense amount of flavor and well-balanced nutrition, this weeknight dinner ended up being a big success. So, what not to love about it! C’on, give it a try – I promise you will appreciate the ease of it all!

20140604_202939

Easy Weeknight Beef Fajita

  • Servings: 4
  • Print

Ingredients
1 lb package shaved beef
1 packet low-sodium fajita seasoning (or make your own)
1/2 teaspoon paprika
1 small red pepper, sliced into long, thin strips
2 tablespoons olive oil, divided
1 avocado
1 plum tomato
1 green onion
1 tablespoon lemon juice
pinch of salt
1/2 cup thinly sliced romaine
1/2 cup thinly sliced red cabbage
8 small flour or corn tortillas, warmed
1 jalapeno, thinly sliced, optional
Bottle salsa, optional
Sour cream, optional

Preparation
1. Begin by preparing the avocado-tomato salad. Peel and dice the avocado. Combine with diced tomato and thinly sliced green onion. Toss with the lemon juice and set aside.
2. Heat one tablespoon olive oil in a skillet over high heat and cook the beef till cooked through. Sprinkle the taco seasoning over the meat and continue cooking for additional two minutes. Remove the beef onto a serving platter and keep warm.
3. Wipe down the pan and add the remaining oil. Reduce heat to medium-high and stir fry the red peppers till lightly browned. Sprinkle with a pinch of salt and transfer onto the beef.
4. Warm the tortillas in the microwave (30 seconds) or in a warm skillet. Serve immediately with the meat and all desired toppings.


Cinnamon-Walnut Bundt Cake

20140525_085639

Coffee cakes are great not just in the afternoon with a cup of coffee or tea, but really anytime you have the craving for something sweet. Having said that, these cakes usually are quite unhealthy with lots of sugar and butter. Although this holds true for this original Cooking Light recipe as well, it does give more than 16 servings (so about 1 teaspoon butter per serving and a tablespoon or so of sugar).

20140525_062515

This cake did keep well for at least 5 days (the time it lasted in our household).

Feel free to substitute pecans for the walnuts. Although the original recipe called for all all-purpose flour, substituting at least 1/3 of it with wheat still tasted great!

20140525_064941  20140525_074716

Lastly, this recipe is really quick to put together. So, while your first pot of coffee is brewing, whip up the cake and sip your coffee while enjoying the aroma of the baking cake! 🙂

20140525_085655  20140525_085711

<

p style=”text-align:left;”>

”Cinnamon-Walnut

  • Servings: ”16″
  • Print

Whole Wheat Crepes with Nutella and Berries

20140525_073524

Crepes are a favorite breakfast item in our household. They are very easy to make and can be tailored to each person’s taste with the addition of their favorite fillings and/or spread. These crepes are especially good (and good for you) because they are made with white whole wheat and 1% milk.

20140525_070704

I usually go for Nutella or sweetened cream cheese for the spread and lots of fresh berries, berry compote etc. for the filling. Here is a tip about cream cheese – make your own sweetened cream cheese to limit the amount of sugar. It just takes a tablespoon or so of confectioner’s sugar to sweeten about 1/2 cup of softened cream cheese. Feel free to grate a bit of lemon zest into it with a dash of vanilla!

20140525_073805 20140525_073409 20140525_073423

Crepes can be enjoyed at room temperature. That means, you can cook all the crepes first and then, finish them off later with the spread and filling. Perhaps, you could just set the crepes with the spread(s) and filling(s) and have everyone compile their own! 🙂

Whole wheat crepes with fresh berries

Ingredients
1 cup white whole wheat flour
1 cup 1% milk
3/4 cup water
1 teaspoon vanilla
3 eggs
1/2 teaspoon vanilla extract
1 tablespoon melted butter
1 tablespoon honey
Extra butter or non stick spray for cooking the crepes

Spread
Nutella
Sweetened cream cheese

Fillings
Fresh berries
Banana
Sautéed apples
Mixed berry compote

Preparation
1. Thoroughly blend all of the crepe ingredients through honey in a blender. I used a handheld mixer to whisk the mixture.
2. Let the batter sit for 15 minutes so the air bubbles disappear.
3. Heat a small sauté or frying pan over medium high heat. Either melt a dab of butter or spray with a non-stick spray.
4. Ladle about 1/4 cup of batter and quickly swirl to coat the bottom.
5. Let cook for a minute and flip to the other side. Continue cooking for about 30 seconds or so.
6. Remove crepes to a plate and keep aside till ready to assemble.
7. When ready to assemble, spread a bit of nutella or cream cheese. Fill with fruits or compote of choice or just enjoy plain with just the spread.
8. Finish off with a dusting of confectioner’s sugar.