20151017_204609

First and foremost, I must apologize to anyone that visits this blog for my extreme tardiness in posting new recipes lately. I won’t lie – I truly, honestly, sincerely felt so guilty not doing it, but something or the other kept me away. So, here I am, trying to keep up my promise to post the recipe for the simply wonderful and autumny apple muffins that I had posted a picture of earlier this week!

20151017_200721  20151017_200938

Something about fall and the crisp air! As the temperature drops, apples take on a whole new dimension! They somehow make fall the best season and they also try to comfort you into believing winter wont be that terrible after all. I have tried to play around with several recipes, but wanted to try a recipe that not only looked great, but also tasted wonderful! That’s when I stumbled upon this recipe on Sally’s Baking Addiction. She has great recipes on her site – so if you are looking for some comfort recipes, you should visit her site. 🙂

20151017_201535  20151017_204212

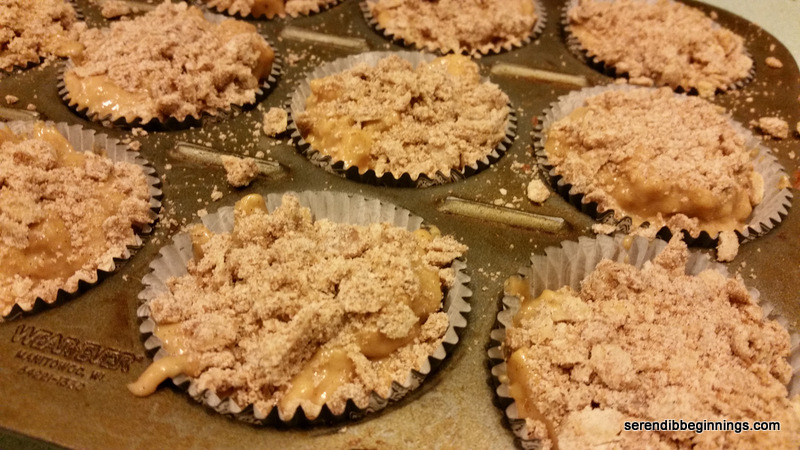
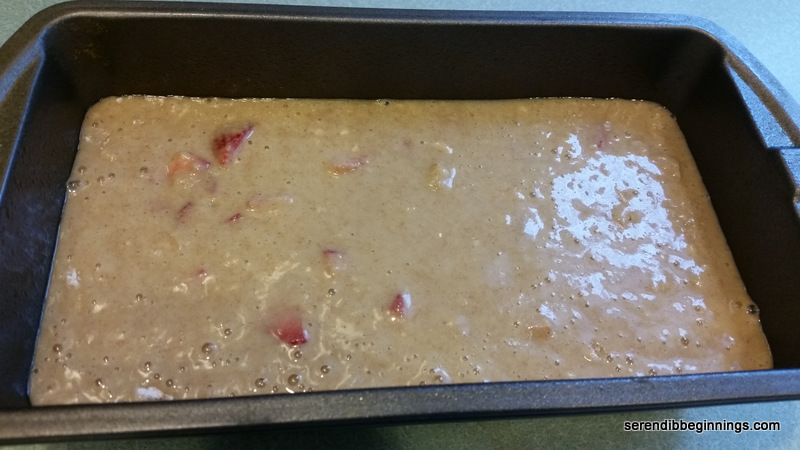
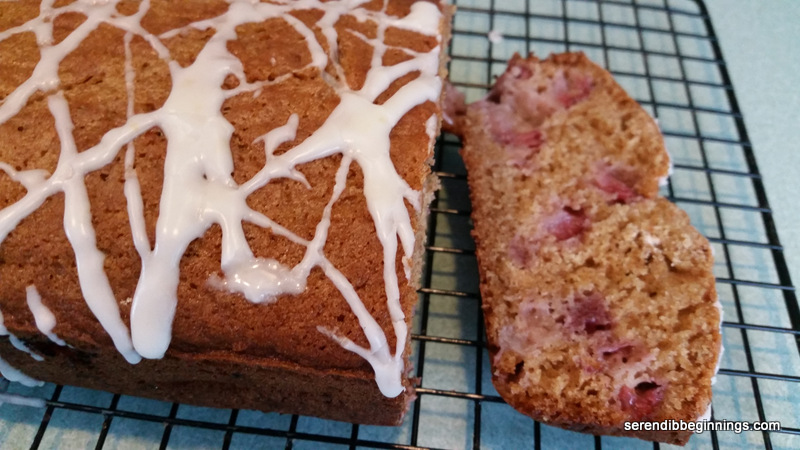
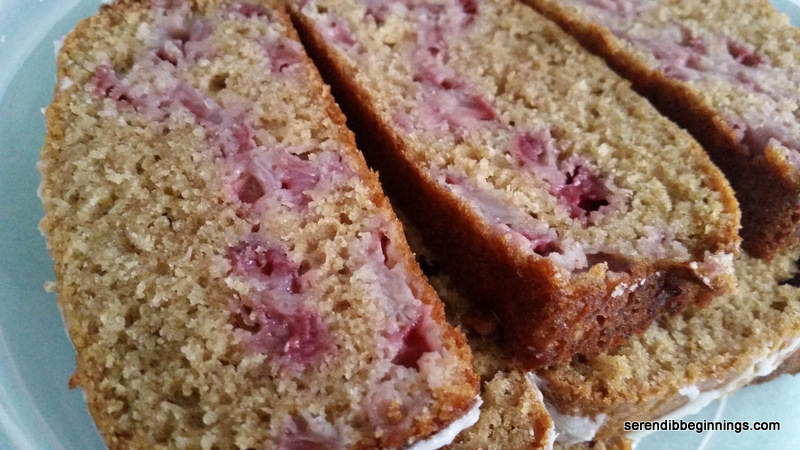
So, back to this recipe…true to what she mentions in her recipe, these muffins do rise well, and taste so cake-like and full of apple goodness. I did use some apple cider in the wet ingredients per one of the reader comments and skipped the glaze. Honestly, I don’t think the glaze is really needed except for that picture perfect oozy look! Yum!

20151020_061235

Whip up these muffins this weekend and watch them disappear!

20151020_061331

Autumn Apple Muffins

  • Servings: 12
  • Print

Ingredients
Muffin Batter
1/2 cup unsalted butter, softened to room temperature
1/3 cup dark brown sugar, packed
2 tablespoons granulated sugar
2 large eggs at room temperature
1/2 cup plain, fat free Greek (or regular) yogurt
1 teaspoon ground cinnamon (better the quality, better the cinnamony goodness)
2 teaspoons vanilla extract
1 cup white, whole wheat flour
3/4 cup all-purpose flour
1 teaspoon baking soda
1 teaspoon baking powder
1/2 teaspoon salt
1/4 cup apple cider
2 small Gala apples (or any firm kind), peeled and chopped into 1/4 inch cubes

Crumb Topping
1/4 cup packed dark brown sugar
1/4 cup rolled oats
1 Tablespoon granulated sugar
1 teaspoon ground cinnamon
1/4 cup unsalted butter, melted
1/4 cup all-purpose flour

Preparation
1. Preheat oven to 425F. Line a muffin pan with 12 liners and set aside.
2. Prepare the crumb topping: Combine all ingredients and gently toss together till they are crumbly. Set aside (wow, that was easy!)
3. Using a handheld mixer, cream butter. Add the sugars and beat for another 2-3 minutes.
4. Beat in the eggs, yogurt, ground cinnamon and vanilla extract. Scrape down the sides and bottom of the bowl and set the bowl aside.
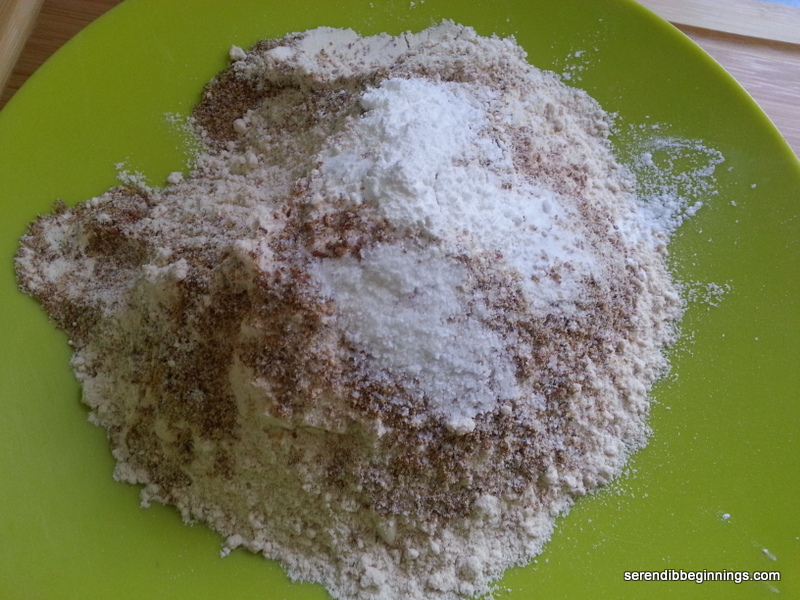
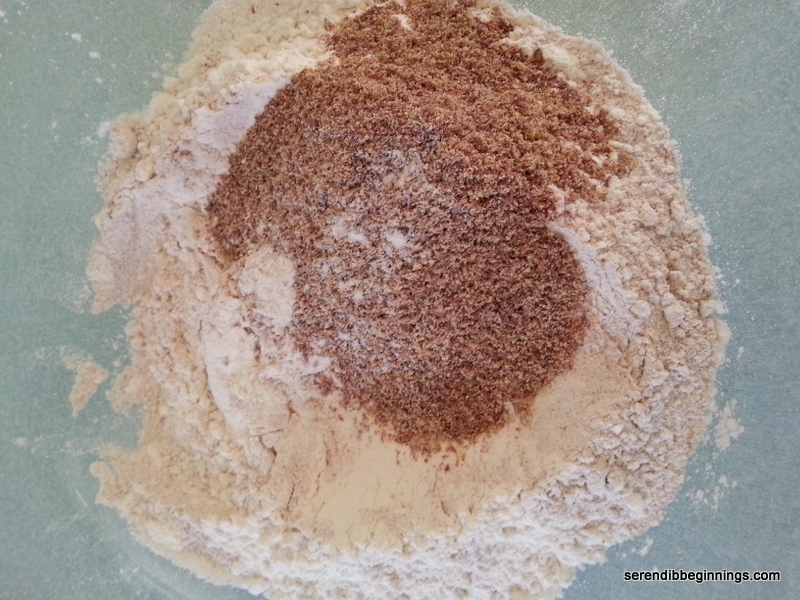
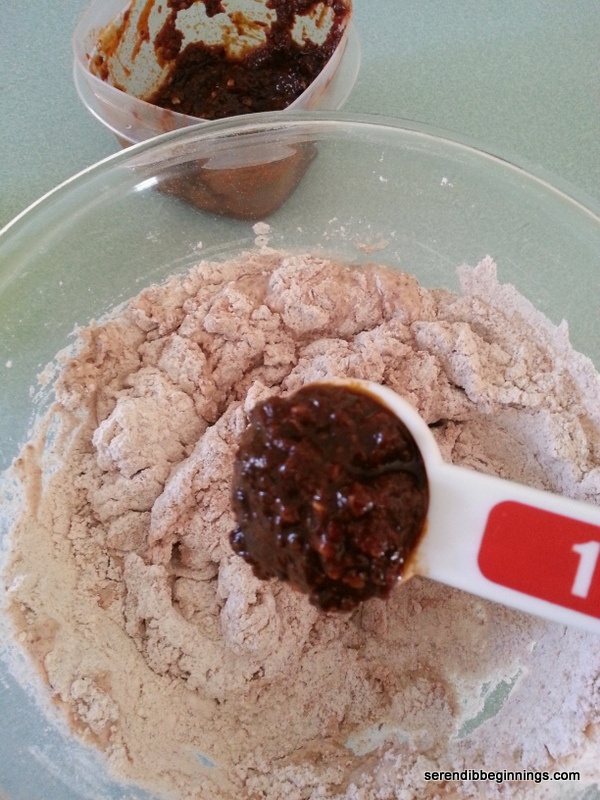
5. In a separate bowl, toss together the flours, baking soda, baking powder and salt. Pour the wet ingredients into the dry ingredients and slowly mix with a rubber spatula or whisk. Add the milk, gently stirring to mix in. Small lumps are OK. Fold in the apples.
6. Spoon the muffin batter evenly between the 12 muffin cups. The tins will be quite full, which is great for making tall-domed muffins!
7. Distribute the crumb topping evenly over all the batter, pressing lightly with your hands so the crumbs will stick to the baked muffins.
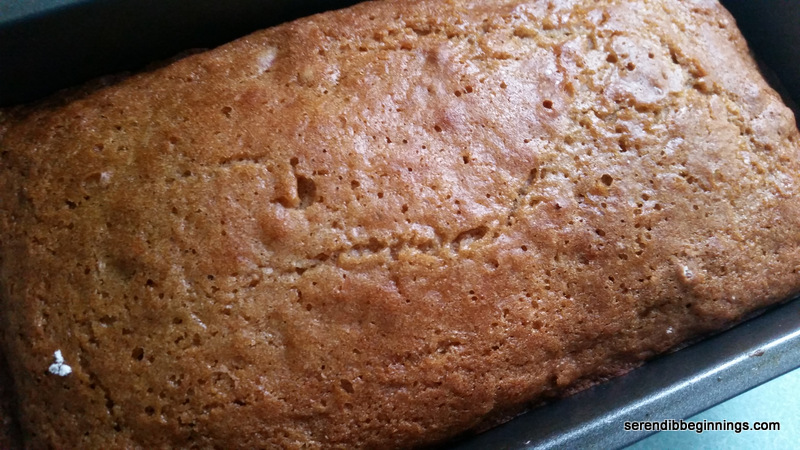
8. Bake the muffins for 5 minutes at 425°F, then reduce heat to 350F and continue baking for another 20-25 minutes, till the top is golden and muffin tests done.
9. Let the baked muffins stay in the pan for about 5 minutes before removing them to a cooling rack to cool completely. Cooled muffins can be stored at room temperature for about 5 days. These freeze well as well.

Enjoy!

Braided Chicken and Spinach Bread

20150110_204825

For all the sighs and groans I hear about working with yeast, I must say, they are not that difficult to work with – that is, provided you have unexpired yeast that you know to keep alive!

20150110_192606  20150110_184812

You think that sounds a bit gory – like some man eating zombie or something! May be I feel that way because I forced myself to watch the much anticipated (not by me by any means) return of The Walking Dead last night! Eeewww…to stupid and….stupid if you ask me! After enjoying Will Smith’s “I am a Legend”, I am content with not watching any more zombie nonsense!

20150110_192830

Anyway, back to yeast! Yes, so if you have braved to make a simple pizza dough, you have passed the threshold into the vast untapped potential of bread making! If you are still contemplating your first encounter with these little eukaryotes, then, fear not…just grab yourself a refrigerated pizza or bread dough from the store! Yes, yes, there is always a place for Pillsbury’s in everyone’s kitchen!

20150110_201147

This recipe is pretty simple and straightforward. Make a savory filling of your choice (let your imagination run wild), roll out the dough, place the filling, score opposite ends of the dough (they will look like a millipede or something similar with a gazillion legs), braid, brush with egg wash and bake! Trust me…it’s a fun art project like endeavor. Once you bake these, you will want to make more! They keep well in the refrigerator for a few days and make a great lunch (make them into single-serving sizes) to pack – for kids, for your spouse, for YOU! If you make them small enough, they also make a great snack for a road trip – depending on your filling and your own taste buds, they taste fine at room temperature as well.

20150110_202511  20150110_204806

So, I hope you won’t skim this recipe and take a pass! Give it a try and I am pretty sure this will become a keeper!

20150110_204835

Braided Chicken and Spinach Bread

  • Servings: 4
  • Print

Ingredients
1 container refrigerated pizza or bread dough (like Pillsbury’s)
OR
1 recipe (equivalent of 1 loaf of bread or 1 12-16″ pizza) of your choice
3/4 lb boneless, skinless chicken* (thighs or breast), seasoned with salt and pepper
1 8oz package frozen, chopped spinach, thawed and excess liquid squeezed out
2 tablespoons olive oil
2 cloves of garlic, finely minced
1/4 cup finely chopped onion
1/2 teaspoon ground cumin
1/2 teaspoon paprika
salt and pepper to taste
1/2 cup grated mozzarella or cheddar, optional

Preparation:
1. Preheat oven to 400F.
2. Heat 1 tablespoon of olive oil in a non-stick skillet over medium high heat. Cook the chicken breast or thighs on each side till golden brown, lower heat to medium and continue cooking for another 5-7 minutes on each side till the chicken is cooked through and all juices run clear. You may need to adjust the cooking time depending on the thickness of the meat.
3. Remove cooked chicken to a platter and let rest. Once the chicken is cool, shred the meat or dice into tiny cubes.
4. Return the pan to heat and add the remaining tablespoon of oil. Saute onion and garlic till fragrant (about 2-3 minutes). Add the ground cumin and paprika, stir to mix. Now, stir in the spinach.
5. Cook the spinach mixture till any remaining liquid evaporates. Add in the shredded chicken and heat through to blend in all the flavors.
6. Let the chicken-spinach mixture cool down to room temperature.
7. Divide the dough into 4 equal portions and roll out into a 1/4 inch thick rectangle.
8. Place 1/4th of the filling along the center of the dough, lengthwise, leaving about 2-3 inches on each long side.
9. Using a sharp knife, cut 1/2 inch strips along each side of the filling like shown in the picture. Criss-cross the strips like braiding and tuck in the ends. Brush with the egg wash.
10. Place all the braids on a parchment lined sheet pan and bake for 18-20 minutes till the tops are golden brown and the dough is cooked through.

You can serve this immediately with a dipping sauce of your choice or refrigerate for later enjoyment!

* Instead of cooking the chicken, you can certainly substitute leftover grilled or poached chicken. Just skip steps 2 and 3!

Super Moist Strawberry Bread

20150124_102748

Strawberries?? In January??? Not great, I know! But, they made it into my kitchen and now I needed to find a way to use them up. My kids, who would normally devour them at the first sight, didn’t seem to care too much for them! Perhaps with good reasons!

20150124_103124  20150124_112734

I could have frozen them for future smoothies, but I had an urge for baking last weekend! My quest for a good recipe landed me at glazed strawberry bread. Sally’s Baking Addiction has bunch of great recipes and this one in particular hit the chord for using up my berries.

20150124_124248

I give her full credit for the recipe, although I did alter it a bit with substituting half the flour with whole wheat and adding in lemon zest in lieu of cinnamon. Also, I don’t like to overdo with the glaze, so my glaze is just a light drizzle.

20150124_124333

Like it is mentioned in the original recipe, this is a very moist strawberry cake bread. I will probably reduce the sugar a bit next time around – perhaps by a 1/4 cup. It is a great recipe to keep for a few days – that is if you can resist the temptation. Although I didn’t particularly detect the flavor getting more intense after a day (could be because my berries were not at their prime), the taste was still great after 3 days. Yes, we managed to keep ourselves in check!

20150124_132404

Do give this a try. It will be worth it!

  • Servings: ”12-14
  • Print

Ingredients:
1 cup all purpose flour
1 cup whole wheat flour
1 teaspoon baking soda
1/2 teaspoon salt
1 large egg, preferably at room temperature
3/4 cup granulated sugar
1/4 cup dark brown sugar
1 cup buttermilk (I made mine using vinegar and milk)
1/3 cup canola oil
2 teaspoons vanilla extract
1 teaspoon grated lemon zest
1 and 1/2 cups fresh strawberries, rinsed and diced into 1/4 inch cubes
1 tablespoon flour

Citrus Glaze (optional)
1/2 cup confectioner’s sugar
1 tablespoon heavy cream
1-2 tablespoons lemon juice
1/2 teaspoon grated lemon zest

Preparation:
1. Preheat oven to 350F. Spray a 9″ x 5″ loaf pan with a cooking spray and keep aside.
2. Combine first 4 ingredients in a large bowl and set aside while you mix the rest of the ingredients.
3. Whisk together the sugars and egg until well combined. Add buttermilk, oil, vanilla and lemon zest.
4. Add the wet ingredients to the dry ingredients and gently fold to combine. Take care not to over mix.
5. Toss the chopped strawberries in a tablespoon of flour. Slowly fold in the berries into the batter, leaving a few to top the batter, if desired (as you can see, I did not do that in my attempt).
6. Transfer the batter to the prepared loaf pan and bake on the middle rack for 50-60 minutes. If you see that the top is getting brown too fast, loosely cover the pan with a piece of foil half way through and continue baking.
7. Test for doneness using a toothpick. Remove pan from oven, let cool for about 10 minutes. Invert onto a wire rack and let cool completely.
8. While the bread is cooling, prepare your glaze. Combine all the ingredients for the glaze till they are smooth and of desired consistency. Once the bread is completely cool, drizzle the glaze over the top.

Tri-Flour Fluffy Pancake


20141213_103246

Happy New Year everyone! It’s been almost a year since I started with this blog! It’s been a whirlwind of an year, wouldn’t you agree! Anyway, as I start the first weekend of 2015, I couldn’t help but start with a post on an all-time favorite breakfast time! Pancakes! Yes, sure, it takes a bit of time in the kitchen, but don’t you think it is so worth it when you dig your fork into the pillowy soft yumminess!

20141213_100358

On those lazy mornings when I do have some time to linger over a good breakfast, I try to alternate between pancakes and waffles. I especially like pancakes because I don’t have to fuss with them like I need to with waffles! Also, I personally think there are countless more recipes for pancakes than waffles! So, for someone who likes frequent changes, pancakes are probably a better choice than waffles – although I guess you could top a basic waffle with a zillion different toppings. 🙂

20141213_103142

So, this recipe is one of those recipes I happened to try out when I was seeking a change from the mundane basic pancake. This one uses an equal blend of whole wheat flour, all-purpose flour and fine yellow cornmeal. The pancake is made pillowy soft with the addition of sour cream and yogurt. And yes, it gets a touch of sweetness from honey!

Feel free to add in grated lemon zest and a squeeze of lemon for a lemony twist to these flapjacks! And top them off with a squeeze of lemon and powdered sugar! Just for this one, please move over syrup!

20150102_060426

Tri-Flour Fluffy Pancakes

  • Servings: 4-6
  • Print

Ingredients
1/2 cup whole-wheat flour
1/2 cup all-purpose flour
1/2 cup fine yellow cornmeal
2 tablespoons honey
1 1/4 teaspoon baking powder
1/2 teaspoon baking soda
1/2 teaspoon salt
3/4 cup fat free plain yogurt
1/4 cup reduced fat sour cream
1 cup 1% milk
2 tablespoons unsalted butter, melted
1 large egg, lightly beaten
1 teaspoon lemon zest and 1 tablespoon lemon juice, optional

Preparation
1. Mix together all the dry ingredients and set aside.
2. In a large bowl, combine all the wet ingredients until well combined (tip: mix honey with melted butter first as yogurt, sour cream and milk will be too cold to incorporate it well)
3. Gently mix the wet and dry ingredients. If using lemon zest and juice, add them now as well. Don’t over mix, batter will be lumpy.
4. Let the batter sit while you preheat a griddle over medium heat.
5. When hot, dab with a touch of butter or spray with non-stick cooking spray. Add about 1/4 cup of batter per pancake and cook for 3 minutes. When the edges look set, flip and cook on the other side for another 3 minutes or so.
6. Stack the pancakes while you cook rest of the batter. Serve warm with your favorite syrup or a squeeze of lemon juice and powdered sugar.

Enjoy!

Whole Wheat Zucchini Chocolate Chip Quick Bread

20140416_173633

Don’t you agree zucchini is one of the most underrated vegetables? It has a mild flavor that works well for slicing it up to enjoy with your favorite dip. It’s flavor could be amped by sautéing with garlic and other seasonings. It could be grated into pasta sauces and quick breads as a way to increase the nutritional value without altering the taste.

  20140416_161945  20140416_162635   20140416_162242

Although my kids will eat pretty much any veggie, there are few veggies that I need to be creative with so I don’t have to listen to too much whining. 🙂 Zucchini is one of them! However, this quick bread with grated zucchini and chocolate chips was a winner! Yes, tiny specks of green did give away the hidden secret, they still continued to bite into the bread! This to me means a winning recipe.

20140416_163336

The original recipe is from King Arthur Flour website. I modified it only slightly by replacing some of the flour with ground flax. I did not add any nuts in this attempt, but I would love to throw in some chopped walnuts or pecans in my next batch.

20140416_163551

Give it a try! I think you will enjoy it!

Whole Wheat Zucchini Chocolate Chip Quick Bread

  • Servings: 12 slices
  • Print

Ingredients
2 large eggs
1/3 cup honey
1/2 cup vegetable oil
1/3 cup brown sugar
1 teaspoon vanilla
1 3/4 cups white whole wheat flour
1/4 cup ground flax
1 teaspoon kosher salt
1/2 teaspoon baking soda
1/2 teaspoon baking powder
1 teaspoon ground cinnamon
2 cups shredded, unpeeled zucchini
1/2 cup semi-sweet chocolate chips

Preparation
1. Preheat oven to 350F.
2. Thoroughly whisk eggs, honey, oil, brown sugar and vanilla.
3. Sift together, salt, baking soda, baking powder and cinnamon. Stir in ground flax.
4. Add the dry mix to the wet ingredients, stirring till well combined.
5. Fold in zucchini and chocolate chips.
6. Transfer batter into a 9″ x 5″ lightly greased and floured loaf pan.
7. Bake for 50-55 minutes till top the bread is baked through.
8. Let cool in the pan for about 10 minutes. Then, remove from pan and let cool completely on a wire rack. Slice and serve or store well covered.

Crispy and Chewy No-knead Bread

20140322_140043

I love freshly baked bread. It is one of my favorite things to create in the kitchen, especially in the colder months. The recipes I have tried in the past have all been the kneading type with lots of all-purpose flour. So, when I came across a recipe online at http://www.the-baker-chick.com which in turn referenced another posted at http://www.simplysogood.com, I thought it’s worth the try since it involved very minimal time commitment.

20140321_175336

This recipe is very versatile meaning you can mix in various things. Janet at Simply So Good gives you a whole bunch of options. In my version, I added a heaping tablespoon of harissa sauce. It infused the bread with bit of heat and a touch of caraway flavor in addition to giving it an orangish tint.

20140321_180048

Replacing half the all purpose flour with whole wheat and adding in a bit of ground flax made the bread a bit more wholesome. It is a little denser than the white bread variety (which I would make next just for comparison), but packs a lot of flavor. I brushed a slice lightly with olive oil and toasted in a pan and it was delightfully crispy and chewy. Whether you are looking for a no-knead bread recipe option or something different for a change, this recipe is a definite keeper.

20140321_180354    20140321_181632

One caveat – this dough needs to be proofed for a long period, typically about 12 – 18 hours or so. I proofed mine for about 19 hours and it was great. So, if you are like me, feel free to mix up the dough on impulse and let it do its thing!

20140322_141325   20140322_140043  20140323_123038

Crispy and Chewy No-Knead Bread

  • Servings: potentially could serve just 4 🙂
  • Print

Ingredients
1 1/2 cups whole wheat flour
1 1/4 cups all purpose flour
1/4 cup ground flax
1 1/2 teaspoon salt
1/2 teaspoon yeast
1 teaspoon sugar
1/4 cup warm water
1 heaping tablespoon harissa sauce, optional
1 1/4 cups room temperature water

Preparation
1. Dissolve yeast and sugar in 1/4 cup of warm water and set aside for 5 min till frothy.
2. In a large bowl, combine all flours and salt.
3. Add yeast mixture and remaining water to the flour mixture and mix with a wooden spoon or spatula till a “messy” dough forms. If using harissa or another add-in item, stir it in while adding the water and yeast mixture.
4. Cover with a plastic wrap and keep on the counter top or in a cool oven for 12-18 hours or more till the dough bubbles up and more than doubles.
5. At the end of the proofing time, remove the bowl from the oven and set oven to 450F.
6. After the oven is preheated, place a pizza stone or an oven proof ceramic container in the oven to preheat for 15-20 minutes at least.
7. Invert a large cookie sheet and place a sheet of parchment paper on it. Empty the dough onto the parchment paper and with heavily floured hands gently mold the dough into a dome shape (mine was about 8 inches or so in diameter).
8. Open the oven and quickly slide the parchment sheet with the bread onto the pizza stone. If using a ceramic bowl, slowly invert the dough into the container.
9. CREATING STEAM EFFECT – I used a heavy stainless steel bowl to cover the dough while baking so the moisture from the sticky dough could act as the steam. If you don’t have a similar set up (or if not using a ceramic dish with a lid), you could preheat a broiler pan on the bottom rack of the oven while preheating the pizza stone and add about 2 cups or so of hot water as soon as you slide the dough onto the pizza stone.
10. Bake covered for 30 minutes. Remove cover and continue baking for another 15 minutes or so till the bread sounds hollow when tapped.
11. Carefully remove from pan and loosely cover with a kitchen/bread towel.
12. Serve toasted or untoasted with spreads of your choice or just a dip of olive oil and garlic.

Perfect Waffle

20140223_100523[1]

Everybody loves a good ol’ waffle right? I enjoy waffles as a meal item or as a base for an occasional ice cream sundae! Back in the college days, I remember how my friends and I looked forward to waffle bar Sundays, when there will be a nice little waffle bar set in the cafeteria with all sorts of yummy toppings. Yeah, those days, we would create our own masterpiece of fully loaded waffle that served both as a meal and dessert in one! But that extent of indulgence is far and few in between now a days, but I continue to make different type of waffles about once a week. At this rate, I keep telling myself I need to buy one of those Belgian waffle makers or at least a rotating type of equipment, but so far I am still holding onto my regular old basic machine. (Note to self: Take the plunge and buy a new one already! Yes, along with an ice cream maker!).

This particular recipe uses an unusual ingredient – cornstarch. It somehow helps to decrease the potential sogginess caused by steam during the cooking process and results in a waffle that is pretty toasted and crispy on the outside, yet soft and chewy on the inside. Also, incorporating stiff egg whites into the batter results in a light crispy texture.

20140223_094555[1]   20140223_094740[1]

Personally, I prefer a plain waffle topped with fruits, honey and occasionally a tiny dollop of fresh whipped cream. Sometimes, I do like to make it a bit special with some semi sweet or dark chocolate chips and maybe a sprinkling of chopped nuts. Let your creativity run wild and use whatever topping your little heart desires! I promise you will enjoy every last bite of it!

A quick note about this recipe: Sometimes you hear people say when you use buttermilk/yogurt in a batter, you typically will have to use baking soda instead of baking powder. I used the latter in this recipe and it worked great!

20140223_101525[1]

Perfect Waffle

  • Servings: 4
  • Print

Ingredients
1 1/2 cups enriched all purpose flour
1/4 cup corn starch
1 tablespoon baking powder
2 tablespoons sugar
1/4 teaspoon salt
2 eggs, separated
1 cup fat free plain yogurt
1/2 cup 1% milk
1 teaspoon hazelnut extract (or vanilla)
1/4 cup oil
Cooking spray

Preparation
1. Measure out the dry ingredients and mix well in a medium bowl.
2. Combine egg yolks, yogurt, milk, extract and oil in another bowl and set aside.
3. In a small bowl, whish egg whites till stiff peaks form.
4. Add wet ingredients to dry ingredients and mix gently with a spatula or whisk.
5. Now, slowly incorporate the beaten egg whites in two batches, taking care not to overwork the batter. You want to retain as much of the air as possible.
6. Follow your waffle maker directions and make your waffles.
7. Serve right away with your favorite toppings.