Sweet potato pie bread

20140326_144813If you give me a choice between pumpkin and sweet potato pies, I would definitely pick the latter! Not that I don’t like pumpkin, but more like I have a little more love for sweet potato. I enjoy them so much that I can happily enjoy a bowl of plain roasted sweet potato – with absolutely nothing added in!

Sweet potato takes on a whole new flavor dimension and sweetness when you roast them in the oven. You simply scrub and wash them, wrap them in pieces of foil and bake for about 45 minutes at 375F. Voila! You have divinely flavorful bright orange spuds with caramelized sugars oozing out of them!). Roasted sweet potato can be used in soups and other dishes, but I chose to make a quick bread using them. Yes, you can certainly substitute canned version, but as you can imagine, oven roasted spuds taste far superior!

20140325_165835  20140325_163902   20140325_170216

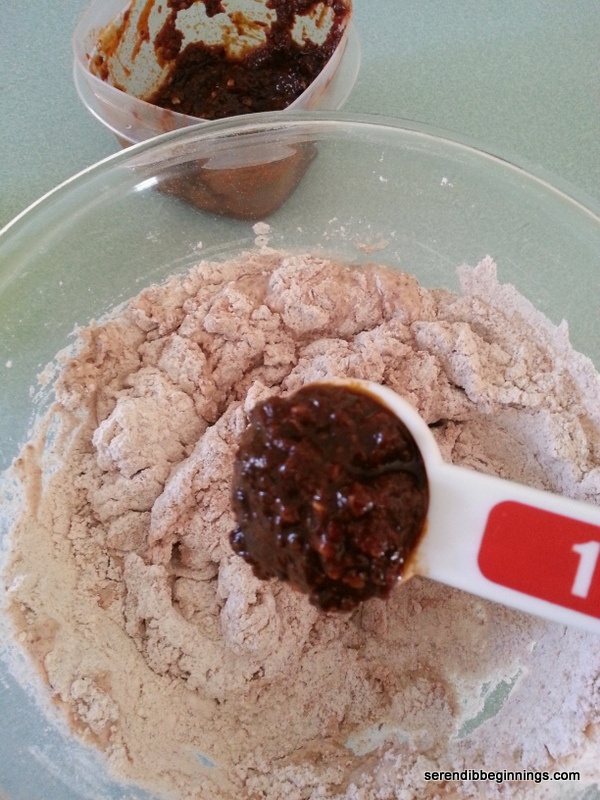
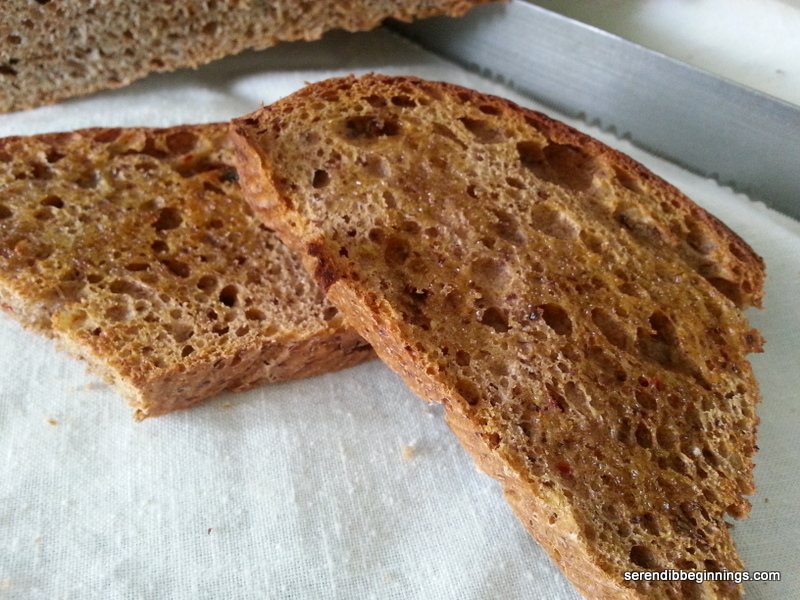
This quick bread has notes of cinnamon, cloves, allspice and nutmeg. Next time, I will also add a bit of ground cardamom for an exotic flair. I replaced half the butter with pureed prunes. This not only reduced the amount of fat, but also added a rich color to the finished product. Also addition of sour cream in this recipe makes the bread very moist.

20140325_181403

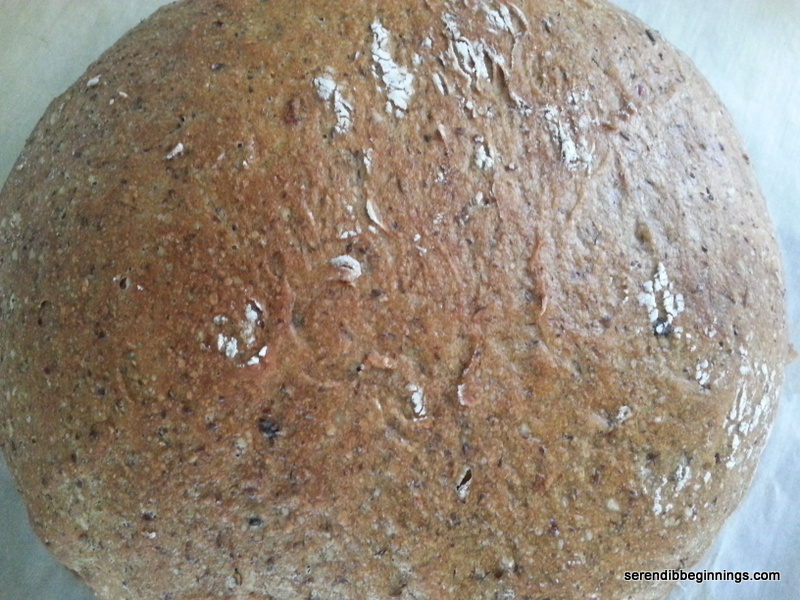
Although my kids usually turn up their noses for roasted sweet potato, they devoured this bread. Certainly a keeper recipe!

Sweet potato pie bread

  • Servings: 12
  • Print

Ingredients
1/4 cup butter, softened
1/4 cup pureed prunes
2/3 cup sugar
2 eggs
1 teaspoon vanilla
1 1/2 cups all purpose flour
1 teaspoon soda
1/2 teaspoon salt
1 cut pureed roasted sweet potato
1/2 cup light sour cream
1/2 teaspoon ground cinnamon
1/8 teaspoon ground cloves
1/8 teaspoon allspice
1/8 teaspoon freshly grated nutmeg
1/4 cup finely chopped pecans, optional

Preparation
1. Preheat oven to 375F. Lightly spray a loaf pan and set aside.
2. In a bowl, whisk together butter, pureed prunes and sugar.
3. Add eggs, one at a time, whisking to combine. Stir in vanilla.
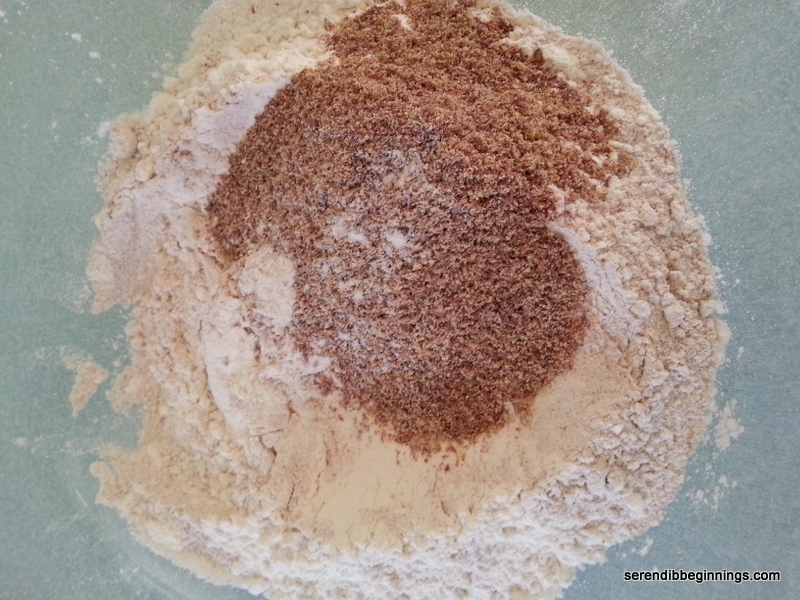
4. Combine flour, baking soda, salt and ground spices.
5. Add the sweet potato and sour cream to the butter mixture.
6. Stir in dry ingredients just until combined. Stir in pecans if being used.
7. Scoop the batter into the loaf pan and smooth out the top.
8. Bake for about 45 minutes, till toothpick inserted in the center comes out clean.
9. Let cool and slice.

Chickpeas in curry sauce

20140327_191710I always try to have a can or two of chickpeas on hand. Yes, they are tastier and probably healthier if you soak and cook them in your own kitchen, but I always seem to need them on the spur of the moment. Hence, I usually stock my pantry with few cans of different types of beans.

20140327_183434  20140327_183800  20140327_184344

I use chickpeas in salads, mixed in with rice, tossed in chicken curry and in myriad other ways. One of the most common preparation is making a curry highlighting their simple, yet delicious taste and texture. Chickpea curry can be prepared in many ways and it goes by different names – chole and channa masala being the most common.

20140327_184525  20140327_190955

This particular recipe also uses some diced potato. Potato soaks up the flavors well without “stealing the thunder” from the chickpeas. Feel free to omit it if you want to just keep it all chickpeas. Taste will be unaltered.

20140327_192904

This dish can be served with steamed rice or any flat bread. Accompany it with a small crispy salad or sliced cucumbers and red onions with bit of lemon juice.

Chickpeas in curry sauce

  • Servings: 4-6
  • Print

Ingredients
1 15-oz can chickpeas, rinsed and drained
1 medium sized potato, diced into about 1/2″ cube
1/2 cup finely chopped onions
2 tablespoons ginger/garlic paste
2″ piece of cinnamon, broken up
1/2 teaspoon cumin
2 tablespoons oil
1 1/2 tablespoons Madras curry powder
1 small can tomato sauce
1 cup water
1/2 teaspoon ground cayenne (adjust to taste)
salt to taste
To garnish
1/4 cup chopped cilantro
1/4 cup sliced red onions
Sliced lemon

Preparation
1. Heat oil in a medium wok or pan. Sauté cinnamon and cumin for a minute under low medium flame.
2. Increase heat to medium and add onions and ginger/garlic paste and sauté for 3-5 minutes.
3. Add potato and continue to cook for another 3 – 4 minutes.
4. Stir in cayenne, tomato sauce, curry powder and water. Season with salt and cook for about 20 minutes, till potato is cooked through.
5. Add chickpeas and continue cooking till chickpeas are heated through and the sauce reaches the desired consistency.
6. Garnish with sliced onions, chopped cilantro and slices of lemon.
7. Serve hot with steamed rice or flat bread of your choice (like naan, roti, chappati or even pita bread).

Chicken thighs in lemon garlic sauce

20140328_185642

Chicken is so versatile, yet there are times when I simply am not sure what I want to do with it. That’s how this recipe came about! I had a package of chicken thighs and had less than an hour to get dinner on the table. What do I do with it?

20140328_182133  20140328_183322  20140328_183154

After bit of pondering, I remembered I had fresh lemons, garlic and parsley on hand. I imagined that to be a rather straightforward “Chopped” basket and quickly thought of a way to incorporate them into a dish that had some sauce/gravy to it. It’s almost like I was working backwards. I had a freshly baked bread from earlier in the day and I wanted something to go with the bread… 🙂

20140328_185302  20140328_185527  20140328_190400

This dish with a wonderful citrus and garlic notes with just the right amount of a light sauce was amazing with a slice of a crusty bread. Since I had incorporated some green beans right into the chicken dish, it really was a wholesome meal. I would certainly like to prepare it again, but this time cook in the oven. If any of you try this in the oven (I would say 375F for about 45minutes or so – check for doneness), do drop a note below to say how it turned out.

Chicken Thighs in Lemon-Garlic Sauce

  • Servings: 4
  • Print

Ingredients
4 medium chicken thighs, bone-in, skin removed
1/2 teaspoon salt
1 teaspoon freshly ground black pepper
1 tablespoon olive oil
3-4 large cloves of garlic, finely chopped
1/4 cup finely chopped onions or shallots
1 cup water or chicken broth
1/2 lb fresh green beans, end trimmed
4 tablespoons chopped fresh parsley
1 tablespoon butter or heavy cream, optional

Preparation
1. Cut chicken thighs into 2-3 pieces and season with salt and pepper.
2. Slice half the lemon into thin slices.
3. Heat olive oil over medium heat and lightly caramelize the lemon slices. Transfer to a small bowl and set aside.
4. To the pan, add the chicken pieces and brown them on both sides. Transfer to a plate and set aside.
5. Add a teaspoon of additional oil if needed and sauté the onions and garlic till onion turns translucent and starts to turn golden.
6. Add back the chicken pieces and a cup of water or chicken broth, making sure to scrape off all bits from the pan.
7. Cover and let cook for 30 – 35 minutes till the chicken is cooked through.
8. Add the trimmed green beans, lemon slices and juice from remaining half lemon. Adjust salt and pepper and continue to cook for another 5 minutes. Stir in parsley.
9. Serve immediately with crusty bread.

NOTE: If sauce is too thin, remove chicken and vegetables to a serving platter and continue to cook the sauce with a tablespoon of butter and/or cream for a few additional minutes till it thickens a bit.

Curried Barley with Chickpeas

20140325_120106

Let me be the first to admit I can’t remember the last time I cooked with barley. It is possible that I never did! Oh boy, am I glad I managed to bring some into my kitchen just couple of weeks ago!

 20140324_202722  20140324_202944
Barley is one of those grains that can be easily passed off in favor of others such as quinoa etc. However, with its delectable chewy texture, thickening properties and satisfying nature, I think it could definitely be one of the most promising grains out there. If you have never had it before and are wondering how it tastes, it tastes like tiny bits of cooked pasta, but perhaps a bit chewier. Definitely a pleasant taste and texture.

  20140324_203130  20140324_203256

For my first attempt at preparing a vegetarian entrée using barley, I wanted something very flavorful and substantial, yet without much heaviness. A pilaf-style dish should fit the bill and that’s what I did. The end product was very satisfying, especially with the addition of chickpeas and was very flavorful with just the right amount of curry flavor.

20140324_203402  20140325_120142

Curried Barley with Chickpeas

  • Servings: 4-5
  • Print

Ingredients:
1 cup of uncooked barley
2 tablespoons butter
1/4 cup chopped onions
1 tablespoon ginger/garlic paste
1 cup diced carrots
1/2 cup diced red peppers
1 6oz can tomato sauce
1 cup water
1/2 teaspoon salt
1 tablespoon Madras curry powder
1/4 teaspoon allspice spider
1/2 teaspoon turmeric powder
1 can chickpeas, drained and rinsed

Preparation
1. Melt the butter in a medium pan over medium heat.
2. Sauté onions and ginger/garlic paste till onion turns translucent and starts to turn golden.
3. Add the barley (rinse barley before adding, if needed) and sauté for 2-3 minutes.
4. Add the vegetables and continue to cook for another 3 minutes. Now add the ground spices.
5. Stir in the tomato sauce, salt and water. Bring the mixture to boil, cover, reduce heat and cook for about 25-30 minutes till all the water is absorbed and the barley is fully cooked.
6. Finally, stir in the rinsed chickpeas and warm through for another 5 minutes.
7. Serve immediately. Leftovers can be refrigerated and reheated.

Crispy and Chewy No-knead Bread

20140322_140043

I love freshly baked bread. It is one of my favorite things to create in the kitchen, especially in the colder months. The recipes I have tried in the past have all been the kneading type with lots of all-purpose flour. So, when I came across a recipe online at http://www.the-baker-chick.com which in turn referenced another posted at http://www.simplysogood.com, I thought it’s worth the try since it involved very minimal time commitment.

20140321_175336

This recipe is very versatile meaning you can mix in various things. Janet at Simply So Good gives you a whole bunch of options. In my version, I added a heaping tablespoon of harissa sauce. It infused the bread with bit of heat and a touch of caraway flavor in addition to giving it an orangish tint.

20140321_180048

Replacing half the all purpose flour with whole wheat and adding in a bit of ground flax made the bread a bit more wholesome. It is a little denser than the white bread variety (which I would make next just for comparison), but packs a lot of flavor. I brushed a slice lightly with olive oil and toasted in a pan and it was delightfully crispy and chewy. Whether you are looking for a no-knead bread recipe option or something different for a change, this recipe is a definite keeper.

20140321_180354    20140321_181632

One caveat – this dough needs to be proofed for a long period, typically about 12 – 18 hours or so. I proofed mine for about 19 hours and it was great. So, if you are like me, feel free to mix up the dough on impulse and let it do its thing!

20140322_141325   20140322_140043  20140323_123038

Crispy and Chewy No-Knead Bread

  • Servings: potentially could serve just 4 🙂
  • Print

Ingredients
1 1/2 cups whole wheat flour
1 1/4 cups all purpose flour
1/4 cup ground flax
1 1/2 teaspoon salt
1/2 teaspoon yeast
1 teaspoon sugar
1/4 cup warm water
1 heaping tablespoon harissa sauce, optional
1 1/4 cups room temperature water

Preparation
1. Dissolve yeast and sugar in 1/4 cup of warm water and set aside for 5 min till frothy.
2. In a large bowl, combine all flours and salt.
3. Add yeast mixture and remaining water to the flour mixture and mix with a wooden spoon or spatula till a “messy” dough forms. If using harissa or another add-in item, stir it in while adding the water and yeast mixture.
4. Cover with a plastic wrap and keep on the counter top or in a cool oven for 12-18 hours or more till the dough bubbles up and more than doubles.
5. At the end of the proofing time, remove the bowl from the oven and set oven to 450F.
6. After the oven is preheated, place a pizza stone or an oven proof ceramic container in the oven to preheat for 15-20 minutes at least.
7. Invert a large cookie sheet and place a sheet of parchment paper on it. Empty the dough onto the parchment paper and with heavily floured hands gently mold the dough into a dome shape (mine was about 8 inches or so in diameter).
8. Open the oven and quickly slide the parchment sheet with the bread onto the pizza stone. If using a ceramic bowl, slowly invert the dough into the container.
9. CREATING STEAM EFFECT – I used a heavy stainless steel bowl to cover the dough while baking so the moisture from the sticky dough could act as the steam. If you don’t have a similar set up (or if not using a ceramic dish with a lid), you could preheat a broiler pan on the bottom rack of the oven while preheating the pizza stone and add about 2 cups or so of hot water as soon as you slide the dough onto the pizza stone.
10. Bake covered for 30 minutes. Remove cover and continue baking for another 15 minutes or so till the bread sounds hollow when tapped.
11. Carefully remove from pan and loosely cover with a kitchen/bread towel.
12. Serve toasted or untoasted with spreads of your choice or just a dip of olive oil and garlic.

“Broken”

For any of you that might have been reading about my 8-week training plan to run….

My last week of the 8-week plan came to a screeching halt mid-week. I guess I must have “thrown” my back. Bottomline, much to my dismay, I was unable to finish my week 8 as planned. I am limping along on a road to recovery and hope to be back on the ‘mill soon!

Basic Healthier Pizza Dough

I am constantly on the hunt for good bread dough recipes and I am constantly tweaking them. This pizza crust recipe is one such discovery and fine tuning. This results in a crust that is slightly nutty (due to the soy, flax and wheat) and lends for a crisy, yet chewy crust. All in all, my type of crust! This is especially good for a thin crust pizza or a Chicago-style crust without all the butter and heaviness. I hope you will give it a try and let me know how you liked (or didn’t like) it!

Healthier

Ingredients
1 1/2 cups whole wheat flour
3/4 cup all purpose flour
1/4 cup soy flour
1/4 cup ground flax
1 teaspoon fine sea salt
1 packet active dry yeast
1 teaspoon sugar
1 cup warm water
2 tablespoons olive oil

Preparation1. Dissolve yeast in warm water and stir in sugar. Let stand for 3-5 minutes.
2. Combine all flours, ground flax and salt.
3. Stir in olive oil and pour in the frothy yeast mixture.
4. Knead the dough for at least 5 minutes till a smooth, elastic dough is formed.
5. Oil a large bowl and place the dough in to begin the rising process. Turn the dough over so the oil coated surface is on the top. Cover with a damp kitchen towel and keep in a warm spot for 1 – 2 hours till the dough doubles in volume.
6. After the first rising, punch dough down and shape the crust as desired.

Lighter Chicago-Style Deep Dish Pizza

20140316_184111

How many of you have heard of tried Chicago-style deep dish pizza? The pie with its classic tall buttery crust, similar in appearance to a tart shell lovingly embraces within its boundaries copious amounts of cheese, sauce and toppings of your choice. For a person with a normal appetite, one slice is all it will take to satisfy your hunger. Anything beyond that is pure indulgence on cheesy, buttery, flaky, chewy goodness.

  20140316_185304  20140316_185537

Although a fully loaded cheesy pizza with all the trimmings can be delicious, I am discovering that a homemade crust topped with lighter cheeses and healthier toppings are far more superior in taste and nutrition than what you can get at a restaurant. I especially enjoy making crusts with varying combination of spices/herbs etc. and amping up the nutrition value by lowering the cheese and increasing the amount of veggies. In order to stick with healthier options, for a meaty pizza, I prefer small amount of cooked crumbled bacon or diced up grilled chicken breast.

20140316_185537

This pizza however has just sliced vegetables – I would have used more but had to do with what I had on hand that was topping appropriate.

20140316_191423

This is the first time I ever tried making Chicago-style deep dish and I am delighted to say that my kids who can be harsh critics (even though they will eat whatever I make) enjoyed every bite of it. Fresh mozzarella used melts beautifully leaving a nice cheesy curtain when you lift a slice to serve. The crust, molded in a tart pan crisps up nicely on the outside while remaining chewing and soft on the inside. It also holds the toppings well without getting soggy. I did modify the crust recipe a little bit by adding a teaspoon of garlic powder and 1 teaspoon each of crushed dried parsley, basil and oregano. All in all, another successful pilot attempt in my kitchen.

20140316_191443

Lighter Chicago-Style Deep Dish Pizza

  • Servings: 6
  • Print

Ingredients
1 recipe dough
4 oz fresh mozzarella, cut into 1/8″ slices
1/2 cup part-skim shredded mozzarella cheese
2 cups of sliced vegetables of your choice (I used red peppers, tomato and red onions)
2 tablespoons grated parmesan
1 tablespoon olive oil

Preparation
1. Preheat oven to 400F.
2. After the dough has proofed, punch it down. Grease a large tart shell with removable bottom (or similar pan with at least 1 1/2″ tall sides) lightly with nonstick cooking spray (or oil).
3. Pat the dough down on the pan and stretch lightly to cover the bottom and the sides completely.
4. Prick the sides with a fork and layer the bottom with fresh and grated mozzarella.
5. Bake for about 7 minutes till the fresh mozzarella begins to melt. Remove from oven and spread your favorite sauce (I used heart healthy bottled sauce).
6. Top with your favorite toppings. Sprinkle parmesan cheese and drizzle the olive oil all over.
7. Return to the oven and bake for another 15 minutes till vegetables are cooked and crust is golden.
8. Serve immediately.

Whole wheat chocolate chip muffin

20140319_181835

Of late, I am trying to have on-hand at least one “to-go” type of food item for those days when everyone at home is running around like a hamster trying to get ready to start the day.  One of my ultimate favorite is Swiss-style muesli (aka overnight oats, chia pudding). Store bought granola bars (and their friends and family) are convenient but they are usually packed with lots of refined sugars and other unnecessary ingredients that are used to extend their shelf-life. So, I have been thinking of alternatives to help us eat a litter healthier.

20140319_173637     20140319_174129     20140319_174927

This is where this recipe fits in. I am not saying these whole wheat muffins are totally healthy at all. They are definitely carb-heavy. Each muffin has about a tablespoon of added sugar (which equates to about 12 grams/48 calories of added sugar in each muffin plus whatever is in the chocolate chips). American Heart Association recommends less than 100 calories from sugar for women and 150 for men. On the other hand, 12 muffins use up only 2 eggs and 1/4 cup of butter, so I guess that may qualify them to be low-fat? 🙂

20140319_180333 20140319_181242

Having said that, I think these are probably better for you than most of the regular muffins that one might get at a grocery store, school/office cafeteria or at a coffee-shop. If you are used to super moist and light muffins, be forewarned that these muffins are on the denser side due to the small amount of added fat and the denseness of whole wheat as compared to all-purpose flour. However, these are quite soft and full of flavor (especially with the hint of orange flavor in them) and I hope you will enjoy them as much as we did.

20140319_183444

Whole wheat chocolate muffin

  • Servings: 12
  • Print

Ingredients
1/4 cup butter
1/4 cup prune puree (homemade or store bought)
2/3 cup sugar
2 large eggs
1 tablespoon grated orange zest
1 teaspoon vanilla
1/2 cup 1% milk
1 1/2 cup whole wheat flour
1/4 cup ground flax
1/4 cup cocoa (I used Dutch processed)
2 teaspoon baking powder
1/2 teaspoon salt
1/2 cup mini chocolate chips

Preparation
1. Preheat oven to 350F.
2. In a large bowl, blend butter, prune puree and sugar until well mixed and light.
3. Add eggs, one at a time, blending well after each addition.
4. Add vanilla and orange zest.
5. Mix all the dry ingredients, except chocolate chips in a medium bowl.
6. Add dry ingredients to wet ingredients alternating with 1% milk.
7. Slowly stir in chocolate chips.
8. Pour batter into a 12-muffin pan lightly sprayed with non-stick cooking spray or lined with paper liners.
9. Bake in the preheated oven for 16-19 minutes and test for doneness.
10. Let cool and transfer to airtight storage container.

Whole wheat pasta in spinach and ricotta sauce

Happy St. Patrick’s Day everyone! I really had all the intention to develop a complete St. Patrick’s Day dinner menu with a green color theme – including a mint, avocado or pistachio based dessert! But, alas, time just slipped by too fast!

  20140314_184746    20140314_182642    20140314_185245

In an attempt to at least pull together a wholesome main entrée, I looked around my kitchen for appropriate ingredients. We enjoy pasta, so I decided to take the route of a pasta dish served with a pan grilled tilapia filet.

This recipe uses whole wheat pasta (pick any type you choose – spaghetti, rotini, penne….), frozen spinach, reduced fat ricotta, bit of garlic, sundried tomato, paremesan and white cheddar. For the meat/seafood component, you could go either with chicken, fish or shrimp to get the optimal flavor. I don’t think beef will be a good match for this pasta dish. Just my opinion! 🙂

20140314_182749     20140314_192505

This pasta, as you can see from the picture, is very green! If green is not a favorite food color in your household, I would like to urge you to still give this a try. Spinach combined with garlic and ricotta results in such a delicate flavor, you will soon overlook the color. The color did not bother my family even a bit, and I must say, I will certainly prepare this dish again. I hope you will give this recipe a try and let me know your feedback.

20140314_193004

Whole wheat pasta in spinach and ricotta sauce

  • Servings: 4
  • Print

Ingredients
8 oz whole wheat pasta
8 oz frozen spinach
3 large cloves of garlic, thinly sliced
3/4 cup low fat ricotta cheese
1/4 cup (or slightly more) cooked pasta water
1 tablespoon olive oil plus additional tablespoon
1/4 cup thinly slivered sundried tomato
1/4 cup grated white cheddar or mozzarella cheese
1/4 cup grated parmesan or pecorino romano cheese
salt and pepper to taste

Preparation
1. Prepare pasta according to directions. Drain, reserving about 1/4 cup of pasta water.
2. Thaw frozen spinach, squeezing out excess water.
3. Heat a small sauté pan over medium heat. Add a tablespoon of olive oil and lightly brown the garlic.
4. Blend spinach, garlic, ricotta and reserved pasta water in a blender or food processor till smooth. Season with salt and pepper.
5. Pour the spinach sauce over cooked pasta. Add white cheddar or mozzarella cheese and sundried tomato and toss to mix.
6. Transfer the pasta/sauce mixture to an oven-proof baking dish and sprinkle parmesan cheese over it. Drizzle about the remaining tablespoon of olive oil.
7. Place the dish under the broiler set at medium high/high heat and broil for about 5-7 minutes till cheese is melted and top is lightly golden.
8. Serve immediately with grilled chicken or fish.