Lighter Chocolate Chip Bread

20150717_060203

Chocolate! What is not to love about it!!!

This recipe is a spinoff from the original recipe for Cinnamon-Swirl Chocolate Chip Bread by Sally’s Baking Addiction. The first time I baked this bread, I must confess I felt like I was transported to a great pastry shop somewhere! The smell of chocolate and cinnamon permeated the entire house and had my kids dash to the kitchen wondering what was baking!

Original Recipe from Sally's Baking Addiction

Original Recipe from Sally’s Baking Addiction

To top it off, I took some of the bread to work that morning (yes, the bread still slightly warm…needless to say, everyone raved about it and I obviously gave credit to Sally. I knew after the first loaf that this recipe was going to be keeper, but I wanted to find a way to “healthify” it up a little!

I thought cutting down the sugar content was quite easy to accomplish. Sally’s recipe calls for 1/2 cup of sugar with cinnamon to use in the cinnamon layer. Personally, I could do without it! So, there it is – my first calorie-saving switch was to eliminate the cinnamon sugar layer and instead use 1 teaspoon of cinnamon in the batter!

20150716_200228  20150716_200355

Calorie-saving tip #2 – replace some of the oil with unsweetened applesauce! I substituted half the oil with the applesauce and you wouldn’t miss much of the moistness! Next time, I am going to try it with pureed prunes instead of applesauce to see how it turns out! I would imagine it will result in an equally delicious loaf with darker color! Yum!

20150716_201156

Final nutrient-boosting tip (#3) – substitute 3/4 cup of the all-purpose flour with whole-wheat. Yes, yes, white flour baked goods are delicious, but at least I feel a bit better knowing almost half the flour is whole-wheat! 🙂

"Lightened Up" Version - Can you tell the difference except for chocolate chip topping vs. chopped chocolate?

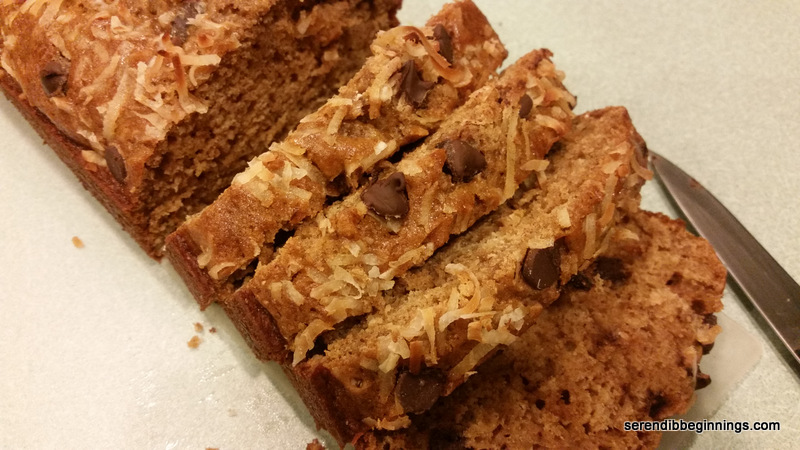
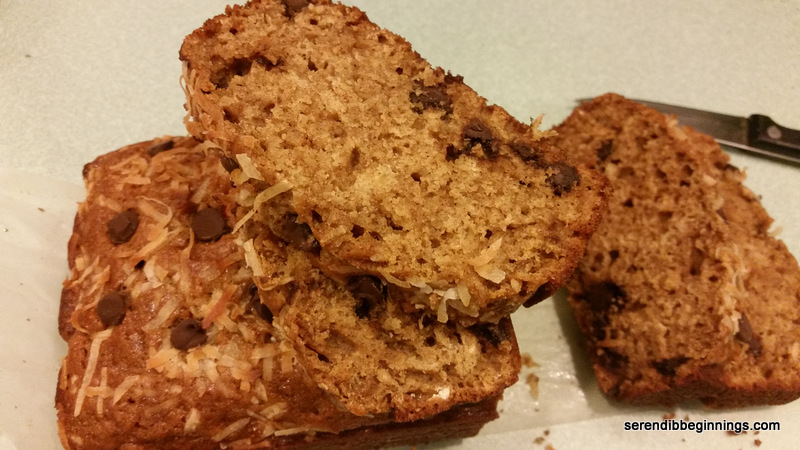
“Lightened Up” Version – Can you tell the difference except for chocolate chip topping vs. chopped chocolate?

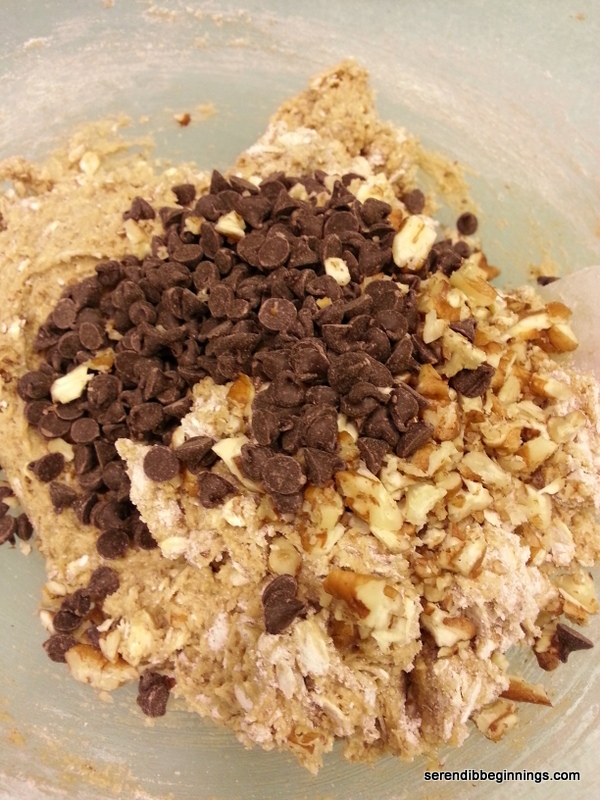
This recipe is pretty simple to put together. As usual, measure out the dry ingredients, whip up the wet ingredients and fold in the dry into the wet making sure not to release your stress during the mixing process! 🙂 Gentle does it! My recommendation is to save your stress release for another bread recipe that calls for extreme amount of kneading! Gentle mixing results in a lighter bread that is not tough! And oh, another word of caution…this bread takes a long time to bake – almost an hour! So, you have to be patient!

20150717_060136  20150717_060244

Enjoy!

Lighter Chocolate Chip Bread

  • Servings: 12
  • Print

Ingredients
1 1/4 cup all-purpose flour
3/4 cup whole wheat flour
1 teaspoon baking soda
1/2 teaspoon salt
1 teaspoon ground cinnamon
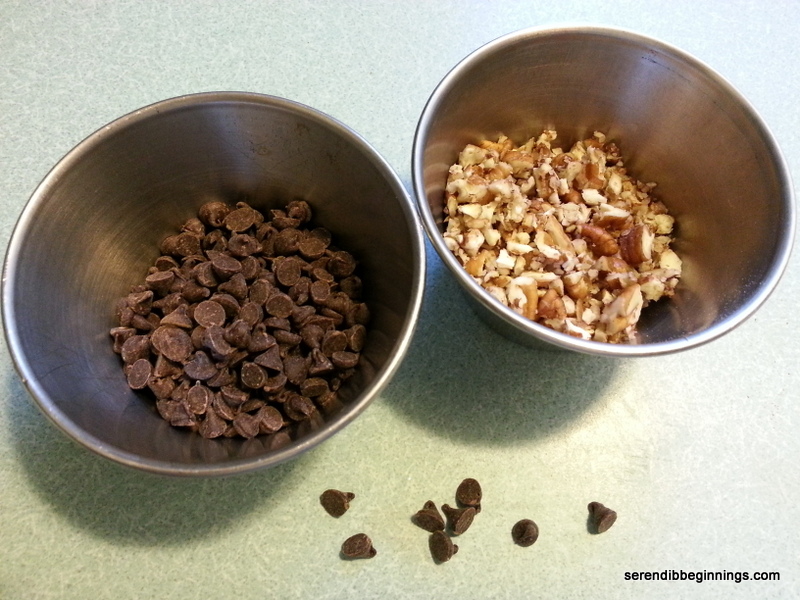
1/2 cup mini or regular semi-sweet chocolate chips
1 egg at room temperature
1/2 cup dark brown sugar
1/4 cup granulated sugar
1 cup buttermilk
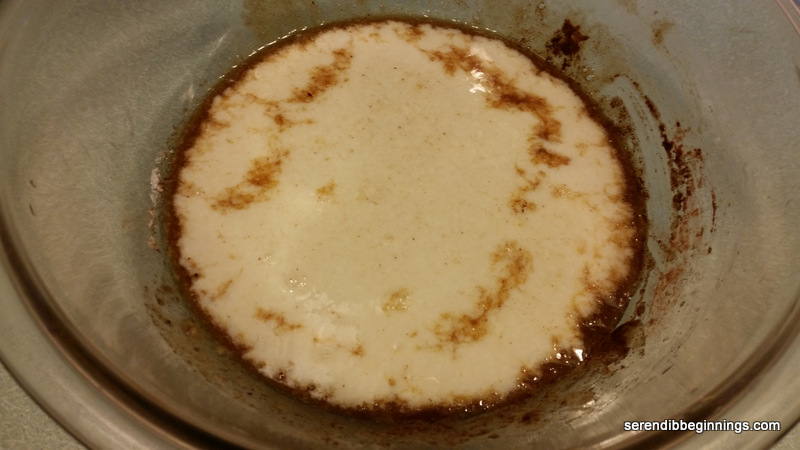
1/3 cup unsweetened applesauce-oil mixture (I spooned in applesauce halfway up a 1/3 measuring cup and topped with oil)
1 teaspoon vanilla

Optional:
2 tablespoons of sweetened coconut flakes
1 tablespoon of chocolate chips

Preparation:
1. Preheat oven to 350F; Spray a nonstick loaf pan with cooking spray on all sides and set aside. Alternatively, you can lay a piece of parchment paper on the bottom of the pan and spray over the sides of the pan. Parchment helps to remove the loaf easily from the pan.
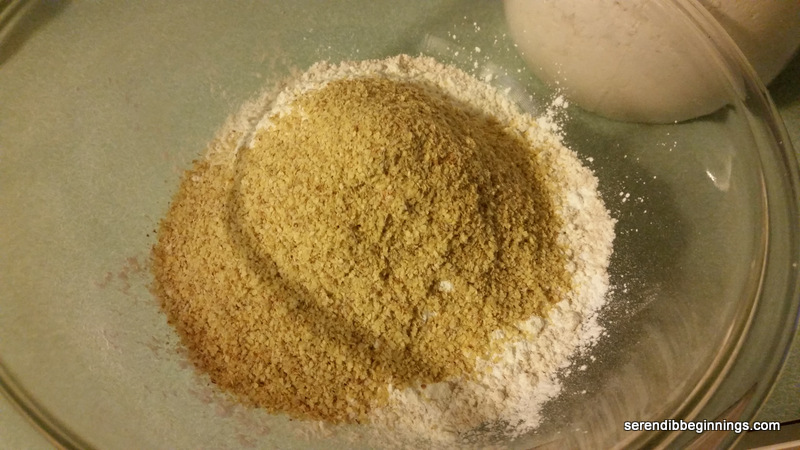
2. Measure out the dry ingredients and sift into a medium bowl.
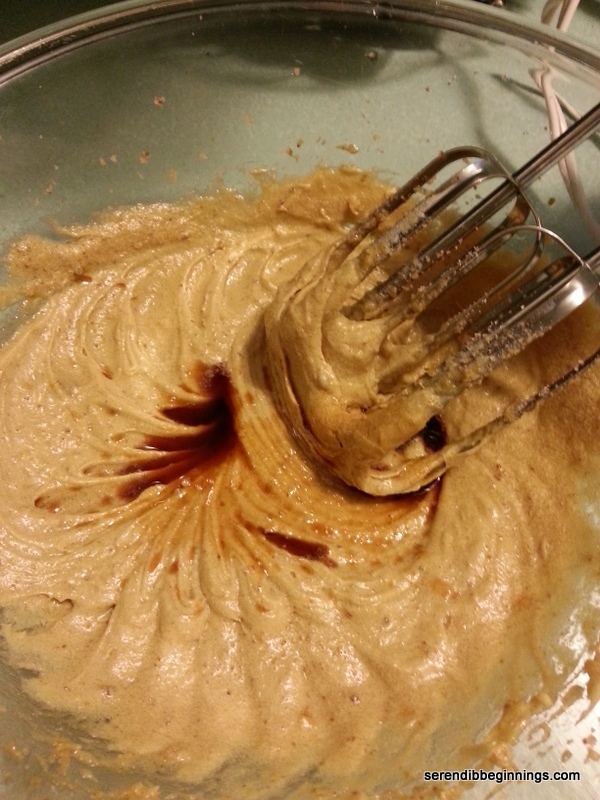
3. In a large bowl, whisk the egg. Mix in the sugars till all lumps are broken down. Stir in the buttermilk, applesauce-oil combo and vanilla.
4. Slowly stir in the dry ingredients, along with chocolate chips taking care not to overmix.
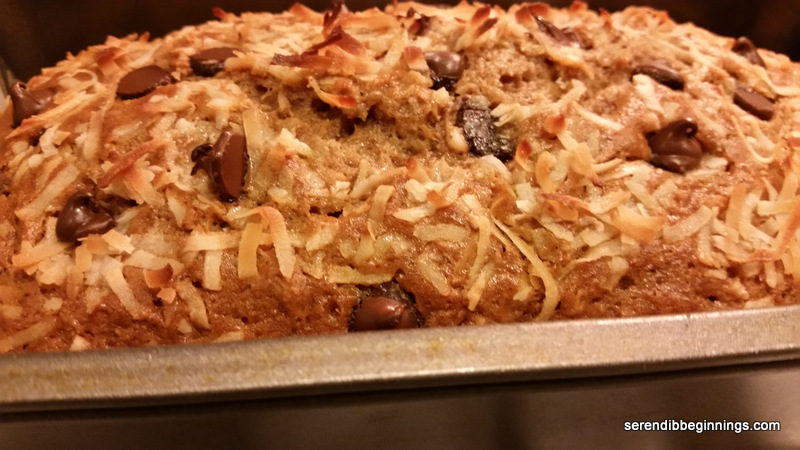
5. Spoon the batter into the prepared loaf pan. Top with some sweetened grated coconut (optional) and additional chocolate chips.
6. Bake for about 50-55 minutes till the bread is baked all the way through (confirm with the usual toothpick trick!).
7. Remove from oven, let cool in the pan completely. If you are in a hurry like I was the first time I baked, let cool for 10 minutes in the pan and carefully remove taking care not to scorch yourself (not advisable). Transfer to a cooling rack.

Bread will stay fresh in a tightly closed container at room temperature for about 5 days.
Enjoy!

Super Crown Muffins


20150213_083008

Baking is one of my favorite ways to start my day! It doesn’t matter what day of the week it is – if I get the desire, I jump to action, pulling out the staples while thinking about the flavors or the mix-ins.

20150209_071820Even though they mostly turned out deliciously moist and flavorful, I was never fully impressed with how they looked. For every batch I pulled out of the oven, my hankering for perfecting the beautiful super crowns you see in coffeehouse muffins kept getting stronger! No matter how much I researched on tips and techniques, my heart would sink every time I pulled out a delicious yet flat muffin batch – well, until this week!

20150209_072107

So, you see, I didn’t give up! I kept whipping up batch after batch nearly every week! After all, they do make great after school snack or mid morning pick me upper even if they are flat topped! I tried tweaking an ingredient here and ingredient there, while still trying to keep the end product relatively healthy! Yes, “healthy” is a loosely used term, so let me explain what I mean. These muffins don’t use much added fat (1/4 cup oil for a dozen), use a blend of whole wheat, all purpose and wheat germ, touch of honey and a bit of boost from 1% milk and fat free yogurt! In my opinion, this probably qualifies as relatively healthy compared to what you will pick up at the grocery store or your favorite coffeehouse. And the best part….this recipe is awesome for those of you who want to use few different mix-ins – like the blueberries and chocolate chip versions I made here. Read on to find out more!

20150213_072139

So, unlike what you might read on the internet about having to overfill the muffin pans to achieve the sky-high crown effect, these muffins do just great with about 3/4 fill. They puff up so beautifully that I sometimes catch myself taking a few peeks before they are done! 🙂 And the golden color….You have to try this to experience the joy yourself! So, I hope you will grab couple of mixing bowls and go to task! Enjoy!

20150209_080446  20150209_082600

Super Crown Muffins

  • Servings: 12 muffins
  • Print

Ingredients
1 1/4 cup whole wheat flour
1 cup all purpose flour
1/4 cup toasted wheat germ
1 1/2 teaspoon baking powder
1/2 teaspoon baking soda
1/4 teaspoon salt
2 eggs, lightly beaten
1/4 cup fat free plain yogurt
1/4 cup canola oil
1/4 cup honey
1 cup 1% milk
Add-ins: Chocolate chips, nuts, berries…
Optional: Streusel topping: Combine 2 tablespoons all purpose flour, 1 teaspoon brown sugar, 1/4 cup rolled oats, 1 tablespoon butter, 1/4 teaspoon ground cinnamon

Preparation:
1. Preheat oven to 400F. Grease a 12-well muffin pan and set aside (or alternatively use paper liners)
2. In a large mixing bowl, combine all dry ingredients
3. In a small mixing bowl, combine all the wet ingredients
4. Add the wet ingredients to the dry and gently fold in just until the flour mixture gets moistened. DO NOT OVERMIX!
5. Scoop about a tablespoon of batter into each greased well. Add a few chocolate chips or berries or whatever you choose. Divide rest of the batter evenly among all the wells and top with few more chocolate chips or other add-in of your choice.
6. If using streusel topping, divide it evenly among all the muffins.
7. Bake for about 20 minutes till the crowns are puffed up and beautifully golden!
8. At the end of baking, remove the pan and let the muffins cool for a few minutes before moving them to a cooling rack to cool completely.

You can refrigerate these muffins for 3-5 days. Because of the low fat content, the muffins taste better when you microwave for just a few seconds!

Crispy, Chewy Oatmeal Chocolate Chip Cookies

20140311_194720

When it comes to cookies, I would imagine the two leading contenders are probably chocolate chip and oatmeal raisin? Maybe it’s peanut butter something instead of oatmeal raisin. Although I do enjoy a yummy chocolate chip cookie once in a while, I tend to lean a bit more towards chewy oatmeal raisin. The bite and chewiness of oats, soft sweetness of raisins…mmmm….

So, when I decided to bake a surprise batch of cookies for the kids (and…ahem…mom and dad), I thought of combining the two cookies. Although I didn’t add any raisins in this recipe, I might consider adding some the next time I make these cookies.

I try to substitute at least some of the all-purpose flour with something more nutritious like oats, ground flax etc. This recipe lends itself perfectly to that – if you wish to replace about 1/4 cup of flour with ground flax etc. Also, I chose to use mini chocolate chips in this recipe in an attempt to have bit of chocolate in every bite and to reduce the total amount of chocolate. It worked out perfectly.

20140311_190528    20140311_183238    20140311_182520

Do use only about a teaspoon of dough at least 2 inches apart. The cookies spread well and results in a thin cookie with a perfect crispy texture when you first bite, quickly leading to a pleasant chewiness. This was a huge hit with my family as well as my kids’ friends. I think you will enjoy it.

20140311_190415   20140311_190907   20140311_190923

If you bake these, let me know how they turn out. I would love to hear about your experience.

Crispy, chewy oatmeal chocolate chip cookies

  • Servings: 30 cookies
  • Print

Ingredients
1 cup all purpose flour
1 cup old-fashioned oats
1/4 cup (heaping) ground flax
1 teaspoon baking powder
1/2 teaspoon baking soda
1/2 teaspoon salt
2/3 cup granulated sugar
1/3 cup packed dark brown sugar
1/3 cup unsalted butter, softened
1 larger egg
1 teaspoon vanilla
1/4 cup mini semi-sweet chocolate chips
1/4 cup chopped pecans

Preparation
1. Preheat oven to 350F.
2. Combine flour, oats, ground flax, baking powder, baking soda and salt in a medium bowl.
3. In a large bowl, beat softened butter with the sugars till well combined.
4. Add egg and beat for another minute. Stir in vanilla.
5. Slowly add flour mixture to the butter mixture and stir until just combined.
6. Fold in chocolate chips and nuts. Dough might feel a bit wet, but that’s OK.
7. Scoop the dough by teaspoon size onto a cookie sheet, spacing each scoop by at least 2 inches.
8. Bake in the preheated oven for about 10-12 minutes till edges are light brown and the cookie has spread well.
9. Remove from oven, let cool for a few minutes on the tray and finish cooling on a cooling rack.
10. Store in airtight container.