Blueberry Cheesecake Ice-Cream

20150803_211856

Blueberry season is winding down! This to me means two things…get to a u-pick farm FAST for several pounds of the blue gems and finding as many ways to use them up throughout the year as possible!

20150802_152106

Throughout the past several years, July has become the month of continuing our family tradition of picking blueberries at a local farm! I get all excited as soon the farms open for the season. I immediately start to think about how many pounds to pick so I have enough to freeze for the rest of the year. Usually, if we pick about 15 pounds or so, they last till about March or April. That’s a lot of picking! And perhaps that’s why my kids never get super excited about getting ready for this day! I guess the summer heat, rivers of sweat pouring down your back and all the patient work to pick the bluest berries could possibly make you a bit less excited! 🙂 But, to their credit, they always go with us, try their best to do their part, and even have a bit of fun!

20150802_151814  20150802_153858

So, after couple of hours of sweating buckets in the scorching sun, we managed to pick almost 13 pounds, little shy of what I would have ideally liked! After sorting through, rinsing, drying and freezing most of the berries, I saved just enough to try hand at my first batch of ice cream – blueberry cheesecake ice cream, combining two of my favorite things!

20150802_154046  20150802_154233

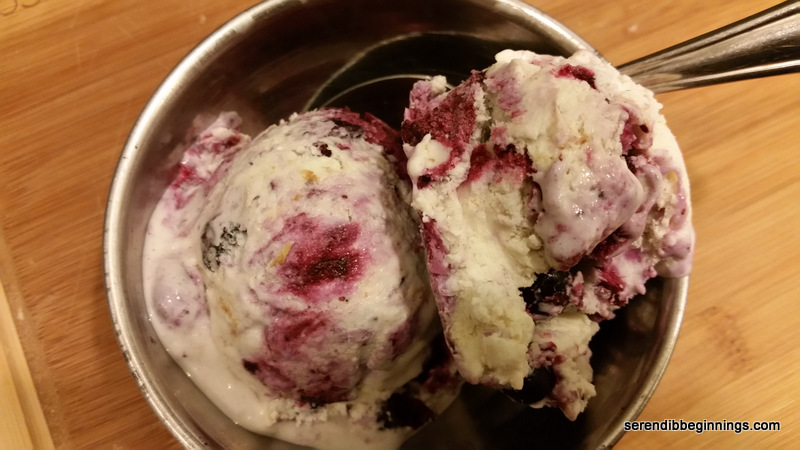
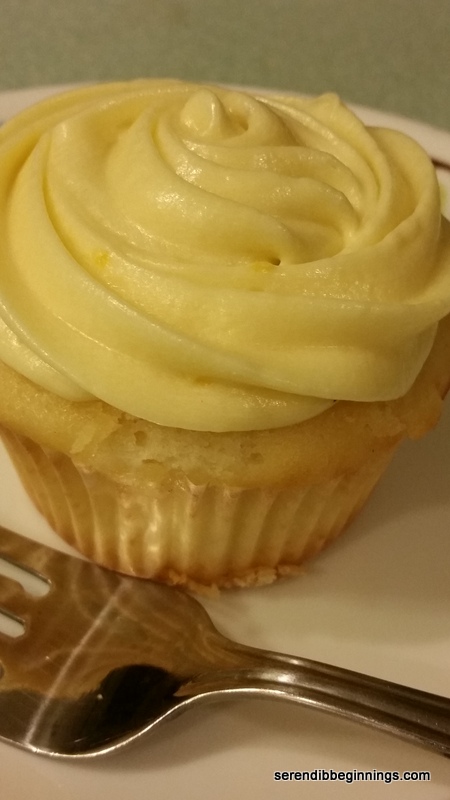
The original recipe is found on the Eagle Brand website. With couple of minor tweaks, including substituting bit of milk for some of the heavy cream and incorporating crushed graham crackers, the ice cream turned out to be quite something! Although the recipe called for at least 4 hours of freezing, mine didn’t quite freeze to an ice cream consistency at 4 hours. But that didn’t stop me from serving this as soft serve for dessert following dinner. It was delicious! I did have enough to let freeze all the way. Next day, it was perfect! You may need to let the container stay at room temperature for about 5 minutes to make it easy to scoop.

This is the scoop served "soft-serve"

This is the scoop served “soft-serve”

This recipe is super easy to whip up! Literally! So, go ahead and give it a try! You will be happy you did!

20150803_211910

Blueberry Cheesecake Ice-Cream

  • Servings: 6-8
  • Print

Ingredients
1 cup blueberries
1 tablespoon lemon juice
2 tablespoon sugar
3/4 cup heavy/whipping cream
1/4 cup milk (I used 1%)
Lemon zest from 1/2 lemon
1/2 container sweetened condensed milk
1/2 package reduced-fat cream cheese
1 teaspoon vanilla
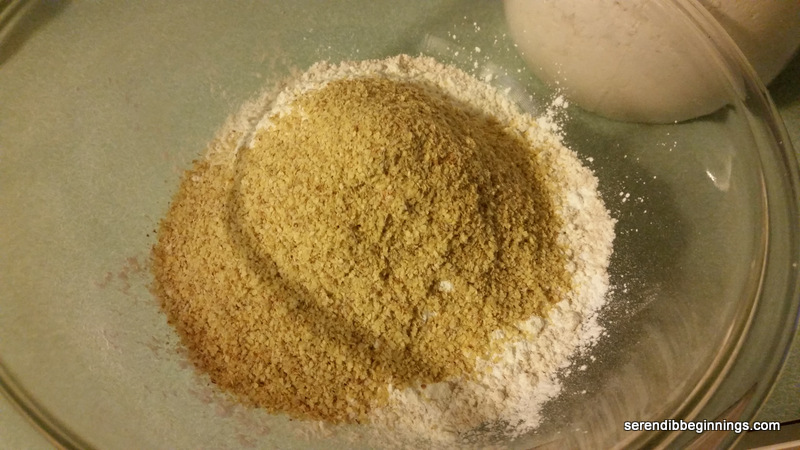
1/4 cup crushed graham crackers

Preparation:
1. In a small pan, simmer blueberries, lemon juice and sugar till the berries start to burst. Continue to simmer for about 5 minutes till the sauce thickens a little. Remove from heat and let come to room temperature.
2. In a medium bowl, whip the heavy cream till stiff peaks form. Keep aside while you proceed to the next step.
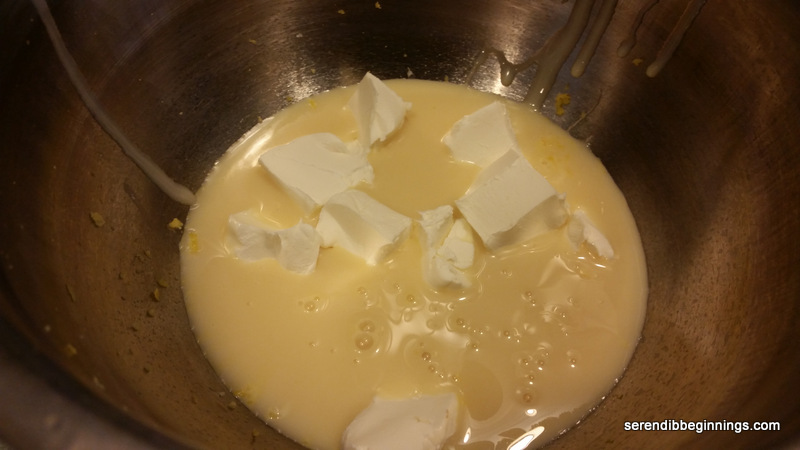
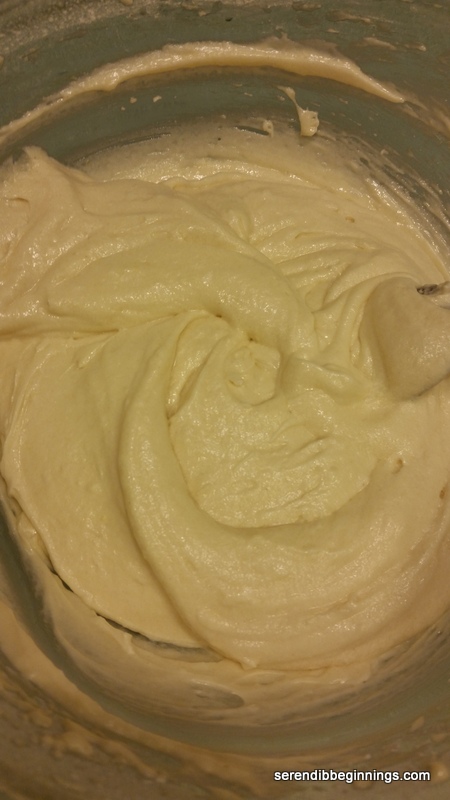
3. In another medium bowl, using hand held mixer, combine the condensed milk, milk and cream cheese till smooth. Add vanilla and the lemon zest.
4. Slowly incorporate the whipped cream into the condensed milk mixture.
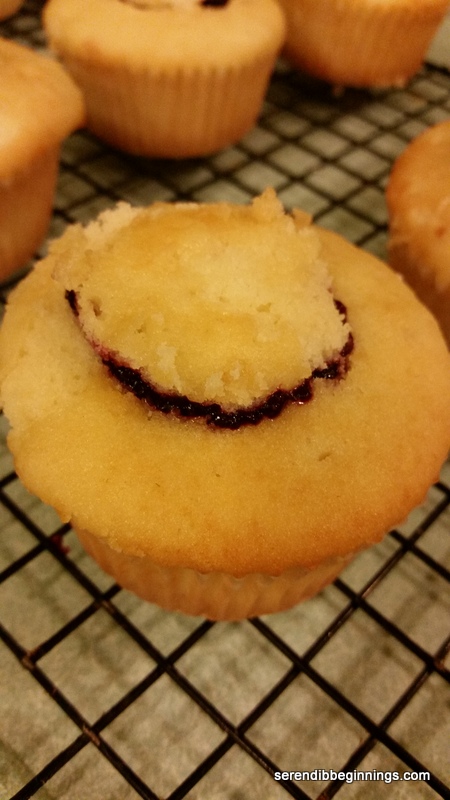
5. Layer one third of the blueberry mixture into a plastic container (with a tight lid). Ladle in 1/2 of the ice-cream base. Sprinkle a tablespoon of crushed graham crackers. Now, gently swirl the two layers. Repeat with the remaining berry mixture, ice-cream base and graham crackers. Cover and freeze till completely set. This will take about 4-5 hours.

Serving tip: Let the ice-cream stay at room temperature for about 5 minutes to make it easy to scoop! Serve with additional blueberries and a sprinkling of crushed graham crackers!

Perfect blueberry muffins

20150517_080442

Berries are a perfect way to start off a sunny morning -even a weekday one! Blueberries, strawberries, raspberries, blackberries….I just love them all!

20150515_064109

I hope you have had the opportunity to try my raspberry scones! They are divine. Although I debated another scone recipe this morning, I went for buttery streusel topped blueberry muffin instead. This recipe is adapted from the original at the Café Sucre Farine. The recipe called for the blissful combination of lemon and blueberries! Heavenly!

20150515_065111

This recipe is so easy – I mean it. Even though the original recipe calls for creaming the butter and sugar, I decided to skip that step, mainly because I have made several batches of muffins before and I felt confident the muffins will turn out just fine without this additional step.

20150517_080431

So, grab yourself the basic ingredients I am sure you already have in your pantry and whip up this recipe in time for a great grab n’ go breakfast.

Perfect Blueberry Muffins

  • Servings: 12
  • Print

Ingredients

Crumb topping

3 tablespoons butter, melted
¼ cup demerara sugar
½ cup all-purpose flour
½ cup oatmeal
¼ cup finely chopped almonds

Muffins
1 cup whole wheat flour
1 cup all-purpose flour
1 ½ teaspoon baking powder
½ teaspoon baking soda
½ teaspoon salt
3 tablespoons butter, melted
¼ cup oil
¾ cup sugar
2 large eggs
¼ cup light sour cream
¼ cup milk mixed with 1 tablespoon lemon juice (set aside for 5 min)
Grated lemon zest from 1 lemon
1 teaspoon vanilla
1 ½ cups frozen wild blueberries
Glaze (Optional)
3 tablespoons lemon juice
1 cup powdered sugar

Preparation
1. Heat the oven to 375F. Spray a 12-cup muffin pan with nonstick cooking spray and set aside. You can also use muffin liners.
2. Prepare the streusel topping by combining all ingredients till crumbly. Set aside.
3. In a large bowl, sift together the flours, salt, baking powder, baking soda and sugar.
4. In a smaller bowl, lightly whisk the eggs. Whisk in the sour cream, curdled milk, oil, melted butter, lemon zest and vanilla.
5. Gently stir in the wet ingredients into the dry mixture just until moistened.
6. Fold in the frozen berries taking care to avoid breaking too many berries. I say this because it is inevitable your batter is going have bluish tint running through it no matter how careful you are! 
7. Spoon the batter into the muffin pan. Don’t level the batter. Top with a generous amount of the streusel topping.
8. Bake the muffins for 5 minutes at 375F. Decrease heat to 350F and continue baking for another 20-25 minutes till the tops are golden and the muffin is cooked through.
9. Remove from the oven, let cool in the pan for 5 minutes. Carefully remove the muffins from the tin and let cool on a wire rack till completely cool.
10. While the muffins are cooling, prepare the glaze (optional) by vigorously stirring together the lemon juice and powdered sugar to a “drippable” consistency (say, like honey).
11. Lightly drizzle over the muffins. Let set.
12. Store muffins tightly covered for up to 5 days.

Super Crown Muffins


20150213_083008

Baking is one of my favorite ways to start my day! It doesn’t matter what day of the week it is – if I get the desire, I jump to action, pulling out the staples while thinking about the flavors or the mix-ins.

20150209_071820Even though they mostly turned out deliciously moist and flavorful, I was never fully impressed with how they looked. For every batch I pulled out of the oven, my hankering for perfecting the beautiful super crowns you see in coffeehouse muffins kept getting stronger! No matter how much I researched on tips and techniques, my heart would sink every time I pulled out a delicious yet flat muffin batch – well, until this week!

20150209_072107

So, you see, I didn’t give up! I kept whipping up batch after batch nearly every week! After all, they do make great after school snack or mid morning pick me upper even if they are flat topped! I tried tweaking an ingredient here and ingredient there, while still trying to keep the end product relatively healthy! Yes, “healthy” is a loosely used term, so let me explain what I mean. These muffins don’t use much added fat (1/4 cup oil for a dozen), use a blend of whole wheat, all purpose and wheat germ, touch of honey and a bit of boost from 1% milk and fat free yogurt! In my opinion, this probably qualifies as relatively healthy compared to what you will pick up at the grocery store or your favorite coffeehouse. And the best part….this recipe is awesome for those of you who want to use few different mix-ins – like the blueberries and chocolate chip versions I made here. Read on to find out more!

20150213_072139

So, unlike what you might read on the internet about having to overfill the muffin pans to achieve the sky-high crown effect, these muffins do just great with about 3/4 fill. They puff up so beautifully that I sometimes catch myself taking a few peeks before they are done! 🙂 And the golden color….You have to try this to experience the joy yourself! So, I hope you will grab couple of mixing bowls and go to task! Enjoy!

20150209_080446  20150209_082600

Super Crown Muffins

  • Servings: 12 muffins
  • Print

Ingredients
1 1/4 cup whole wheat flour
1 cup all purpose flour
1/4 cup toasted wheat germ
1 1/2 teaspoon baking powder
1/2 teaspoon baking soda
1/4 teaspoon salt
2 eggs, lightly beaten
1/4 cup fat free plain yogurt
1/4 cup canola oil
1/4 cup honey
1 cup 1% milk
Add-ins: Chocolate chips, nuts, berries…
Optional: Streusel topping: Combine 2 tablespoons all purpose flour, 1 teaspoon brown sugar, 1/4 cup rolled oats, 1 tablespoon butter, 1/4 teaspoon ground cinnamon

Preparation:
1. Preheat oven to 400F. Grease a 12-well muffin pan and set aside (or alternatively use paper liners)
2. In a large mixing bowl, combine all dry ingredients
3. In a small mixing bowl, combine all the wet ingredients
4. Add the wet ingredients to the dry and gently fold in just until the flour mixture gets moistened. DO NOT OVERMIX!
5. Scoop about a tablespoon of batter into each greased well. Add a few chocolate chips or berries or whatever you choose. Divide rest of the batter evenly among all the wells and top with few more chocolate chips or other add-in of your choice.
6. If using streusel topping, divide it evenly among all the muffins.
7. Bake for about 20 minutes till the crowns are puffed up and beautifully golden!
8. At the end of baking, remove the pan and let the muffins cool for a few minutes before moving them to a cooling rack to cool completely.

You can refrigerate these muffins for 3-5 days. Because of the low fat content, the muffins taste better when you microwave for just a few seconds!

Blueberry Cheesecake Cupcakes

20140806_205100
So, this is really part 2 of the 2-part cupcake posting! I have been meaning to make some sort of treat using the blueberry preserves I had recently made. What better way than to test it as a filling for cupcake! So, that was going to be the second cupcake flavor. Vanilla cupcake with blueberry preserve filling and lemon cream cheese frosting! Yummmm!

20140805_202842         20140805_203429

I am not sure where I came upon this recipe! Since I wanted to stick with the “made from scratch” spree, I decided to whip up this quick cupcake recipe. One warning – be gentle with your mixing if you want to avoid big air pockets in the cake. The cake was totally amazing – especially the frosting! Just the right amount of sweetness with a bit of citrusy tang! Delicious! And the bit of blueberry preserve you get in each bite is just perfect!

20140806_203232  20140806_203503  20140806_204327

(BTW, if you are have leftover frosting, use it as a drizzle for a breakfast treat (sweet rolls or as a spread for crepes!)

20140806_204408

Blueberry Cheesecake Cupcakes

  • Servings: 12
  • Print

Ingredients:
6 tablespoons soft unsalted butter
2/3 cup sugar
1/2 teaspoon salt
1 teaspoon baking powder
2 eggs
1 3/4 cup cake flour
1/2 cup milk

Cupcake filling
1/4 cup blueberry preserve

Lemon Cream Cheese Frosting
1 8-oz reduced fat cream cheese
1/3 cup unsalted butter, softened
2 cups powdered sugar
1 teaspoon fresh lemon juice
Lemon zest from 1/2 lemon

Preparation:
1. Preheat oven to 350F. Line a cupcake pan with paper liners and set aside.
2. Using an electric hand held beater, combine butter, sugar till light and fluffy.
3. Add one egg at a time, mixing well.
4. Combine cake flour, salt and baking powder.
5. Add the flour mixture alternating with milk in two additions.
6. Divide the batter among the 12 cupcake “wells”. Bake for about 20-22 minutes till the top is lightly golden and the center tests done.
7. Remove from the oven and let cool in the pan for 5 minutes. Remove the cupcakes and let cool completely on a cooling rack.
8. To decorate, slowly and carefully cut out a 1/2 inch piece of cupcake in the middle as shown in the picture above. Reserve the cut out piece. Fill the hole with a teaspoon of blueberry preserve and place the cut out cake back on top. Now, cover the top with lemon cream cheese frosting.

Lemon Cream Cheese Frosting
Combine all the ingredients in a medium bowl using handheld mixer. If frosting is too thick, you can thin it by adding few drops of lemon juice.

Berry-licious Scones

20140510_084238

Happy Mother’s day ladies! I hope all you moms out there have a wonderful day tomorrow! I know, I know, we are supposed to stay in bed till breakfast is ready and not worry about anyone spilling hot coffee on themselves or burning their fingers in the stove or oven etc. And your kids ordered you to just take it easy and relax the whole day! THE WHOLE DAY! Yikes!

20140510_072324

Am I the only weird one out there that finds it near impossible to just sit still and watch all the rumblings in the kitchen. You know, I am OK with the family CLEANING, DOING LAUNDRY etc., but when it comes to cooking or any kitchen related task, I think I develop some sort of an anxiety. Hmmm….maybe not so much anxiety, but perhaps a longing to be in there, in my kitchen, where I am always ME!

20140510_072729     20140510_073011

Yes, for the love of my kids, I will let them do what they please on Sunday! But I couldn’t help but share with you a pre-Mother’s day recipe that is likely to be a winner! I came across this recipe at http://www.averiecooks.com. I modified the recipe only slightly by replacing half the flour with white whole wheat. I am starting to fall in love with KAF white whole wheat!

20140510_080415  20140510_082235  20140510_084547

Scones are an indulgence of mine! I especially like the cinnamon-pecan and chocolate chunk ones! Yum. But in honor of Mother’s Day, I wanted to make a batch with berries! Personally I think there is something about Mother’s Day and BERRIES! These berry-licious scones are light, almost muffiny and delicious! I hope you get to make them and enjoy! WARNING: The hardest part of this recipe is waiting for the scones to cool so you could drizzle the lemon glaze and devour it in one inhale! 🙂

20140510_085801  20140510_084238

Berry-licious Scones

  • Servings: 8
  • Print

Ingredients
1 cup all purpose flour
1 cup white whole wheat flour
1/2 cup granulated sugar
1 tablespoon baking powder
1/4 teaspoon salt
1/2 cup unsalted butter
1 large egg
1/2 cup light sour cream
1 tablespoon grated lemon zest
1/2 teaspoon vanilla essence
1 heaping cup mixed berries of your choice (fresh or frozen)
2 tablespoons of coarse or turbinado sugar for sprinkling on top

Lemon Glaze
1/2 cup confectioners’ sugar
1 tablespoon (slightly less) lemon juice

Preparation
1. Preheat oven to 400F. Line a baking sheet with parchment paper and set aside.
2. Mix the flours, sugar, baking powder and salt in a large bowl.
3. Using two forks or pastry cutter, incorporate the cold butter into the dry mix (just like how you prepare a pie crust). Once the butter is sufficiently incorporated, the flour mixture will resemble very coarse crumbs. (This is one of the least favorite tasks in the kitchen for me – for no good reason!)
4. Lightly beat the egg in a small bowl. Stir in the sour cream, vanilla and lemon zest.
5. Fun begins. Gently stir in the wet ingredients into the dry mix just until barely incorporated. Like with muffins, pancake batter etc., over mixing will result in tougher end product. The “dough” will be rather sticky and wet, but avoid the temptation to grab more flour for a CPR!
6. Fold in the berries. If using frozen berries, do not thaw them prior to using.
7. Turn the dough onto a floured work surface (use about couple of tablespoons of flour for the surface) and gently knead to bring the dough together. Just a few movements. If the dough is too sticky to form into a general circle or square, add another tablespoon of flour, but no more.
8. Pat the dough into a circle about ….diameter and ….thick. Alternatively you can form the dough into a square …x….. For circle, cut it into 8 wedges. For square, cut initially into 4 squares and each square diagonally into 2 triangles. You didn’t know you were going to use geometry here, did you? 🙂
9. Using a spatula, transfer the scones to the parchment lined baking sheet. Sprinkle with turbinado or coarse sugar if desired. Bake the scones for about 15-18 minutes till the top is lightly golden.
10. Remove from oven, let cool on the baking sheet for about 5 minutes before moving them to a wire rack to cool completely.
11. GLAZE: Mix the confectioner’s sugar and lemon juice. Drizzle about a teaspoon on top of each scone. Let the glaze set prior to serving.

ENJOY!

Pineapple Muffins

20140223_184010[1]
This recipe was the result of my attempt to use up a bunch of crushed pineapple I had leftover. I debated between a cake and a muffin. The more I considered the options, the more I was leaning towards a muffin. Ultimately, one has to think of the end users – in this case, primarily my kids.

20140223_180616[1]  20140223_180853[1]

Muffins are a great grab ‘n go breakfast item – especially if they are homemade with some love added to it in the form of healthier ingredients. This was you don’t feel like your kids are eating cupcake for breakfast.

  20140223_183902[1]  20140224_070812[1]

This is a rather simple recipe that could be put together in a jiffy. I actually made these while also preparing dinner.

Pineapple Muffins

  • Servings: 12
  • Print

Ingredients
1 1/2 cups all purpose flour
1/2 cup wheat germ
1 tablespoon ground flax
1/2 teaspoon sea salt
1/2 teaspoon baking soda
1/2 teaspoon baking powder
1 20-oz can crushed pineapple, undrained
2 eggs
1/2 cup minus 2 tablespoons sugar
1 tablespoon oil
1 teaspoon vanilla
1/2 cup fresh or frozen blueberries (if frozen, thaw and drain)
1 tablespoon flour

Preparation
1. Preheat oven to 400F.
2. Combine all dry ingredients from flour till baking powder in a large bowl.
3. Lightly whisk eggs and combine with crushed pineapple, oil, vanilla and sugar in a small bowl.
4. Slowly add wet ingredients to dry ingredients and stir gently to combine.
5. Coat blueberries in a tablespoon of flour so they don’t sink to the bottom of the muffins.
6. Slowly stir in the berries.
7. Scoop the batter and fill a 12-muffin pan almost to full. You can either use a paper liner or spray the pan with non stick spray. I went with latter to get a nice golden color.
8. Bake for about 18-20 minutes till muffin tests done (insert toothpick and see if it comes out clean).
9. Cool in the pan for 10 minutes and remove for storage.